SDRick
Active Member
I just lifted the phone charger tray up for easier access to the wire once i fished it out from the console and towards the footwell area.
Does the phone charger tray unsnap from the front by lifting it straight up?


You can install our site as a web app on your iOS device by utilizing the Add to Home Screen feature in Safari. Please see this thread for more details on this.
Note: This feature may not be available in some browsers.
I just lifted the phone charger tray up for easier access to the wire once i fished it out from the console and towards the footwell area.
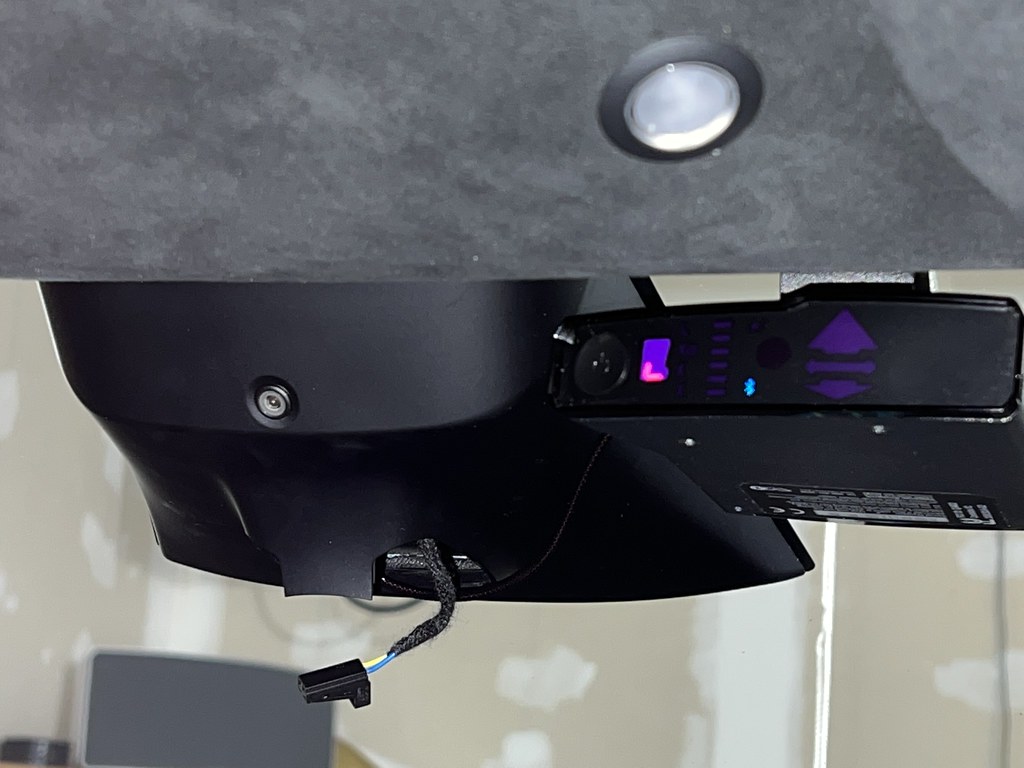
We have a couple of good reports from tapping the mirror with pins (which I have done on my two previous Tesla's) but I'm not sure how to approach removing the mirror cover(s).
What are you installing? The OBDII is probably the easiest. And they have the 90 degree angle plugs on amazon that would make the intrusion into the footwell area very slight.
https://www.amazon.com/dp/B07WSTH5M5/ref=cm_sw_r_cp_api_glt_fabc_7K8GDKH9J4MY9V2HSTMN?tag=tmc064-20
I don't know where to access 12v behind the mirror since I personally removed the mirror trim to route wires that I brought up from the A pillar all the way to a blendmount adapter on the mirror. Removing the plastic pieces was an easy process and mine weren't held so securely that anything would crack. Of course use caution but I can't see how anyone would crack their windshield.alb,
That video is very helpful. Makes it look quite easy. My first thought was to place the pins in the back of the mirror connector but I read that that is low-voltage just for the mirror dimming system. So now without opening it up I do not see where to get the 12 V.
Then I read further down in the video description some trim pieces were held so securely that one guy cracked his windshield trying to remove it! Ouch!
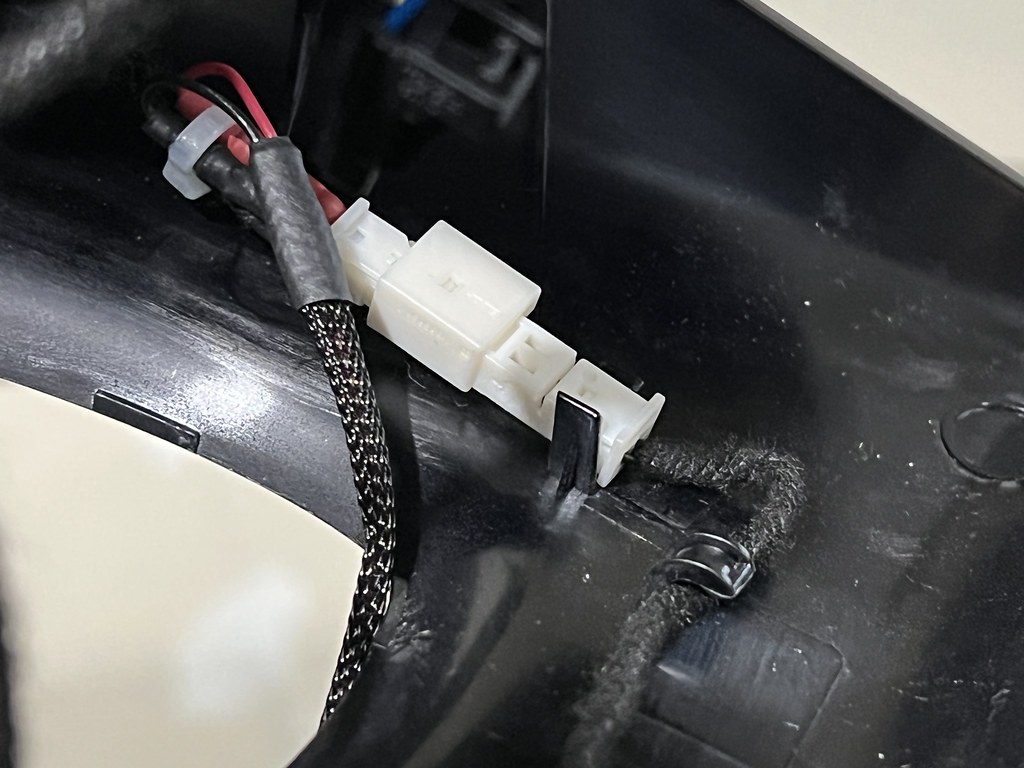
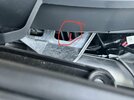
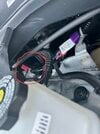
Someone who had installed a power frunk said they tapped into the same wire. However a local installer of the power frunk indicated they tapped a “red cap” that appears to be a terminal like option. Has anyoneThrough another member in this forum, I tapped a wire in the frunk for unswitched access. If you remove the center panel, closest to the windshield, there is a harness there with about 3 or 4 wires. The purple wire gives always-on power. It is a 16 G wire, so use that size to tap. PLEASE DO SO AT YOUR OWN RISK. From there, I ran it to a basic automobile fuse block that I bought from Amazon (there are many to chose from), and ran a ground wire from that block to a bolt that was easily accessible. I used 3M tape to stick the block to somewhere under one of those panels. This is probably overkill though, as I am currently only using that source to power my lighted-T. I may add some other fun mods later though, and have 5 free ports on the block to choose from.
I will continue to use the OBD for my radar. No need for radar to be powered on when the car is parked. I always prefer plug 'n play rather than tapping, and personally would never consider tapping the wires behind the mirror given that the OBD port is right there and a simple wire run up the A-pillar. Like I said upthread, the OBD continuous source has proven unreliable. The switched source has been perfect.
Here is the right angle 12v plug that I used. It made for a cleaner setup in the console and fit snug to avoid it falling out like my prior straight plug. https://www.amazon.com/dp/B07TT1R9Q6/ref=cm_sw_em_r_mt_dp_X0TW723NDNDPJEBT01HC?_encoding=UTF8&psc=1I was all set to use that nice right angle OBD plug from Amazon but thought it may raise some flags if I ever needed to take the car into the shop. The right angle plug was very unobtrusive and could be easily unplugged for shop visit, but it would just be hanging there.
The connector at position 4 in the picture up thread was very tempting as I had already removed the right side console panel. Before making a final decision I took a short piece of 14gauge into the large console compartment and within a minute or two found a path exiting the large storage compartment in the upper right corner which then exited at the right side panel that I had previously removed.
Since I had a 12 V plug on hand and black phone cord wire with a RJ11 plug I decided on that route. If I find a nice looking right angle 12v plug I may swap so it becomes less obtrusive inside the large console storage area. Other than that, it works great, turning on and off with the main screen.
Why would Tesla care if you plugged into the OBD? When I bring my car in, I just unplug and leave it visibly dangling.I was all set to use that nice right angle OBD plug from Amazon but thought it may raise some flags if I ever needed to take the car into the shop. The right angle plug was very unobtrusive and could be easily unplugged for shop visit, but it would just be hanging there.
The connector at position 4 in the picture up thread was very tempting as I had already removed the right side console panel. Before making a final decision I took a short piece of 14gauge into the large console compartment and within a minute or two found a path exiting the large storage compartment in the upper right corner which then exited at the right side panel that I had previously removed.
Since I had a 12 V plug on hand and black phone cord wire with a RJ11 plug I decided on that route. If I find a nice looking right angle 12v plug I may swap so it becomes less obtrusive inside the large console storage area. Other than that, it works great, turning on and off with the main screen.
Why would Tesla care if you plugged into the OBD? When I bring my car in, I just unplug and leave it visibly dangling.
From what I can tell. They don't really care and do whatever if it's during the basic warranty. They didn't seem to care about my ambient lighting or anything with my last visit for a bum door handle.It just could give Tesla another thread to pull on if they wanted to deny some kind of electrical warranty? As it is, my foot well lights are so dim they basically are not working. The light in the driver foot well is very close to the OBD so it could look like I may have done something to cause the issue. Unlikely but that combined with not needing the $10 OBD part pushed me over to using the 12 V socket.
I followed this link for tapping the power for the lift gate.Has anybody tried to find 12v access in the trunk area?
 teslamotorsclub.com