


I had initially posted a few photos of the testing I was doing on this unique Radar Detector location in the Radar Detector thread. I finally finished my Valentine One install and thought it deserved a separate thread because what I did could be used for other applications. Like a Rear DashCam. I think it came out awesome.
To summarize I'm using an application on my Phone called V1Driver to completely control the V1 via Bluetooth. I have AutoMute and Speed Mute on all bands. So I never have to touch the V1 directly. It will announce Band and Direction over the car radio. The only awkward thing it does not do is verbally tell you a critical alert is still present after it mutes it. I may mount a Valentine One Concealed display facing forward so I can check it in the rear view mirror. Some other Radar Detectors might work as well like an Escort 360. However the Escort will never AutoMute Ka. So if you get stuck near a cruiser it could get real annoying.
Also as I mentioned in the Radar Detector thread, I did not want to impact the clean Model 3 look with a Radar Detector. Nor did I want to tap power or route wires anywhere in the front to avoid Service issues. The V1 is stuck up there using 3M Dual Lock (same as EzPass). So I could take it down very easily. And if I remember to turn it off, I doubt anyone would ever notice it unless they were looking for it. You'll also see where I mounted my EzPass.
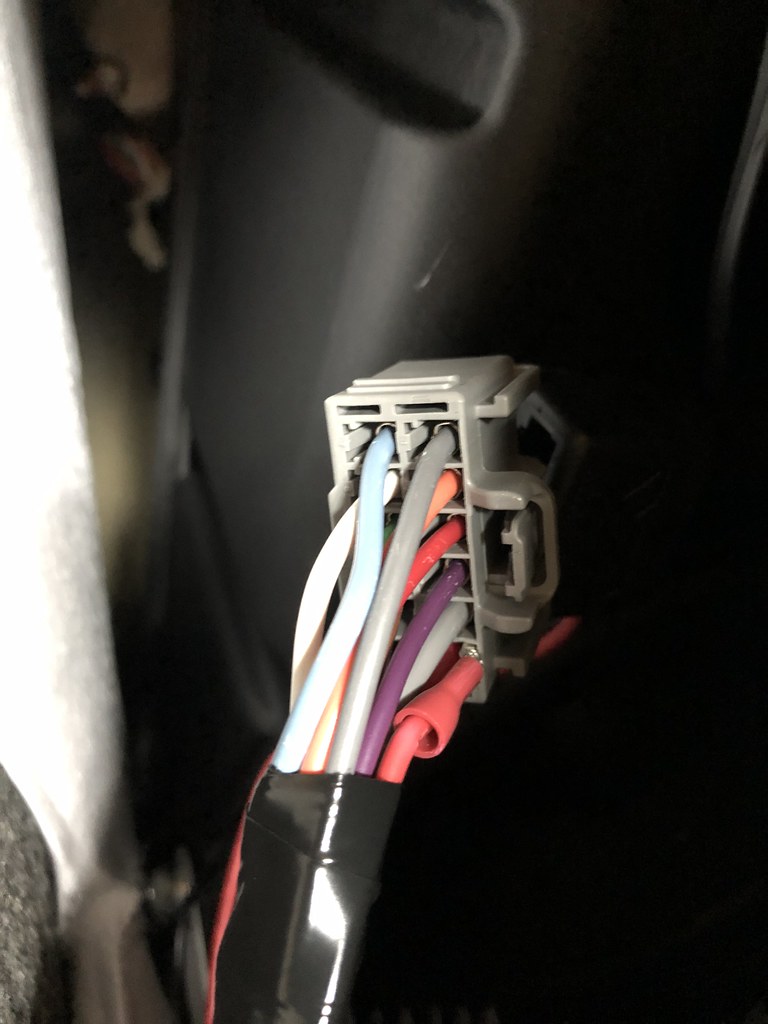
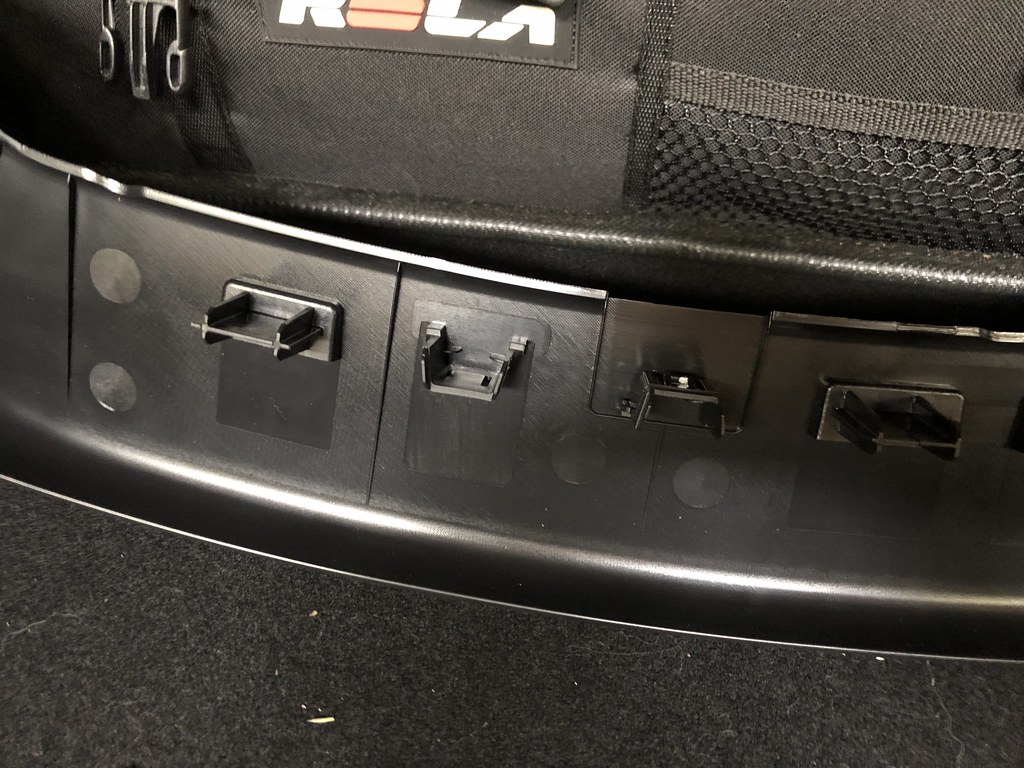
This is where I tapped power, on the Rear Amp. Note: Any time the car is not "Sleeping" this is ON. It is on more often than the Cigarette Lighter Adapter Circuit. But it does shut OFF. I bent U shape lug to 90 degrees and wedged it in there. I didn't want to tap the wire. Partly because it's very large gauge. The V1 is immediately fused after the tap.
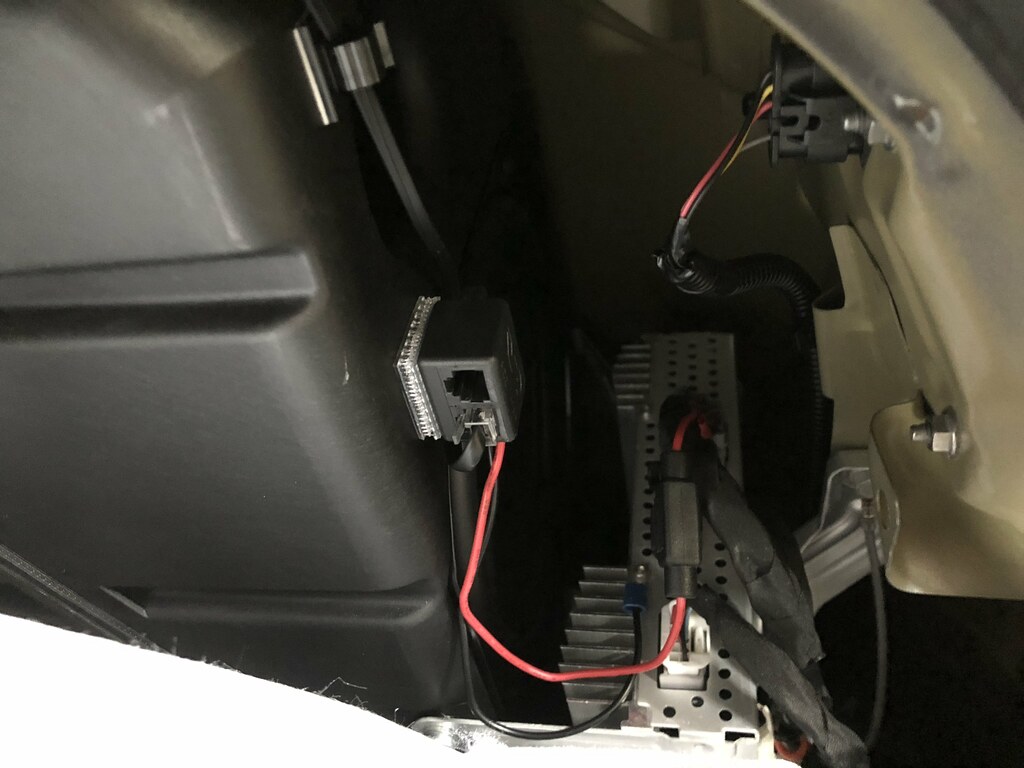
This is where I mount the Valentine One Hardwire Kit. Grounded to Radio and Clips on the Subwoofer.
This is the route to get up to the inside of the bottom of the rear window
The lining comes out easy. Just fold back the trunk gasket. You do not have to remove gasket. I tied it back with string while I worked.
This are the plastic rivets you have to remove to get the center trim off before you can peel back the lining.
Getting these rivets back in was the hardest part. They come out easy. But they are a little bit sprung and the whole has very sharp edges. Maybe a file on the hole edges to smooth it or a little bit of lube would have helped.
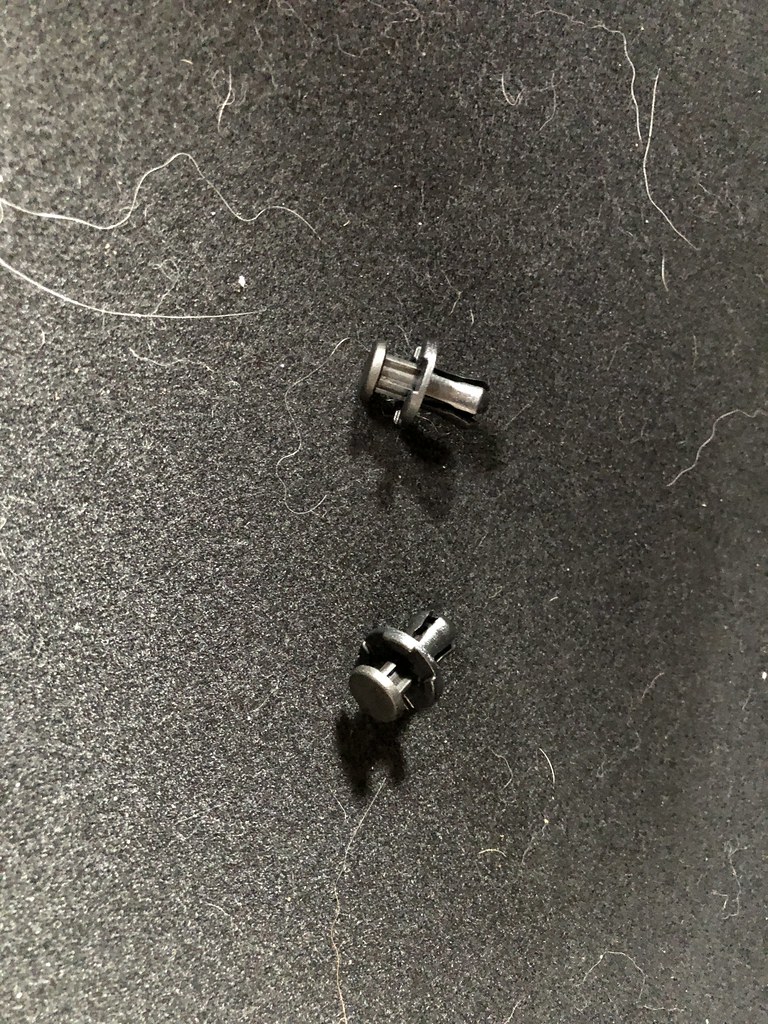
This is a close up of the center trim you need to remove. So you can see how the clips work. You do not have to pull hard and it came out very easy and went back in easy. Except those darn rivets.
You need to remove this rivet on each side. Pull the center plug back with a small screw driver then wiggle the whole plug out.
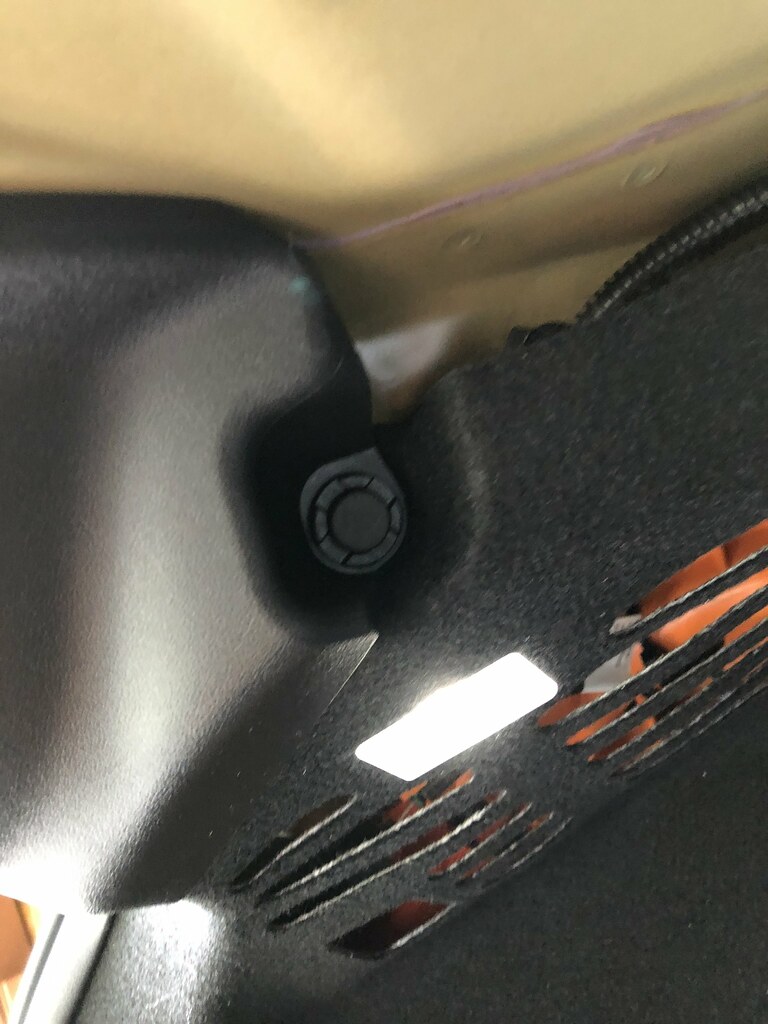
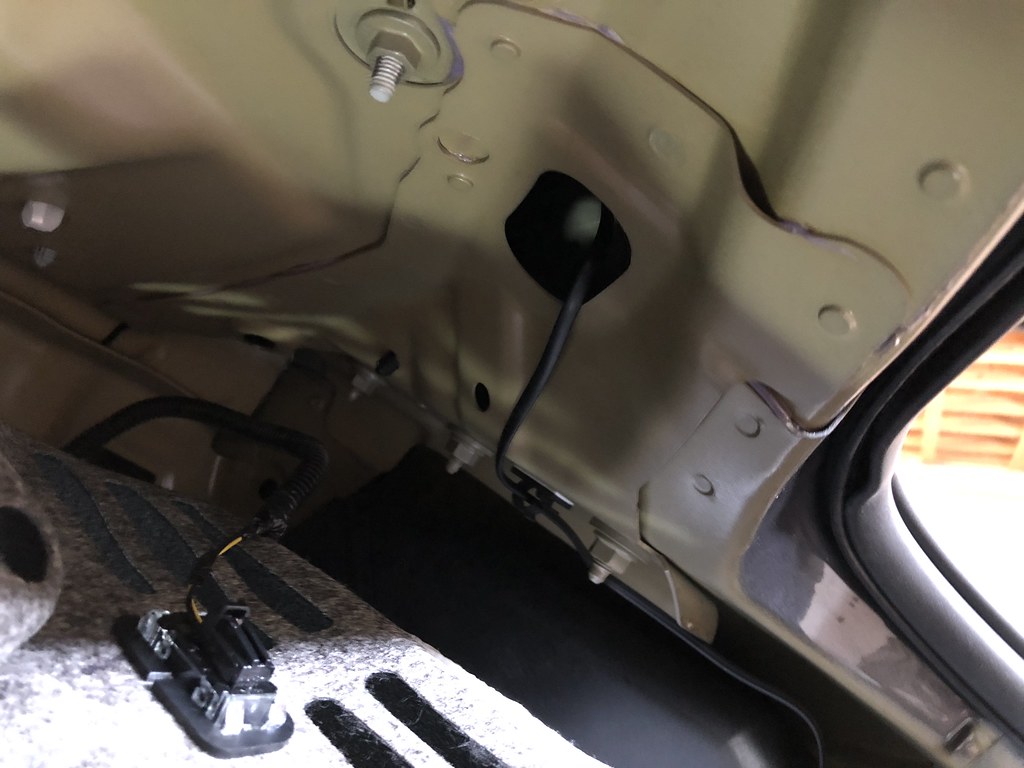
This is where I went down into trunk. I shined a flash light from the bottom at night to find it. It goes direct to trunk. It's not along some path. Just push the wire down and you'll see it below. It's in a little double wall cavity though. Which has lots of large holes in it.
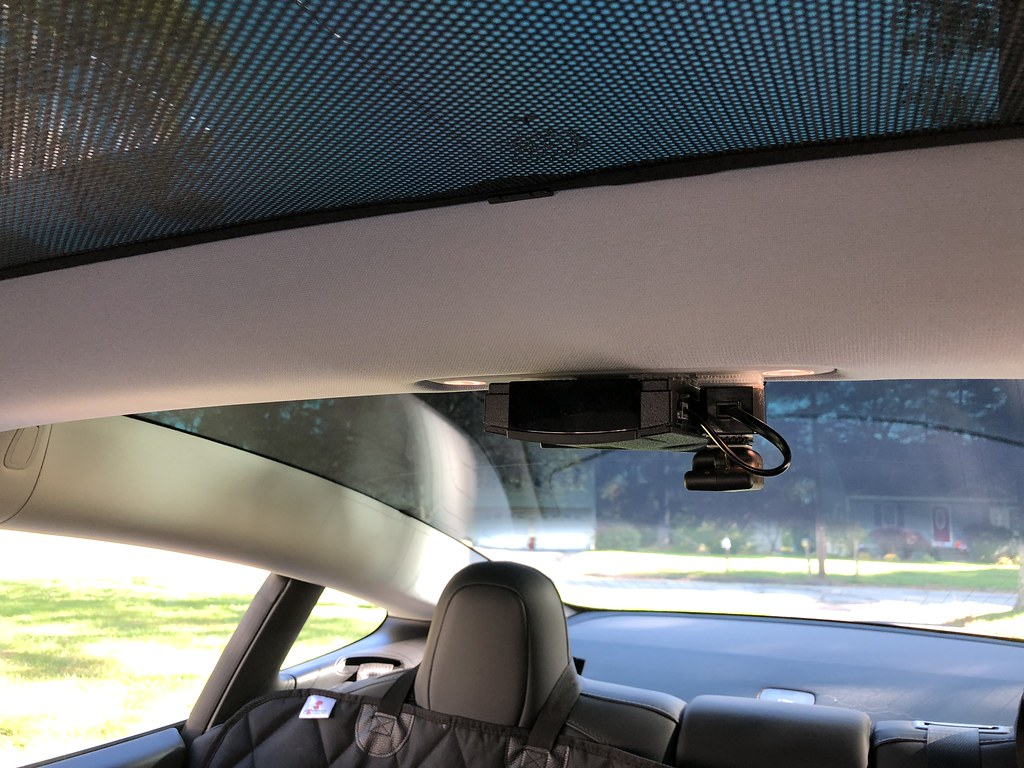
This is what the V1 looks like looking back from drivers seat.
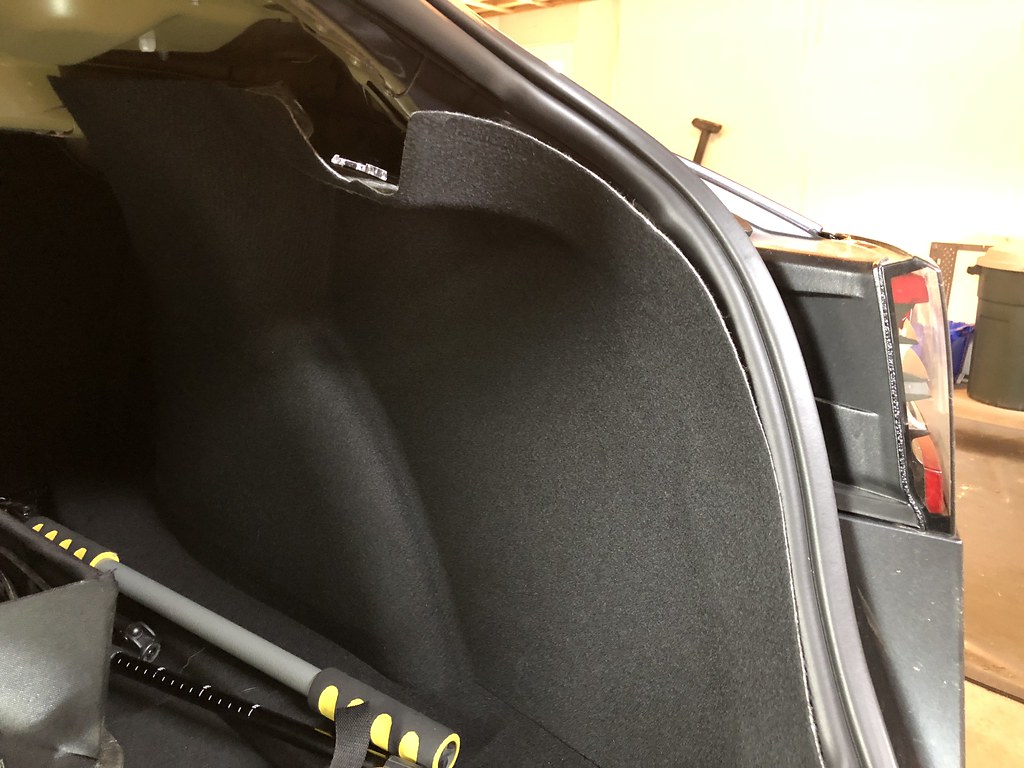
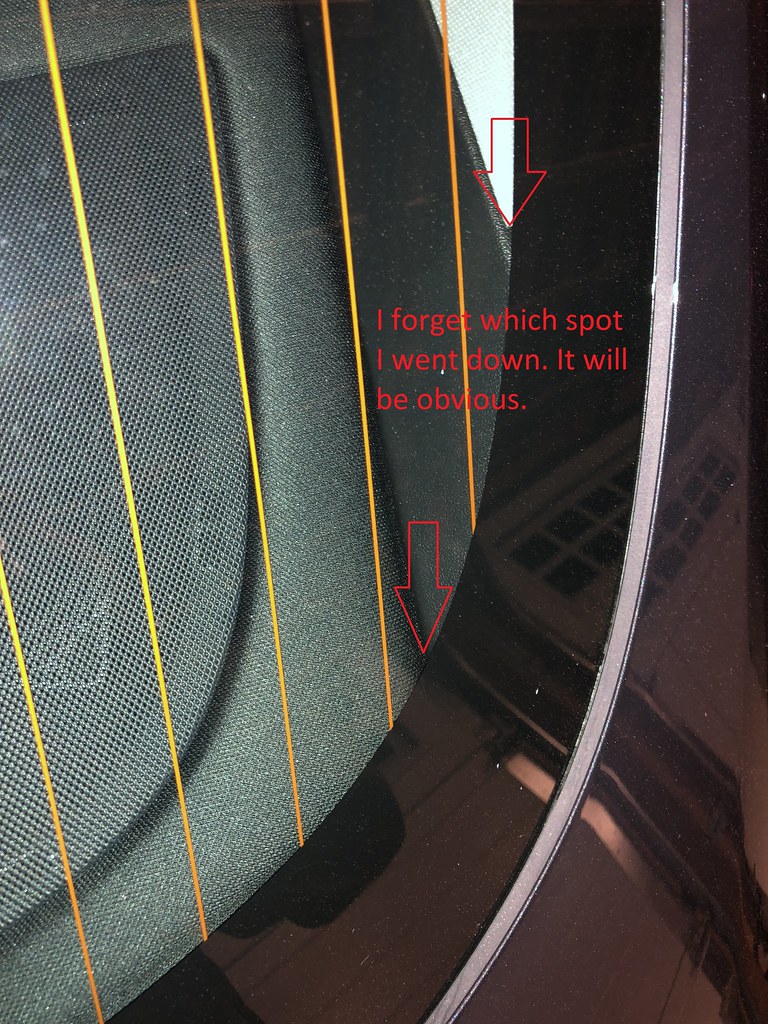
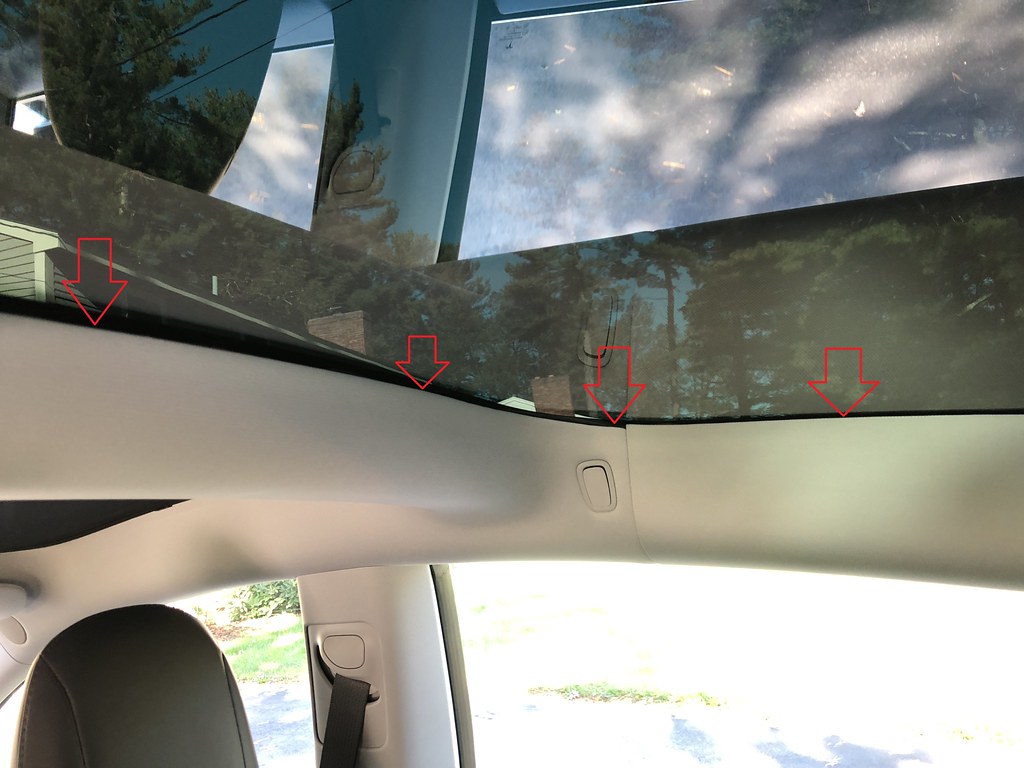
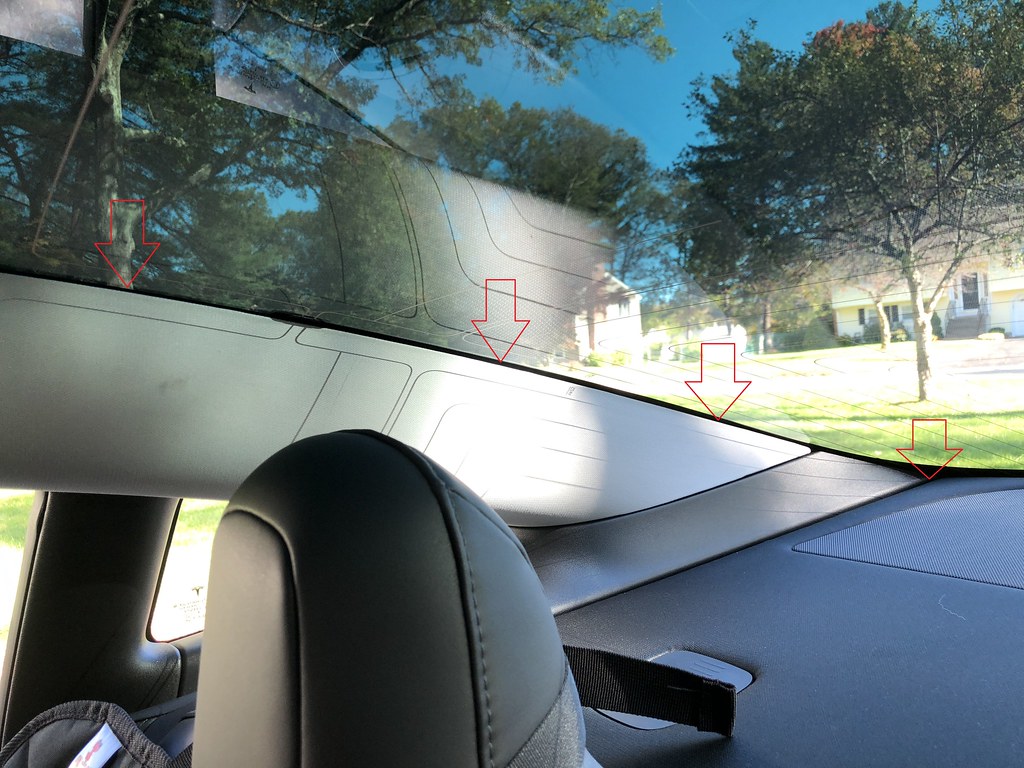
This is the path the wire takes in the cabin. I used a plastic pry bar to tension the trim away from glass as I tuck the wire in. Some spot didn't even need the prying but some did. It varied a bit.
And more... It was a little snug around the rear defog connector. But was fine.
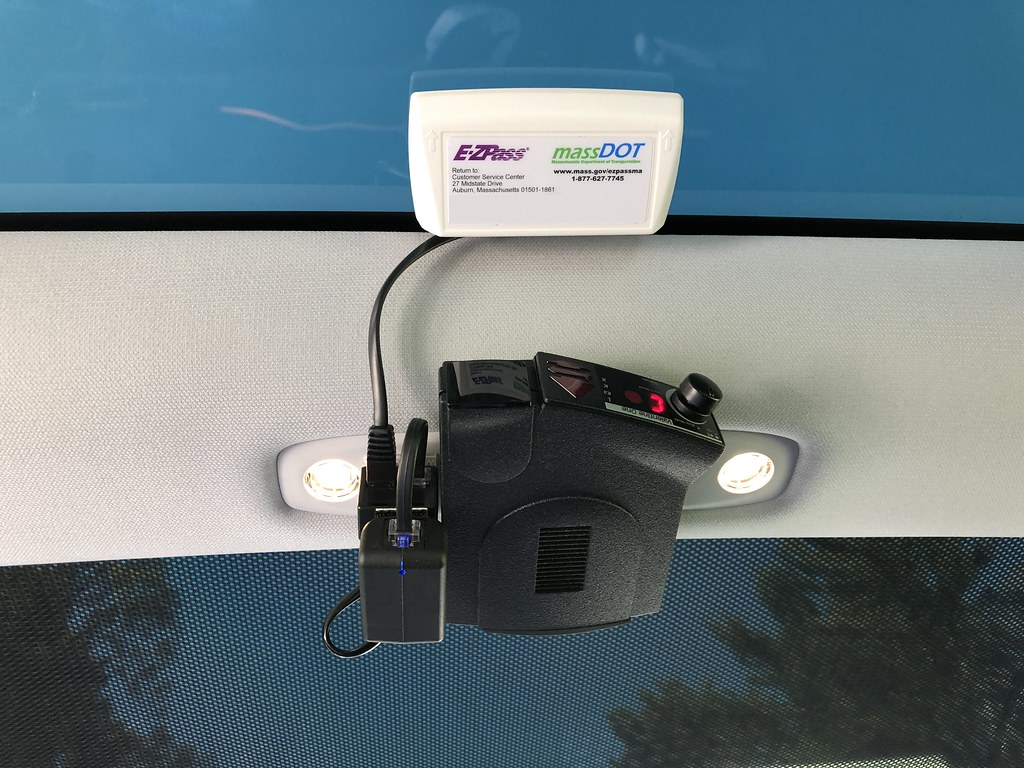
Looking up at V1 from rear seat. The Dongle and splitter could be in trunk but it might not get a good signal there.
I might add the conceal display facing forward.
To summarize I'm using an application on my Phone called V1Driver to completely control the V1 via Bluetooth. I have AutoMute and Speed Mute on all bands. So I never have to touch the V1 directly. It will announce Band and Direction over the car radio. The only awkward thing it does not do is verbally tell you a critical alert is still present after it mutes it. I may mount a Valentine One Concealed display facing forward so I can check it in the rear view mirror. Some other Radar Detectors might work as well like an Escort 360. However the Escort will never AutoMute Ka. So if you get stuck near a cruiser it could get real annoying.
Also as I mentioned in the Radar Detector thread, I did not want to impact the clean Model 3 look with a Radar Detector. Nor did I want to tap power or route wires anywhere in the front to avoid Service issues. The V1 is stuck up there using 3M Dual Lock (same as EzPass). So I could take it down very easily. And if I remember to turn it off, I doubt anyone would ever notice it unless they were looking for it. You'll also see where I mounted my EzPass.
This is where I tapped power, on the Rear Amp. Note: Any time the car is not "Sleeping" this is ON. It is on more often than the Cigarette Lighter Adapter Circuit. But it does shut OFF. I bent U shape lug to 90 degrees and wedged it in there. I didn't want to tap the wire. Partly because it's very large gauge. The V1 is immediately fused after the tap.
This is where I mount the Valentine One Hardwire Kit. Grounded to Radio and Clips on the Subwoofer.
This is the route to get up to the inside of the bottom of the rear window
The lining comes out easy. Just fold back the trunk gasket. You do not have to remove gasket. I tied it back with string while I worked.
This are the plastic rivets you have to remove to get the center trim off before you can peel back the lining.
Getting these rivets back in was the hardest part. They come out easy. But they are a little bit sprung and the whole has very sharp edges. Maybe a file on the hole edges to smooth it or a little bit of lube would have helped.
This is a close up of the center trim you need to remove. So you can see how the clips work. You do not have to pull hard and it came out very easy and went back in easy. Except those darn rivets.
You need to remove this rivet on each side. Pull the center plug back with a small screw driver then wiggle the whole plug out.
This is where I went down into trunk. I shined a flash light from the bottom at night to find it. It goes direct to trunk. It's not along some path. Just push the wire down and you'll see it below. It's in a little double wall cavity though. Which has lots of large holes in it.
This is what the V1 looks like looking back from drivers seat.
This is the path the wire takes in the cabin. I used a plastic pry bar to tension the trim away from glass as I tuck the wire in. Some spot didn't even need the prying but some did. It varied a bit.
And more... It was a little snug around the rear defog connector. But was fine.
Looking up at V1 from rear seat. The Dongle and splitter could be in trunk but it might not get a good signal there.
I might add the conceal display facing forward.
