


Welcome to Tesla Motors Club
Discuss Tesla's Model S, Model 3, Model X, Model Y, Cybertruck, Roadster and More.
Register
Install the app
How to install the app on iOS
You can install our site as a web app on your iOS device by utilizing the Add to Home Screen feature in Safari. Please see this thread for more details on this.
Note: This feature may not be available in some browsers.
-
Want to remove ads? Register an account and login to see fewer ads, and become a Supporting Member to remove almost all ads.
You are using an out of date browser. It may not display this or other websites correctly.
You should upgrade or use an alternative browser.
You should upgrade or use an alternative browser.
KArnold
Active Member
staran
Member
Not sure this product works. Remote works 20% of the time. I can't save settings. This may have been a major mistake but I want to give @BearBu a chance to advise before going that far.
A switch to power cycle is a requirement. Short of that how do you do it manually?
Simply unplug/replug the ODB2 connector that provides power to the unit.
Most of the time it is a non issue since power to ODB2 is cut every time you lock the car, so the 360 gets rebooted regularly
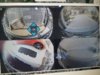
So today we finished the passenger side, all buttoned up.
I got my SD card extender so I decided to see what was on the SD card so far. only a directory LOST.DIR
Nothing in it at all. Wonder if we have to force it to write files to the SD card.
Also after installing the second camera and testing if it has video , it did.
LAter in the process the 360 would not come on, so I power cycled it. all is good in da hood.
KArnold
Active Member
There's something broken on mine. I've been unable to get a response at all the last 25 times I tried. Power cycle did not help. Somehow it's stuck on the "left" view. I can see the IR flashes from the remote via phone. But either that is defective, the receiver, or something else. I've written to BB.
The cameras are working great though!
The cameras are working great though!
staran
Member
Yes, it should respond to the remote. Make sure to wait for maybe 20s after a reboot for the unit to be fully responsive.
The 3D view should change if you use the left/right turn signal.
Maybe the battery for the remote needs to be replaced?
The 3D view should change if you use the left/right turn signal.
Maybe the battery for the remote needs to be replaced?
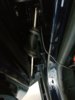
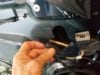
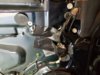
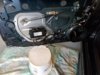
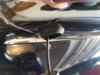
So here is how we did the camera install to the doors of my S.
Definately use a chop stick to feed the camera cable thru the flex tube.
Put the door panels on a upside down bucket to keep from scratching the panel, and to make it easier to install the cables back.
Also retaped the cables with Gaffers tape from Home Depot.
Definately use a chop stick to feed the camera cable thru the flex tube.
Put the door panels on a upside down bucket to keep from scratching the panel, and to make it easier to install the cables back.
Also retaped the cables with Gaffers tape from Home Depot.
Attachments
KArnold
Active Member
Make sure to wait for maybe 20s after a reboot for the unit to be fully responsive.
Give that man a cigar! I think that was the problem - at least it worked twice in a row! Apparently if you push buttons too soon the remote can get disabled somehow. Good to know.
Now next problem - while the options are set to the recommended values, turning on the turn signals has no effect. That includes the "turn signal trigger" set to on. Thoughts?
staran
Member
Ah... For the turn signals to work with the 360 unit your car must be "on", that is, make sure it did not go back to "sleep"
Enter pin to drive if you have one and switch to park/drive/reverse etc before triggering your left/right turn signals...
ps: Thanks for the cigar but I am all hooked to Zero emissions and keeping the air clean") ...
...
Enter pin to drive if you have one and switch to park/drive/reverse etc before triggering your left/right turn signals...
ps: Thanks for the cigar but I am all hooked to Zero emissions and keeping the air clean
...staran
Member
So here is how we did the camera install to the doors of my S.
Definately use a chop stick to feed the camera cable thru the flex tube.
Put the door panels on a upside down bucket to keep from scratching the panel, and to make it easier to install the cables back.
Also retaped the cables with Gaffers tape from Home Depot.
A bucket is also a must to prevent pulling on all these wires... I also like the chopstick suggestion...
Not sure this product works. Remote works 20% of the time. I can't save settings. This may have been a major mistake but I want to give @BearBu a chance to advise before going that far.
A switch to power cycle is a requirement. Short of that how do you do it manually?
Sorry, didn't check message here in a couple of days. Remote works 20% of the time? Would you please check the cable connection between the remote receiver and the 360 unit? Make sure it is a CR2025 battery for the remote controller. I would guess it's the cable (connector connection problem)
Please kindly check
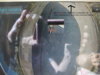
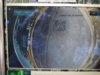
So today we tried to calibrate the cameras. The rubber is correct, but now I find the cameras have a top .vs bottom orientation.
Would be nice if we had a dot or something to show where that is before we put them in the rubber grommet.
I have completely gotten claw marks on my cameras now from adjusting the angles. And still not right as you can see.
@BearBu
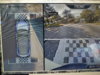
Please change the graphic for the left and right camera - we do not need the two squeares in the view, only seems to align to the front camera matt squares.
The remote I have when we are ready to calibrate the cameras, only allows for the down arrow to be accepted as OK. the center button does not full fill this option, as OK button.
I made comments in the pictures.
Will work on the recalibration again in a few days.
Would be nice if we had a dot or something to show where that is before we put them in the rubber grommet.
I have completely gotten claw marks on my cameras now from adjusting the angles. And still not right as you can see.
@BearBu
Please change the graphic for the left and right camera - we do not need the two squeares in the view, only seems to align to the front camera matt squares.
The remote I have when we are ready to calibrate the cameras, only allows for the down arrow to be accepted as OK. the center button does not full fill this option, as OK button.
I made comments in the pictures.
Will work on the recalibration again in a few days.
Attachments
-
 20190908_092712.jpg500.4 KB · Views: 124
 -
 20190908_092315.jpg272.4 KB · Views: 124
 -
 20190908_092519.jpg688 KB · Views: 118
 -
 20190908_092633.jpg629.2 KB · Views: 117
 -
 20190908_092102.jpg606.7 KB · Views: 119
 -
 20190908_093535.jpg655.4 KB · Views: 115
 -
 20190908_091001.jpg492.3 KB · Views: 124
 -
 20190908_091015.jpg621.1 KB · Views: 112
WilliamSo today we tried to calibrate the cameras. The rubber is correct, but now I find the cameras have a top .vs bottom orientation.
Would be nice if we had a dot or something to show where that is before we put them in the rubber grommet.
I have completely gotten claw marks on my cameras now from adjusting the angles. And still not right as you can see.
@BearBu
Please change the graphic for the left and right camera - we do not need the two squeares in the view, only seems to align to the front camera matt squares.
The remote I have when we are ready to calibrate the cameras, only allows for the down arrow to be accepted as OK. the center button does not full fill this option, as OK button.
I made comments in the pictures.
Will work on the recalibration again in a few days.
The left and right camera settings are wrong, the original image is not front facing for left/right camera before calibration. You can refer to the instruction from the UI. I will show you some pictures for the calibration of the left/right camera in the next thread
WilliamSo today we tried to calibrate the cameras. The rubber is correct, but now I find the cameras have a top .vs bottom orientation.
Would be nice if we had a dot or something to show where that is before we put them in the rubber grommet.
I have completely gotten claw marks on my cameras now from adjusting the angles. And still not right as you can see.
@BearBu
Please change the graphic for the left and right camera - we do not need the two squeares in the view, only seems to align to the front camera matt squares.
The remote I have when we are ready to calibrate the cameras, only allows for the down arrow to be accepted as OK. the center button does not full fill this option, as OK button.
I made comments in the pictures.
Will work on the recalibration again in a few days.
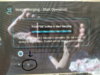
For your right camera, you should twist it with 90degree counter-clockwise, please refer to the below pic:
vice versa, for the left camera, you should twist it with 90degree clockwise, sorry I don't have the pic to show you for the left camera.
For the TF card density is limited up to 32MB, I would suggest to use an either 16MB or 32MB TF card for storage.So today we tried to calibrate the cameras. The rubber is correct, but now I find the cameras have a top .vs bottom orientation.
Would be nice if we had a dot or something to show where that is before we put them in the rubber grommet.
I have completely gotten claw marks on my cameras now from adjusting the angles. And still not right as you can see.
@BearBu
Please change the graphic for the left and right camera - we do not need the two squeares in the view, only seems to align to the front camera matt squares.
The remote I have when we are ready to calibrate the cameras, only allows for the down arrow to be accepted as OK. the center button does not full fill this option, as OK button.
I made comments in the pictures.
Will work on the recalibration again in a few days.
KArnold
Active Member
Good timing Starlog as I am going to try to get a better calibration tomorrow.
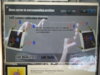
I'm still not getting any CAN data apparently - front guide lines and turn signals do nothing. Settings are per the book best I can tell. Thoughts?
I'm still not getting any CAN data apparently - front guide lines and turn signals do nothing. Settings are per the book best I can tell. Thoughts?
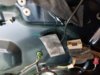
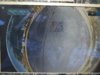
Please kindly check the cable connection as per the following pic, I will specify it with red circle:Good timing Starlog as I am going to try to get a better calibration tomorrow.
I'm still not getting any CAN data apparently - front guide lines and turn signals do nothing. Settings are per the book best I can tell. Thoughts?
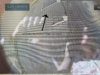
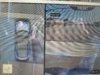
OK, so I took the cameras out of the rubber grommets and let them dangle. Then went to the quad camera view, and marked with a silver sharpie what was TOP of the camera.
Also made sure the grommet was 50 degrees facing backward. Now I need to recalibrate. Still may need a little more calibration of the cameras before the system stiching.
Thanks Tommy for the SD card info, LOL I just purchased a 256GB card for it, but had a 32GB card in it before, will put back in.
So can we record in some manner to the SD card.?
Attachments
Similar threads
- Replies
- 2
- Views
- 721
- Replies
- 9
- Views
- 1K
- Replies
- 43
- Views
- 4K
- Replies
- 0
- Views
- 4K