Welcome to Tesla Motors Club
Discuss Tesla's Model S, Model 3, Model X, Model Y, Cybertruck, Roadster and More.
Register

3D Printing

This site may earn commission on affiliate links.
I know this is not an interior part, but maybe worth mentioning I made a set of lowering links for my car..

3D printed lowering links

I made mine adjustable, printed in ABS, with stainless steel bolt for adjustment.

But I also posted up various fixed length lowering links in thingiverse, details in that thread.

And after having made a few sets, I love PETG plastic ... for strength parts such as these links.
It's a very friendly to use plastic and looks good too.
A 6" heated bed 90C and 0.4 nozzle 240C sliced at 0.25mm layer height makes a strong part.
 
  • Like
Reactions: RichardD
New Qidi printer arrived. 2 hours to configure it, and 3 hours to print this:

Much faster than the monoprice. It handles dual colors seamlessly. I did buy simplify3d though to make quick work:
I modified the change tray, removed the penny and added a USB space to store a spare usb drive. I added a slot in the back to hold cash, since it fits in a cup holder it might be nice to store some emergency funds :)

IMG_8828.JPG

IMG_8834.JPG


Thanks for looking.
 
I have made a charging cable organizer, the charger holder, a few iterations of a change holder.

I am experimenting with a cubby tray with the tesla logo embedded on the front and the tesla naming on the inside of the tray.

Awesome idea on the cubby drawer... awesome you provided the link.

Is that designed for use in the space below the display, or somewhere else. I do admit, blue is an interesting color...

Your designs are great. Willing to share any more, or are your other designs available online?
 
You can print it with any color filament you load. Thingverse likes to dump things in blue. The cubby drawer should fit perfectly in the space below the display. I am now printing two baskets to go inside it. I think the S and the X share the same space. When I actual get my cubby printed, I may take a trip to the service center and see if it fits in the X.

I will share anything I make, I just started this two weeks ago so I have not made too many remixes or projects.

I am open to suggestions on what needs to be printed. Today is the first day with the dual color (extruder) printer and I am loving the ease of print, although now I just printed a 3 color item by swapping the color at the end...

Thanks for looking..
 
Last edited:
You can print it with any color filament you load. Thingverse likes to dump things in blue. The cubby drawer should fit perfectly in the space below the display. I am now printing two baskets to go inside it. I think the S and the X share the same space. When I actual get my cubby printed, I may take a trip to the service center and see if it fits in the X.

I will share anything I make, I just started this two weeks ago so I have not made too many remixes or projects.

I am open to suggestions on what needs to be printed. Today is the first day with the dual color (extruder) printer and I am loving the ease of print, although now I just printed a 3 color item by swapping the color at the end...

Thanks for looking..

So do you scan an item for reproduction, or design from scratch?

I guess the software can be "dumbed down" to non-engineers to modify dimensions as needed, or to create some new design... or is it pretty advanced?

Was purchasing simplify3d worth the price, and better than the software that came with the printer?
 
@essmd
I typically start with something in thingverse, then modify it in tinkercad. Save it and reload it up to thingverse, they call that a remix.. so I always give credit to the original author for his idea. I have created some unique items in tinkercad. The trays that go in the cubby for example. After I print them and make sure they work, I will upload them to thingverse.
It is pretty fun so far, I don't know if simplify3d is worth it yet at $149. The slicing options out there are pretty robust, but it rated very high, and one thing I wanted was a splicer that handled dual extrusion natively. One thing it did was increase some of my print times. My tray inserts will be done printing shortly and will upload a picture.

Thanks for looking.
 
  • Like
Reactions: tomp
I have an Ultimaker 2 and have printed a tray insert which unfortunately was designed so that the walls where too thin. That didn't really work. The walls started buckling, it wasn't really usable. I'm interested in checking out what has been shown above.

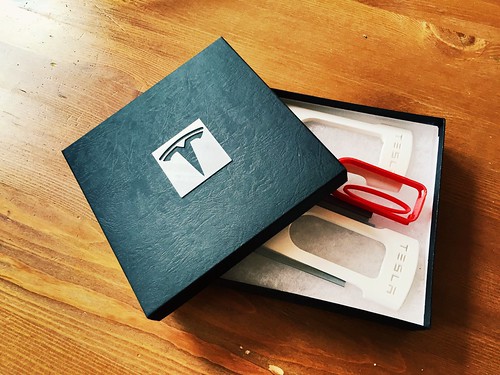
Other than that I have only printed a logo, that I put on gift box, in which I put a printed phone Tesla charger (yeah, "that" one) which I gave to the person who gave me and my wife a test drive. I wanted to try the standard seats and Tesla didn't have any demo cars with standard seats. A Tesla Club member kindly volunteered.

I print essentially everything I print with InnoFill 3D 2.85 mm PLA.

 
  • Like
Reactions: RichardD
We have about 35 printers operating, ranging from Lulzbots and Maker Bots up to Fortis 250 and 450MC, Connex 303, EOS poly, and Objet24 and Objet30, as well as Concept M2s and Mlab for metals. For release, the students use AquaNet- after three years, this is the most reliable release material for ABS (with or without fiber fill), PLA, and nylon 6 (powders). We use SolidWorks, Autodesk, NX, MSC. They all have advantages and shortcomings, just depends on the application. One of my students has studied the details of the deposition/formation process for filament-based tools for the past two years- there are some interesting issues with printing/scaffolding/sacrifical scaffolds and fills, etc. You need to pay attention to tight corners, infills, temperatures (as noted in several replies above), and trace (writing) velocities. Experimentation first is a good thing to do... One other thing to note- the "lower" price tools have larger tolerances/lower accuracy, relative to the expensive units.
 
  • Informative
Reactions: RichardD
I have an Ultimaker 2 and have printed a tray insert which unfortunately was designed so that the walls where too thin. That didn't really work. The walls started buckling, it wasn't really usable. I'm interested in checking out what has been shown above.

Other than that I have only printed a logo, that I put on gift box, in which I put a printed phone Tesla charger (yeah, "that" one) which I gave to the person who gave me and my wife a test drive. I wanted to try the standard seats and Tesla didn't have any demo cars with standard seats. A Tesla Club member kindly volunteered.

I print essentially everything I print with InnoFill 3D 2.85 mm PLA.

I am making these now. They are time consuming but I need a few so lets see how it goes.
 
  • Like
Reactions: bjelkeman