


Welcome to Tesla Motors Club
Discuss Tesla's Model S, Model 3, Model X, Model Y, Cybertruck, Roadster and More.
Register
Install the app
How to install the app on iOS
You can install our site as a web app on your iOS device by utilizing the Add to Home Screen feature in Safari. Please see this thread for more details on this.
Note: This feature may not be available in some browsers.
-
Want to remove ads? Register an account and login to see fewer ads, and become a Supporting Member to remove almost all ads.
You are using an out of date browser. It may not display this or other websites correctly.
You should upgrade or use an alternative browser.
You should upgrade or use an alternative browser.
4-CH dashcam setup + coverage of footage around the car
- Thread starter aikisteve
- Start date
Nice setup, considered a similar install on my daughters Model 3, just ended up deciding it was too costly for additional coverage.
I would add some videos showing how the install looks inside the car as well (if you are looking to use this to gain customers).
What do you mean with "how the install looks inside the car"? How the install is actually done and where the wires run?
Darren Donovan
Member
Do the 4 cameras stay on and record when the vehicle is parked? How long does that last?
Thanks,
Thanks,
Yes they film 24/7, but only record to disk when movement or impact is detected. Since the devices take max 4W per set, this can last for up to a year, if that would be the only power drain.Do the 4 cameras stay on and record when the vehicle is parked? How long does that last?
Thanks,
") For comparison, the AP2 computer alone uses 250W. So you don't even notice it in your consumption.
For comparison, the AP2 computer alone uses 250W. So you don't even notice it in your consumption.Darren Donovan
Member
Yes they film 24/7, but only record to disk when movement or impact is detected. Since the devices take max 4W per set, this can last for up to a year, if that would be the only power drain.
I assume the power for the 4 cameras is drawn from the 12 volt battery?
SKRGO
Member
Yesterday, I installed another 4-channel dashcam in a #Tesla Model S, so I thought you might be interested in the way it is set up. And I've also included footage of the coverage around the car.
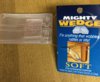
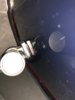
I have the same setup as you have done for 1 year and running 24/7 wired with fuses. The only change you should consider is a wedge under the side camera mount. I used the Mighty Wedge and trimmed it down then painted it black, with a permanent marker. You will need to tape the camera and wedge in place with blue tape. Then turn on your phone settings to show the two cameras to figure out the overlap at each of the corners, it is much easier with a second person. Once you get it correct, as you drive down the road and cars go to pass you, their will be no loss of video of the car as it passes. The same goes when parked. Make sure to use the new setting of Time Lapse when parked and adjust the G force settings higher so that the camera does not think you were in an accident every time you punch it and lock the recording. You can attach directly onto the window tint if you use a 3m a product.
Attachments
cwerdna
Well-Known Member
Very cool! FWIW, Europeans are probably familiar with Benelux (and probably the vast majority of Benelux's member countries) but I'd wager a majority of Americans aren't.
I hadn't ever heard of it until my current job. My company (an American one) had been expanding into more and more countries over time and we had a French guy on my team, which are the only reasons why I'd heard the term.
I hadn't ever heard of it until my current job. My company (an American one) had been expanding into more and more countries over time and we had a French guy on my team, which are the only reasons why I'd heard the term.
Last edited:
What do you mean with "how the install looks inside the car"? How the install is actually done and where the wires run?
Sorry my mistake, I skipped past the part where you clearly show the interior install from 1:20 - 2:15. I skipped past it too quickly when I was scrubbing / watching. Very nice install, very well done.
Akikiki
A'-Lo-HA ! y'all
rfmurphy81
Member
I watched the video but don't have sound on so not sure if you referenced where each main camera is getting power. I know the front camera can pull constant power from around the microphone grill. Where are you tapping into constant power for the back? Would love specifics for when I decide to get a second camera set up.
Akikiki
A'-Lo-HA ! y'all
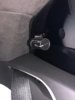
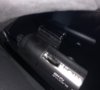
This is documented in a couple of other threads already here. I know I have explained it a couple of times, but I don't have tnose old links. The first time we figured it out, it was installing the Lighted Rear applique. Artsci figured it out and I copied him. I added a fuse box/block in the right inside trunk area hear on "this side" of the fuzzy where the light gate controller is under/behind the fuzzy. If you want to read up on the power source to to https://tesla-lights.net/installation/ and read about installing the rear applique and use the same power source. I used it and ran from my fuse box up through the liftgate boot and across to the center of the back window. (With the fuse box, I have a fuse to the rear camera and fused sources for other stuff in the back.
NeverFollow
Active Member
Good job. IMO this layout for the side cameras located on the back make this like a surveillance camera system.
I wish I could put the two side cameras more toward the front. Ideal would be inside the front bumper or front fender,
or to put them inside the side mirrors, and then been able to display the camera on your dash board.
This would be very usefull then when you are in a T intersection, especially to make a left turn on a two ways intersection.
Idem when you exit a garage in the street with cars parked on both side of the garage exit blocking the view of the street.
Akikiki
A'-Lo-HA ! y'all
I watched the video but don't have sound on so not sure if you referenced where each main camera is getting power. I know the front camera can pull constant power from around the microphone grill. Where are you tapping into constant power for the back? Would love specifics for when I decide to get a second camera set up.
Power is drawn from the OBD port. For some reason, European cars do not have that connector behind the microphone grill. I had it in my early P85D, but it did only deliver 3V and not 12V.
Also, OBD is fused separately, so there is not interference with any other system on the car when you just draw power there.
Similar threads
- Replies
- 5
- Views
- 662
- Replies
- 15
- Views
- 635
- Replies
- 5
- Views
- 2K
- Replies
- 23
- Views
- 2K