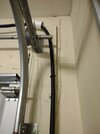
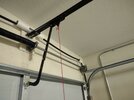
Installed a spring balancer to make it more convenient for daily plugging in/out and to give the charging cable and the shopvac some space. Wife seems happy and has said this makes it easier to plug in each day.
View attachment 929675
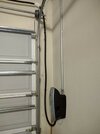
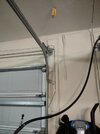
Not too impressed with the spring balancer but I did start with
the cheaper ones off Amazon for $13. First I used the one for 3-6lb but there was too much tension in the spring so 'balance' was not possible. The 1-3lb version worked better for the roughly 9 foot of dangling cable and handle. It does balance alright just only in the middle 80% of the cord length. And with 48" of cord and 10' ceiling, we have to extend the cord the full length. Here is a photo of the cable dangling at the lowest height it will still balance:
View attachment 929674
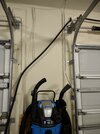
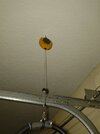
Problem is that when you plug the handle into the charge port, that takes some weight off and the balancer wants to retract the cord some. So there is some very slight upward tension on the cable when the handle is plugged in. I've tried adjusting the spring tension but it doesn't seem to make much difference with the cord almost fully extended. And then when you raise the cable, it will slip down some unless I increase the spring tension significantly. Not a big deal since the slack is still over the shopvac area where we won't run into it, but I might look into different balancer options to find one with a longer cord given my higher ceiling.
First photo is after pushing up the cable and second is after it extends a little on its own.
View attachment 929676View attachment 929678
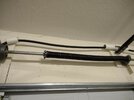
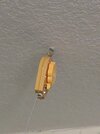
For the rigging, I just used some discarded hose sleeve and zip ties. The gen2 WC cable is pretty thick and doesn't have much bend to it. The white zip ties act as collars to keep the hose sleeve from sliding too much. I left the sleeve just loose enough so I could shift the position later if needed. I also added a backup clip to attach to the cord since the one that came with the balancer is low quality.
View attachment 929677
I will update if I try another balancer or another solution.