Welcome to Tesla Motors Club
Discuss Tesla's Model S, Model 3, Model X, Model Y, Cybertruck, Roadster and More.
Register

Aftermarket fog lights

This site may earn commission on affiliate links.

Hayden

Active Member
Apr 12, 2016
1,691
959
Belgium
I drive a 2019 SR+ without fog lights.
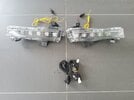
Now I bought aftermarket fog lights that come with a harness for the SR+ without the fog lights.
However, there is no manual on how to connect the harness.
Has anyone here ever placed these lights and connected them with the harness?
I found a youtube video about installing the same fog lights but without using the harness as it already had fog lights.
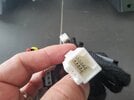
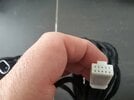
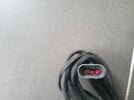
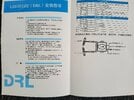
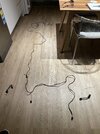
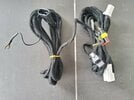
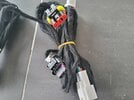
I've added some pictures of the harness.
The installation video
The pictures of the parts
20210820_142933.jpg20210820_142826.jpg20210820_142844.jpg20210820_142856.jpg20210820_142910.jpg20210820_142918.jpg20210820_143433.jpg
 
I haven't installed this, but I did add OEM fog lights to my SR+. Since I don't have the fog light "button" on the touchscreen, at the OEM harness you need to splice the center wire (that would normally power the fog light) to the side marker's + wire (black wire is ground so don't tap into that). Thus the side marker is powering both the side marker and fog light.

In your case, it looks like you want to do the same to the OEM harness (to power the white portion of your aftermarket light), and then also run the yellow wire to the turn signal in the fender. Then just plug and play and abandon that big harness that comes with your kit.

Disclaimer - What I described will likely work, but I don't know the power draw of the lights you purchased. Thus, it's possible to overload the side marker circuit.
 
  • Informative
Reactions: Hayden
I have those black plastic covers where the fog lights are normally. I don't think the OEM wiring is present.
I got some "better" information from the seller.
Connect the red wire to ACC
Black wire ground wire
Yellow/blue turn to postive
The white wire is connected to the positive elektrode of the headlight
Hd7062cbb6796481ebd1f73df16199c6b9.jpg
 
  • Like
Reactions: UNCLETYS
You are in luck as I installed mine today!!!
You do not need to jack your car up or remove the wheels but if you do it will make things a bit easier. You can also jack the car up without removing the wheels as well. Otherwise, turn the wheel left and right as needed (I did this option...Car parked on the street!).
Here's the directions:
1. Remove all the trims in the frunk.
2. Remove the frunk well
3. Remove the bumper (3 screws and 1 nut on each side along with clips on the bottom)
4. Remove the large sensor harness from the passenger (right side) before you yank off the bumper.
5. Remove the fog light housing from the bumper, install new ones. Make sure clips are in the right slot, 3 screws each.
6. Plan your wiring, run it from driver side to passenger side. Tie down your harness with tapes or cable ties.
7. Do not attempt to get power from the Daytime running light...your fog lights will stay on even when your car is locked (don't ask me how I knew).
8. Remove wheel well covers.
9. Remove the side camera. You will tap the yellow (for Right side) and Teal (for Left side) wire. Use the compact T tap connectors. https://www.amazon.com/gp/product/B07DFZ8CBV/ref=ppx_yo_dt_b_asin_title_o00_s00?ie=UTF8&psc=1 Hint: use plastic removal tool as not to create paint scratch.
10. Mount the yellow wires from the fog lights in the wheel well area then put everything back.
11. Remove a lot of panels: right passenger side by the door sill, rear passenger side by the door sill, seat rocker panel, and the rear deck speaker panels. Note: you might have to remove the rear seat air bag panel and the panel that holds the rear deck speaker down as well. You need access to the very end of the rear deck speaker panel as there's a plug in there that you need. DO NOT remove the center panel where the front passenger seat belt is. It will be very difficult for you to put it back together.
12. The fog lights get power from the rear tail light area. Keep that in mind.
13. Ground your harness to the right side by the day time running light plug.
14. Run your thin cable to the right fender, exit thru a narrow opening to the door, then route the cable thru the plastic window seal. Make a hole and pass the wire thru.
15. Continue running the cable to the back. Slide the cable into the center panel where the passenger seat belt is.
16. Route that cable up to the rear deck speaker area. Remove old plug, put in new one as a pass thru.
17. You will have a very hard time plugging in one side of the plug. I recommend you sand the inside of it with a dremel and remove the two side edges inside the plug.
18. Test to make sure your fog lights are working. Check turn signals too.
19. Put all the panels back...this is the fun part.
20. Enjoy. Contact me if you have any questions: [email protected]

First time doing it will take you 5-6 hours easily.
 
I haven't installed this, but I did add OEM fog lights to my SR+. Since I don't have the fog light "button" on the touchscreen, at the OEM harness you need to splice the center wire (that would normally power the fog light) to the side marker's + wire (black wire is ground so don't tap into that). Thus the side marker is powering both the side marker and fog light.

In your case, it looks like you want to do the same to the OEM harness (to power the white portion of your aftermarket light), and then also run the yellow wire to the turn signal in the fender. Then just plug and play and abandon that big harness that comes with your kit.

Disclaimer - What I described will likely work, but I don't know the power draw of the lights you purchased. Thus, it's possible to overload the side marker circuit.
You should check out my setup. I want to see how your OEM fog lights compared to mine
 
Last edited:
I have those black plastic covers where the fog lights are normally. I don't think the OEM wiring is present.
I got some "better" information from the seller.
Connect the red wire to ACC
Black wire ground wire
Yellow/blue turn to postive
The white wire is connected to the positive elektrode of the headlight
View attachment 700278
The wiring harness is still present on the SR models that have the “fake” black fog lights.

If you plug in a real fog light assembly, it’ll light both the orange reflector light and the decorative LED line. If you want to fog light itself to light, you’ll have to Hotwire it as explained in the post above since the SR has no software fog light control.
These are other foglights than oem.
 
You are in luck as I installed mine today!!!
You do not need to jack your car up or remove the wheels but if you do it will make things a bit easier. You can also jack the car up without removing the wheels as well. Otherwise, turn the wheel left and right as needed (I did this option...Car parked on the street!).
Here's the directions:
1. Remove all the trims in the frunk.
2. Remove the frunk well
3. Remove the bumper (3 screws and 1 nut on each side along with clips on the bottom)
4. Remove the large sensor harness from the passenger (right side) before you yank off the bumper.
5. Remove the fog light housing from the bumper, install new ones. Make sure clips are in the right slot, 3 screws each.
6. Plan your wiring, run it from driver side to passenger side. Tie down your harness with tapes or cable ties.
7. Do not attempt to get power from the Daytime running light...your fog lights will stay on even when your car is locked (don't ask me how I knew).
8. Remove wheel well covers.
9. Remove the side camera. You will tap the yellow (for Right side) and Teal (for Left side) wire. Use the compact T tap connectors. https://www.amazon.com/gp/product/B07DFZ8CBV/ref=ppx_yo_dt_b_asin_title_o00_s00?ie=UTF8&psc=1 Hint: use plastic removal tool as not to create paint scratch.
10. Mount the yellow wires from the fog lights in the wheel well area then put everything back.
11. Remove a lot of panels: right passenger side by the door sill, rear passenger side by the door sill, seat rocker panel, and the rear deck speaker panels. Note: you might have to remove the rear seat air bag panel and the panel that holds the rear deck speaker down as well. You need access to the very end of the rear deck speaker panel as there's a plug in there that you need. DO NOT remove the center panel where the front passenger seat belt is. It will be very difficult for you to put it back together.
12. The fog lights get power from the rear tail light area. Keep that in mind.
13. Ground your harness to the right side by the day time running light plug.
14. Run your thin cable to the right fender, exit thru a narrow opening to the door, then route the cable thru the plastic window seal. Make a hole and pass the wire thru.
15. Continue running the cable to the back. Slide the cable into the center panel where the passenger seat belt is.
16. Route that cable up to the rear deck speaker area. Remove old plug, put in new one as a pass thru.
17. You will have a very hard time plugging in one side of the plug. I recommend you sand the inside of it with a dremel and remove the two side edges inside the plug.
18. Test to make sure your fog lights are working. Check turn signals too.
19. Put all the panels back...this is the fun part.
20. Enjoy. Contact me if you have any questions: [email protected]

First time doing it will take you 5-6 hours easily.
I better foresee some time because it looks like a serious job.
I can continue with your step-by-step plan.
Did you figure all that out yourself? Respect for that.
Thanks for the help!
 
So many thanks @TonyLSF for showing me his aftermarket fog lights/animated turn signals. We did a side-by-side comparison between his fog lights and my OEM fog lights, as well as a side-by-side comparison of his 2020 headlights versus my 2021 headlights.

Methodology: Both vehicles were parked 25-feet from a garage wall next to each other. Brightness levels were measured using my phone running the "Lux Light Meter" app. The app was NOT calibrated to a lux meter. Thus, the actual lux values measured ARE NOT ACCURATE and the values measured can be used ONLY to compare brightness between the two lights. Ambient lux measurements were taken 25-feet away from the vehicle at the left edge, center line, and right edge of the vehicle 6-inches from the ground (since fog lights illuminate closer to the ground). Headlight housings/DRL were covered with a blanket to block stray light from other sources. All housings were clean.

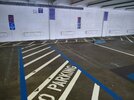
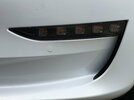
Aftermarket (Photo 1)
Ambient - 19 lux left, 19 lux center, 22 right
Fog Lights On - 30 lux left (+11), 33 lux center (+14), 38 lux right (+16)
We can see that the aftermarket fog light has an extremely wide and diffused beam pattern, which would make sense since the light changes color for turn signal duty. We can also see that as a fog light, the beam is brighter toward the right side of the vehicle, which is consistent with RHD vehicles. Since these housings are from China, it wouldn't surprise me that the beam pattern was tailored for that market.

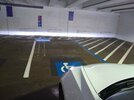
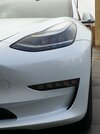
OEM (Photo 2)
Ambient - 25 lux left, 28 lux center, 32 right
Fog Lights On - 242 lux left (+217), 206 lux center (+178), 222 lux right (+190)
We can see that the OEM fog light has a very wide and bright dispersion with sharp vertical cutoff. The beam is brightest at the left side of the vehicle, which is consistent with LHD vehicles, is slightly dimmer in the middle, and bright again on the right side of the vehicle. This is consistent with what actual fog lights are supposed to do - light up the road "beneath" the fog and better define the edges of the road / traffic lanes.

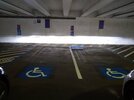
Headlights & Fog Lights (Photo 3)
We measured the brightness at the center of the vehicle, approximately 24" above the ground, and recorded the brightest lux reading.
2020 SR+ - 14 lux ambient, 1,177 lux max
2021 SR+ - 20 lux ambient, 2,751 lux max
We can see in the photo a slightly different beam pattern between the two vehicles, where the 2020 (on the left) has 2 standout "hotspots", while the 2021 (on the right) is slightly more dispersed and even. Both vehicles show excellent vertical cutoff. Despite the measured brightness difference between the two vehicles, to my eye I did not notice any significant brightness difference between the two. Most importantly, you can see there's little actual difference on the wall between the aftermarket and OEM fog lights when the headlights are also in use.

Therefore, just get the fog lights you like for the look that you want to achieve. From an actual illumination standpoint, you don't really need them at all. That said, if you routinely drive through fog and feel the SR+ headlights alone are lacking, you should SLOW DOWN first :D and then consider the OEM housings for their brightness and beam pattern.
 

Attachments

  • IMG_20210905_172739044.jpg
    IMG_20210905_172739044.jpg
    412.9 KB · Views: 302
  • IMG_20210905_172932108.jpg
    IMG_20210905_172932108.jpg
    293 KB · Views: 270
  • IMG_20210905_173107216.jpg
    IMG_20210905_173107216.jpg
    258.7 KB · Views: 273
Last edited:
Those are daytime running lights, not fog lights. As the pictures above show, they do not have the correct beam pattern to be considered fog lights. The instruction manual even says DRL.
The OEM lights on the LR and Performance trims have an amber side marker, a DRL light strip, and a fog light. The SR+ has only the amber side marker, but I retrofitted the LR/Performance housing into my SR+. I'm measuring the brightness of the fog light portion, and comparing it to the an aftermarket version.
 
The OEM lights on the LR and Performance trims have an amber side marker, a DRL light strip, and a fog light. The SR+ has only the amber side marker, but I retrofitted the LR/Performance housing into my SR+. I'm measuring the brightness of the fog light portion, and comparing it to the an aftermarket version.

My comment was about the aftermarket "fog lights" that aren't actually fog lights - their intended use is as daytime running lights, as the manual says. The OEM fog lights perform very well, as your pictures show.
 
You are in luck as I installed mine today!!!
You do not need to jack your car up or remove the wheels but if you do it will make things a bit easier. You can also jack the car up without removing the wheels as well. Otherwise, turn the wheel left and right as needed (I did this option...Car parked on the street!).
Here's the directions:
1. Remove all the trims in the frunk.
2. Remove the frunk well
3. Remove the bumper (3 screws and 1 nut on each side along with clips on the bottom)
4. Remove the large sensor harness from the passenger (right side) before you yank off the bumper.
5. Remove the fog light housing from the bumper, install new ones. Make sure clips are in the right slot, 3 screws each.
6. Plan your wiring, run it from driver side to passenger side. Tie down your harness with tapes or cable ties.
7. Do not attempt to get power from the Daytime running light...your fog lights will stay on even when your car is locked (don't ask me how I knew).
8. Remove wheel well covers.
9. Remove the side camera. You will tap the yellow (for Right side) and Teal (for Left side) wire. Use the compact T tap connectors. https://www.amazon.com/gp/product/B07DFZ8CBV/ref=ppx_yo_dt_b_asin_title_o00_s00?ie=UTF8&psc=1 Hint: use plastic removal tool as not to create paint scratch.
10. Mount the yellow wires from the fog lights in the wheel well area then put everything back.
11. Remove a lot of panels: right passenger side by the door sill, rear passenger side by the door sill, seat rocker panel, and the rear deck speaker panels. Note: you might have to remove the rear seat air bag panel and the panel that holds the rear deck speaker down as well. You need access to the very end of the rear deck speaker panel as there's a plug in there that you need. DO NOT remove the center panel where the front passenger seat belt is. It will be very difficult for you to put it back together.
12. The fog lights get power from the rear tail light area. Keep that in mind.
13. Ground your harness to the right side by the day time running light plug.
14. Run your thin cable to the right fender, exit thru a narrow opening to the door, then route the cable thru the plastic window seal. Make a hole and pass the wire thru.
15. Continue running the cable to the back. Slide the cable into the center panel where the passenger seat belt is.
16. Route that cable up to the rear deck speaker area. Remove old plug, put in new one as a pass thru.
17. You will have a very hard time plugging in one side of the plug. I recommend you sand the inside of it with a dremel and remove the two side edges inside the plug.
18. Test to make sure your fog lights are working. Check turn signals too.
19. Put all the panels back...this is the fun part.
20. Enjoy. Contact me if you have any questions: [email protected]

First time doing it will take you 5-6 hours easily.
I found this short video that shows your step-by-step plan a bit. Not really in detail unfortunately.
 
  • Like
Reactions: UNCLETYS
That's the one I followed! In theory you don't need to run the power harness to the back like the video. You could tap the power for the fog lights nearby as long as it shuts off when the car locks itself. I agreed that the after-market fog lights kit is not really a fog lights perse but more like an additional set of lights to illuminate the road better. Fog lights are supposed to be a narrow and focused beam.
 
Today I placed the harness. First removed the air inlet grille and duct to get to the grommet under the air duct. The grommet allowed me to get through the fire wall into the cabin, the grommet is located under the carpet on the passenger side just next to the air filters. Drilled a hole in the grommet from the inside and so I could bring in the wire from the frunk. Then the frunk removed to route the wire to the DRL lights and ground the wire. In the cabin then the wire under the trim led to the rear. Disconnected the speaker deck on the passenger side. To do this, first have to remove the trim on the side window at the back. This way I was able to lift the speaker deck enough to get to the connector. After some fiddling, connected the connectors and put everything back. Since I didn't have much time, I'll continue tomorrow. Tomorrow I will remove the bumper, place the lights, connect the indicators and plug in the connectors.
So far so good.
Thanks to @TonyLSF for the guidance
 
  • Like
Reactions: UNCLETYS
Installed the drl lights today. I was able to fit the lights without removing the bumper, there was plenty of room to install them through the wheel arches. The biggest job was installing the wire harness, the lights themselves were in an hour. Thanks for all the help here and if anyone decides to install this as well, feel free to contact me for tips.
20211113_112754.jpg

20211113_115942.gif

20211113_110730.jpg20211113_110744.jpg
 
Last edited:
Can someone help (ELI5) - see the pic,
I need to know where exactly all those plugs go, if it’s simply marked as to where I put them in good to go & as always, thanks in advance 🤓
 

Attachments

  • A12553B8-5A46-4D2C-A1C6-966C93189C1F.jpeg
    A12553B8-5A46-4D2C-A1C6-966C93189C1F.jpeg
    666.3 KB · Views: 135
You plug the wires in your fog lights, then connect them to the harness and run the wire on the passengers side all the way to the back. Under the platform where the back speakers are there is a plug, disconnect and connect to the harness and that should do it. Read the instructions above, you cant miss with the plugs. It's a lot off work but a easy job. You can PM me for help and i can send you pictures. Good luck.