I tried, but there's very little clearance in the grommet to squeeze the 1/4" tube. I was afraid about the long term effect of the friction against the existing wires/cables whenever opening and closing the trunk.You can use polyethylene tubing to run the cables, like what is used for aquariums RODI water systems etc. Dirt cheap and you probably only need about 6' of it. 1/4" Mur-lok Polyethylene RO Tubing


Welcome to Tesla Motors Club
Discuss Tesla's Model S, Model 3, Model X, Model Y, Cybertruck, Roadster and More.
Register
Install the app
How to install the app on iOS
You can install our site as a web app on your iOS device by utilizing the Add to Home Screen feature in Safari. Please see this thread for more details on this.
Note: This feature may not be available in some browsers.
-
Want to remove ads? Register an account and login to see fewer ads, and become a Supporting Member to remove almost all ads.
You are using an out of date browser. It may not display this or other websites correctly.
You should upgrade or use an alternative browser.
You should upgrade or use an alternative browser.
BlackVue DR750S-2CH install - step by step guide
- Thread starter arcus
- Start date
f3honda4me
Member
For what it's worth I used it just fine through the back driver's side grommet.I tried, but there's very little clearance in the grommet to squeeze the 1/4" tube. I was afraid about the long term effect of the friction against the existing wires/cables whenever opening and closing the trunk.
MacGreiner
5YJ
Thanks for this excellent guide. I installed using your guide today.Here is my take on the installation of the dual channel dash camera system in Model S:
BlackVue DR750S-2CH installation in 2017 Tesla Model S
I managed to install the rear camera without removing the large piece of trim from the tailgate, so if that was a show stopper for some, hope you will find the above instructions useful.
Comments are welcome!
You're welcome! Glad it worked outThanks for this excellent guide. I installed using your guide today.
")
Emcsquared
Member
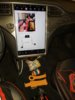
I finally found a use for the tesla browser! Had the DIY pulled up on it for the install. Finally got around to installing my 750 last weekend. The passenger side boot on the rear hatch was super snug for the fishtape but a little non-conductive tech grease made a world of difference.
Thanks for the install guide!
Thanks for the install guide!
Attachments
jorobsand
Member
@arcus - I used your guide this past weekend for my 4k Blackvue install. I found your guide very helpful in my installation. Using your parts list, I had everything I needed without the need to make a trip to the hardware store with a half taken apart car .
Only thing I did different was use a blue colored 1/4" tubing for cable routing. The connectors of the Blackvue cables fit perfectly within the tube to be able to be taped together for pulling the cable through. The blue color also made it easier to see as I was fishing it out.
Glad I also voltage tested my spare hardwire connector as the cable colors I saw through yours and other tutorials were NOT the same for me. My spare connector also only had 3 wires connected to it.
Also, great call on buying some spare plastic trim clips that you knew would be broken. I only broke a couple, but it was good to know I had some available to use and didn't have to worry about these snapping when removing trim pieces.
.Only thing I did different was use a blue colored 1/4" tubing for cable routing. The connectors of the Blackvue cables fit perfectly within the tube to be able to be taped together for pulling the cable through. The blue color also made it easier to see as I was fishing it out.
Glad I also voltage tested my spare hardwire connector as the cable colors I saw through yours and other tutorials were NOT the same for me. My spare connector also only had 3 wires connected to it.
Also, great call on buying some spare plastic trim clips that you knew would be broken. I only broke a couple, but it was good to know I had some available to use and didn't have to worry about these snapping when removing trim pieces.
Thank you, @jorobsand ! I must have bought a wrong 1/4 tube, mine was way too thick to even try fishing it through. Great that your worked
The credit for spare clips goes to one of the youtubers who mentioned that in hi video. I think I broke 2 clips as well, so they came very handy!
The credit for spare clips goes to one of the youtubers who mentioned that in hi video. I think I broke 2 clips as well, so they came very handy!
SucreTease
Teslarian
Can you post a link to the tubing you used?@arcusOnly thing I did different was use a blue colored 1/4" tubing for cable routing. The connectors of the Blackvue cables fit perfectly within the tube to be able to be taped together for pulling the cable through. The blue color also made it easier to see as I was fishing it out.
jorobsand
Member
Here is what I used: https://www.amazon.com/gp/product/B00E6A1EVO/ref=oh_aui_detailpage_o01_s00?ie=UTF8&psc=1
Was flexible enough when I needed it to be and cut it for each pull as necessary. I could even pre-shape it for a pull when I wanted. I also felt comfortable working it through the rubber grommet pull where there isn't a lot of room.
Was flexible enough when I needed it to be and cut it for each pull as necessary. I could even pre-shape it for a pull when I wanted. I also felt comfortable working it through the rubber grommet pull where there isn't a lot of room.
Great, thanks for the info!Here is what I used: https://www.amazon.com/gp/product/B00E6A1EVO/ref=oh_aui_detailpage_o01_s00?ie=UTF8&psc=1
Was flexible enough when I needed it to be and cut it for each pull as necessary. I could even pre-shape it for a pull when I wanted. I also felt comfortable working it through the rubber grommet pull where there isn't a lot of room.
If my 2015 S has always-on power, then this looks like a very easy install for the forward camera?
I don’t have any interest in the rear camera, and definitely not interested in the install of it with my solid roof!
I assume I can run it without the rear camera?
I don’t have any interest in the rear camera, and definitely not interested in the install of it with my solid roof!
I assume I can run it without the rear camera?
If my 2015 S has always-on power, then this looks like a very easy install for the forward camera?
I don’t have any interest in the rear camera, and definitely not interested in the install of it with my solid roof!
I assume I can run it without the rear camera?
Yes, will work great (though no need to spend the extra on the 2ch version if you just want front). And yes, forward only is a very easy install.
What he saidYes, will work great (though no need to spend the extra on the 2ch version if you just want front). And yes, forward only is a very easy install.
You should be done with it in < 30 mins with just a front camera.wasn't as brave as you guys (respect!) so got an installer to come by the house. Used him for other cars, his work is top notch. However going back to comments on Pg 1, at times, key is no longer recognized post install. He routed the cables on the driver side. Anybody experiencing the same issue?
Thanks
Thanks
wasn't as brave as you guys (respect!) so got an installer to come by the house. Used him for other cars, his work is top notch. However going back to comments on Pg 1, at times, key is no longer recognized post install. He routed the cables on the driver side. Anybody experiencing the same issue?
Thanks
There's an antenna for the key right behind the trim piece that faces the door hinge. Although he shouldn't have routed anything through there?
The end cap on the driver side was removed when I checked on him during the install. I will confirm with him but it looks like he routed from rear view mirror through the headliner then driver's A pillar then connected the magic box behind the dash so might be the issueThere's an antenna for the key right behind the trim piece that faces the door hinge. Although he shouldn't have routed anything through there?
Olle
Active Member
Don't know what causes your key problem, but here is a tip for simplifying your set up; You don't need the Magic Box that you mentioned. The box is meant to save an ICE battery from being drained from cameras running while parked. Since a Tesla replenishes its 12 V battery by itself while parked, the box does nothing for you. Having done 2 Model S installs and running my black vues for years 24/7 I can tell you they run perfectly without the boxThe end cap on the driver side was removed when I checked on him during the install. I will confirm with him but it looks like he routed from rear view mirror through the headliner then driver's A pillar then connected the magic box behind the dash so might be the issue
Thanks Olle, good to know. Currently my blackvue shuts down when the car is off. Does it need to be wired differently?
Yes. Get rid of the Power Magic battery pack and make sure the dash cam power is coming from an always-on 12V line.
Similar threads
- Replies
- 1
- Views
- 576
- Replies
- 5
- Views
- 2K
- Replies
- 0
- Views
- 4K
- Replies
- 20
- Views
- 6K