Welcome to Tesla Motors Club
Discuss Tesla's Model S, Model 3, Model X, Model Y, Cybertruck, Roadster and More.
Register

Building my own pseudo(Powerwall)

This site may earn commission on affiliate links.
Alright lots of info there, here's a couple things:

You won't be able to curtail because the M215 don't support it. In other words you can't slowly raise the grid freq 1hz at a time to lower the solar output by x% per hz. You can still however trip using freq shift, meaning that if the freq goes to 62.5hz they'll shut off. This is good to keep in mind while looking at inverters since curtailing is more expensive than just AC freq trip.

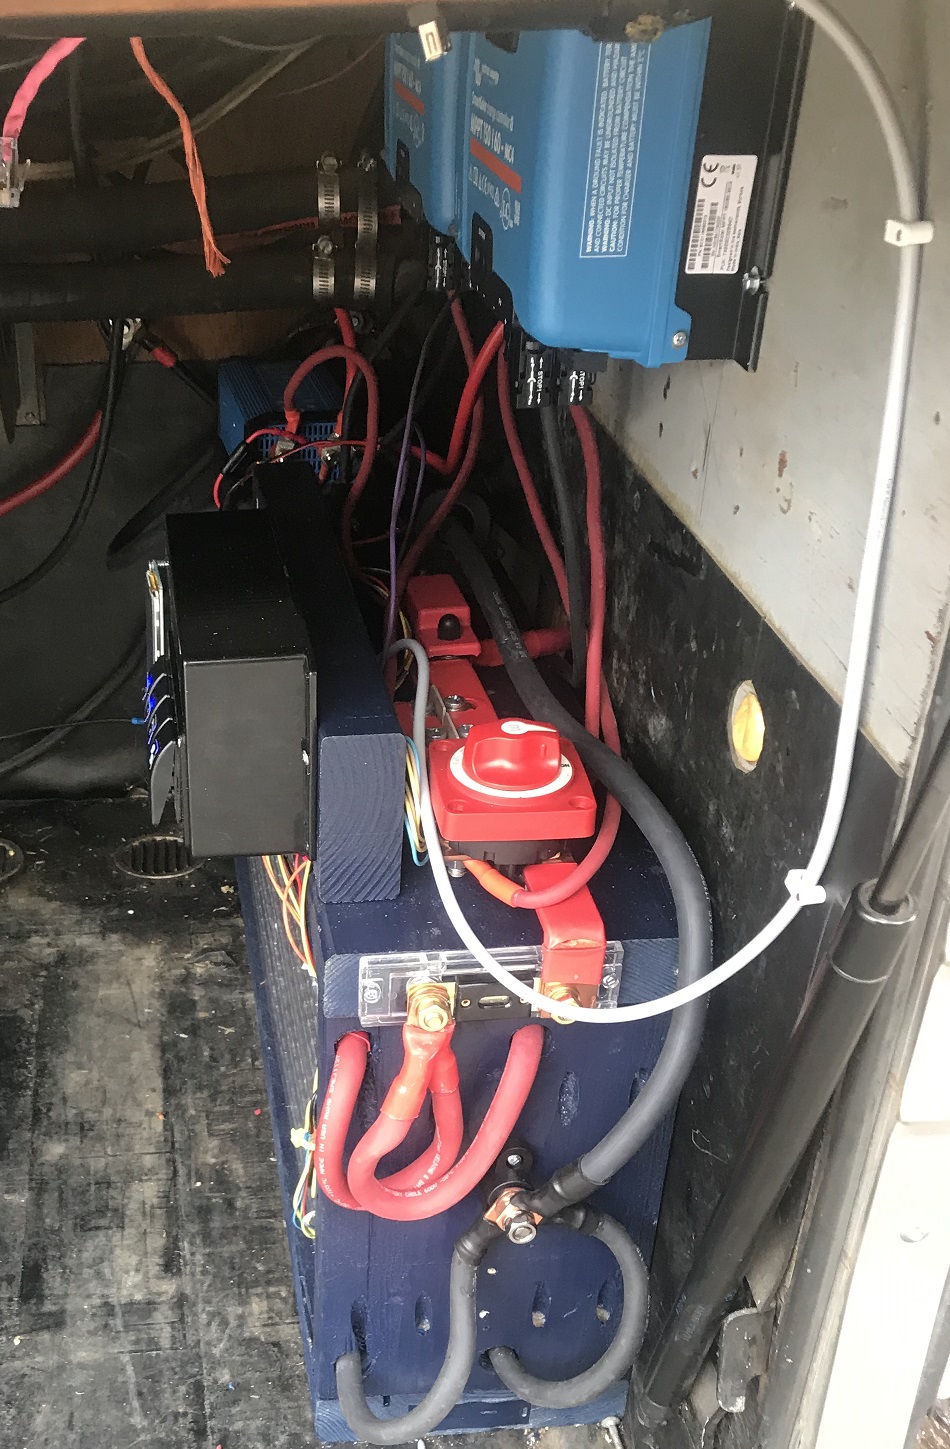
is 11kW the max you've ever seen or the average? You'll want to know the max it outputs for the next calculations, for example here are mine
View attachment 493768

I used the table above to calculate the charging rate for each module and cell to ensure I wasn't charging the cells at a rate higher than they were designed, to figure out if I would need cooling during charging and the size of my fuses (after figuring out the max usage of my loads). You'll also want to know the max solar output to figure out what size inverter you'll need.

Here's my parts list for the major components, I already had things like RPI, contactors, etc.

Interconnect Pannel $206.03 Amazon 6/1/19
ATS $232.68 Amazon 6/1/19
Hose to drain battery coolant $10.50 Lowes 5/22/18
BMS $2,495.00 EVTV 5/17/29
Four Module Harness for BMS $59.95 EVTV 5/17/29
Four Module Extension Harness for BMS $59.95 EVTV 5/17/29
Sigineer 12kW $2,695.00 EVTV 5/17/29
Surge Protector $119.95 EVTV 5/17/29
60kW Battery Pack $11,200.00 eBay 5/17/19
Pack wall mounting hardware $30.37 Lowes 6/11/19
Hydraulic Crimper $35.95 eBay 6/2/19
Module Level Fuses + Holders $82.54 OnlineComponents 6/11/19
AC Relay for ATS $11.99 Amazon 6/11/19
Bus Bars $133.13 Alro Metals 6/4/19
Insulator, 20mm Hgt, M6 Thread $33.27 Galco 6/6/19
Line Splice $70.24 Amazon 6/11/19
Wire Cutter $17.65 Amazon 6/11/19
Vise Brake $34.95 Amazon 6/11/19
Q280 Breaker (2) $60.00 Amazon 6/11/19
Q250 Breaker $9.91 Amazon 6/11/19

The main issue I see with your current setup is that you have a supply side interconnection, so islanding your home during a power outage will also disconnect your solar since that is on the meter socket itself, Would you happen to have a diagram of your circuit? I want to make sure I'm reading your post correctly, even a hand drawn one will do.

You also mentioned not being worried about UL, keep in mind that a lot of AHJs require UL listing when submitting your plans, if FL requires it I'm sure CA does as well.


L-P-G Thanks for the awesome writeup. I have a nearly done project very similar to yours with some fun features in a Rpi controlling SimpBMS on my Tesla modules and a Solaredge Grid-tied Inverter behind it. You specifically call out using a contactor you added to the Signeer to take it off the grid and force offgrid mode. Why not just flip the Battery Priority/AC Priority dip switch on the Signeer?
 
The battery priority mode on the Sigineer won't activate until the grid fails. Essentially once you set it it'll stay using the grid until the grid goes down, at which point it'll stay off the grid until the battery is low then it'll engage the grid to charge.

That wasn't a mode I wanted so I keep it in Grid mode (essentially like a UPS) and use the contactor to go off grid.

How do you like the SimbBMS? I had no idea it existed until after I had built my system. How are you getting data out of it?
 
Thanks for the reply L-P-G.
I figured that having the Raspberry Pi flip Dip Switch 1 (AC Priority/Battery Priority) and the Battery Charge Rate Selector (As you did) would let me do all kinds of fun TOU/Arbitrage/Weather/Event overrides (much as you are apparently doing). It talks to the Ardunio running the SimpBMS over USB as a serial console (doing that work now). Also have a few hats on the RPi right now: analog input for a secondary voltage meter and 8 Relay board for some fun things like telling the Solaredge Grid-Tie to gracefully back off production based on the battery level vs relying on the Sigineer to modify the frequency.

The SimpBMS is very cool but still getting it all set up as it's not a complete box like the EV TV one. So I had to wire it all up, source many of the parts, a housing, and test, test, test. Like the flexibility of it, but its absolutely not a plug and play solution. Happy to share my final build results with it when all finished.
 
  • Helpful
Reactions: ra88it
Thanks for the reply L-P-G.
Also have a few hats on the RPi right now: analog input for a secondary voltage meter and 8 Relay board for some fun things like telling the Solaredge Grid-Tie to gracefully back off production based on the battery level vs relying on the Sigineer to modify the frequency.

What hat are you using? I've been looking at adding one to mine. How are you curtailing the GT without freq shift?

I'd def like to see the final product.
 
HATS:
Current Analog to Digital is the Abelectronics ADC Pi. Decent and you can add a male header to let you stack another.
The first version I used a nice small stackable 4 relay board, but soon realized I needed to talk to more than 4 relays.
Currently using the "ebay/amazon special" no-name relay board you will see a lot of with a title like: "5V/12V 1-2-4-8-16 Channel Relay Module Arduino Raspberry PI...."

GT without Freq shift:
Many Solaredge inverters can operate with frequency shift, Complicated RS485 signaling, OR via a 4 wire connector and using different patterns to signal 0,30,60,100%. Called Power Reduction (PRI) Control.

If I can just get more free time to work on projects instead of work this might get finished someday. :)

I was looking at this one: Raspberry Pi IO Card for Home Automation
  • Eight on-board relays
  • Four layer stackable
  • Eight 12-bit ADC channels
  • One 12-bit DAC output
  • Eight opto-isolated inputs
  • Four open drain outputs
  • 29 GPIOs (23 GPIOs from Raspberry Pi + 6 new)
Way overkill but at $35 it doesn't matter.

Man I wish Enphase had that interface, or hell any type of way to communicate with the micros that was exposed via the Envoy API. Do you have the documentation for the RS485? Funny enough I already have a Node-Red flow setup to work with Modbus RS-485, maybe it's a simple change for you.
 
That board looks excellent, I will absolutely grab one.

Most of the Chinese inverters out there use one of a handful of "brains" in the form of a little board that does all the magic. There were a few that made it look possible to adjust the frequency using an external source to compute the frequency. I have not dug into the Sigineer too far yet to see if it's possible as I have the workaround. If we could control the frequency based on battery levels, many of the grid-tie units have the ability to adjust output based on frequency shift (This is "AC coupling" for people reading this).

Yea I have the Solaredge RS485 info, and looked at the Sigineer but did not see anything but read-only values as I recall. Would be sweet of the SimpBMS could talk to it directly as they have already done that for the Victron but maybe if we figure out a RS485 "box" based on the Rpi it could be a much more plug and play option for all the folks interested in doing this.
 
Hello Everyone

I am updating the house power system on bus conversion motor home using Tesla Battery modules with SimpBMS, just went live with this week.
TeslaPower.jpg


I also have a SIGINEER 6KW Tesla inverter and this thread caught my eye.

Inverter.jpg


I am looking at using Node Red for automation in combination with home assistant.

Has anyone see a Node Red flow for monitoring the serial port output on the remote monitor for the inverter?

Thanks
Fred

I tried to get data out of the serial port on the remote but was unsuccessful. I wouldn't get any reply when sending it the commands on their documentation.
Take a look at some of the first pages, I attached the document showing which commands the port accepts and the baud settings. The node part is easy tho.
 
No, let me explain it a different way. The panel ATS is only used to bypass the battery inverter for when I need to do maintenance, as such I don't have to downgrade the breaker since the panel has a a 200A main and 125A breakers above the ATS and below the ATS (left side of the picture attached.

When the panel ATS is not in bypass mode (switched to the right side of the pic attached) an 80A breaker on the grid only side of the panel gives power to the inverter, the inverter in turn (depending on the configured mode) will either pass the grid through its internal ATS giving the house 80A of grid power (also giving me the choice to grid charge the batteries) through the backfeed 80A breaker attached to the right side of the panel ATS.

In this way I can keep the panel ATS always switched to the right and the inverter ATS will act as a whole house UPS, when the grid goes out it'll switch its internal ATS to island the house and give power to the whole house and the AC coupled solar.

If i switch it to the left, all the batteries and the inverter is bypassed and the house/solar is just grid tied.

View attachment 476687

Hello,

I have a follow up question for this. As I see on your diagram, you have an 80A breaker for the Inverter OUT (Either Grid or Battery). Yet, you house panel is 125A. Are you assuming that you can cover the 125A demand with the 80A plus the 80A Solar ? Is there a case at night for example where you would not have enough of the 125A max power as it would be limited to the 80A production from the Inverter side ?

Thank you,

Christian

You're combining 2 separate circuits.

upload_2019-11-13_20-59-55-png.476687


On the picture above the transfer switch controls which breaker is providing power to the house but only one is engaged at any one time. If the R leg of the transfer switch is enabled it means the 80A is disabled. This puts the house and all the circuits below the ATS directly on the grid without the PW backup using the 125A breaker on the left.

On the opposite side, if the R leg of the ATS is enabled the 80A breaker is enabled and the inverter controls if the bottom of the ATS is fed off the grid or backup power. Since the inverter has it's own ATS it can sense when the grid is up and give grid to the house, the ATS can handle a max of 80A hence the 80A breaker on the panel ATS (with the grid down it can only invert 50A) Since the house does have a 125A breaker if the house uses more than 80A while in hot-standby mode the inverter will shutdown or the 80A breaker will pop. That being said, I turned on everything in the house at the same time (AC, WH, range, MW, etc) and it only registered 13kW which is 54A so nowhere near high enough to the max of the inverter or the breaker.

All my wiring is 3/0 awg which is rated at 200A which is overkill but that gives me peace of mind and gives me room for expansion if I wanted to switch to a different inverter down the line all I'd have to do is replace the breakers..
 
I tried to get data out of the serial port on the remote but was unsuccessful. I wouldn't get any reply when sending it the commands on their documentation.
Take a look at some of the first pages, I attached the document showing which commands the port accepts and the baud settings. The node part is easy tho.

Hi L-P-G

I also have a Tesla model Sigineer inverter APC6024DT.

Quick question does your inverter LCD display show a load percentage? If so when did you purchase it?

Mine shows zero percent load on both the remote and inverter displays with a 1800 watt load.

As to not getting any data back; I tried the both my software and another package "Termite" which is required the SimpBMS interaction. The Termite program does not work.

I write terminal emulation software for a living and after entering the RS-232 port command "Q1<CR>"; it outputs "(000.0 000.0 242.0 000 60.0 22.8 00.0 10001011<CR>"

Which according to the documentation decodes as:

Input Voltage is: 000.0
Input Fault voltage is: 000.0
Output Voltage is: 242.0
Output Current is: 000
Output Frequency is: 60.0
Battery Voltage is: 22.8
Temperature is: 00.0

And the final "10001011" decodes as:

1 = Power/Utility input Fail
0 = Battery is not low
0 = AVR Normal
0 = UPS Good
0 = Testing is not in progress
1 = Shutdown active ??
1 = Beeper on

As you can see from the report it is showing an output current value of zero when it should be a value of 7 or greater for an 1800 watt load.

Note: The only command mine responses to is: "Q1<CR>"

Yes, mine displays a load in percentage. I bought it last year but I have the 12kw version. I believe the remote LCD is the same for both though.

You're getting more back than I am. When I enter Q1 and hit enter I can see the LCD on the remote dim for a second but there is no data coming back on the terminal itself.

OK our units are of a similar vintage, now that I know basic communication works via the remote LCD, I will experiment with a Node Red to see if I can come up with a starting flow that monitors the inverter.

Sorry I haven't been through this entire thread; I was an early member to this forum when I brought my 2014 P85 (missed autopilot, damm it) and had to plug into dryer outlets at B&B's to make it to Cody/Greybull Wyoming from Seattle.

Anyway back to today, while the Signineer seems to have the inverter side of the puzzle nailed (sort of) for Tesla battery modules. They don't seem to be up to level of Victron with the power boost feature which adds the ability to do driveway surfing off of a single extension cord, which is something that important in a RV situation.

It's kind of limiting to only be able to charge at 2KW (my inverter) on 240 volts. When my potential power sources might be:

1. Driveway extension cord 120 volts (max 1800 watts, 15 amps)
2. Campground 120 volts at 30 amps
3. On board 12.5KW diesel generator at 240 volts (I currently have 10.4KW of Tesla modules).
4. Campground 240 volts at 50 amps (OK, that one is doable with the AC priority mode and slowly filling the battery).

What's the charger capacity on your 12KW unit?

My sort of qualification for Signieer is that SimpBMS is conservation out of the box in that the minimum and maximum battery module voltage are 19V and 24V. I can understand the upper limit as most solar installations do not know how to ramp down charging as it reaches the top limit and 24V is a safe point that a single battery module can suck down the amps.

Signieer has Tesla values burned into ROM without any possible user settings.

For the charging side I am thinking maybe replacing the user adjustable POT with a digital POT that Node Red can control down the road, to throttle charging down to nothing when I reach my current target full point for the battery pack.
 
The 12KW unit can grid charge up to 5kWh.

You're correct that the min/max charge values are harcoded into the chip, take a look at post #41 on this thread to see how I got around it. I don't have the ability to set the charging current to be able to trickle charge when reaching max V so instead I turn off the charger, let the cells balance and if the V is falls below my set target due to balancing the charger turns back on. That cycle continues until the set voltage is reached and is maintained.

The digital pot would be a much nicer solution to turn on off the charger.

OK our units are of a similar vintage, now that I know basic communication works via the remote LCD, I will experiment with a Node Red to see if I can come up with a starting flow that monitors the inverter.

If your LCD definitely returns data I may ask you for a favor and ship you my remote (with a return label) to try out the command using your inverter. I have reached a point where I don't know if the reason why I'm not getting data back is due to my remote not working correctly or my inverter not having that feature.

This is the doc I was using when I was testing the serial port on my remote
https://www.sigineer.com/wp-content...verter-Charger-RS232-Communicate-Protocol.pdf
 
The 12KW unit can grid charge up to 5kWh.
If your LCD definitely returns data I may ask you for a favor and ship you my remote (with a return label) to try out the command using your inverter. I have reached a point where I don't know if the reason why I'm not getting data back is due to my remote not working correctly or my inverter not having that feature.

This is the doc I was using when I was testing the serial port on my remote
https://www.sigineer.com/wp-content...verter-Charger-RS232-Communicate-Protocol.pdf

Hi L-P-G

I sent you a private message.
 
Although I appreciate all the effort and engineering that went into this build, a simple V2H setup would have been much easier. It's a shame it's not available. Hopefully some day soon. I have 8.4 kw of solar in my backyard and a Model 3 with a 75 kw battery sitting in my garage. I want to do a DIY Powerwall so badly but it just doesn't make economic sense just for backup. Our grid goes down about 3 times a year for short periods. Plugging in a fully charged Model 3 for power outages would be awesome (and cost effective).
 
  • Like
Reactions: cali8484 and mspohr
Hi Freds,

Similar to L-P-G I receive no response from the inverter over the serial port. I have tried with terminal software and writing my own software. As I have no issue connecting to 2 Morningstar devices over rs232 (modbus) tomy setup I do not believe the problem is at my end.

Did you use the exact params from the Sigineer RS232 doc (see below) or did you have to modify any of them?
BAUD RATE............... : 2400 bps
DATA LENGTH.......... : 8 bits
STOP BIT..................... : 1 bit
PARITY........................ : NONE

COMPUTER UPS
========================
RX <---------- TX (pin 2)
TX ----------> RX (pin 3)
GND <-------> GND (pin 5)​
 
Hi L-P-G,

My sigineer inverter reads approximately a volt lower than my fluke meter reads at the terminal with no load. I am hoping to correct this.

When you had your inverter apart to do some soldering (post 41) did you take any pictures of the power or logic boards and if so could you either post them of pm they to me?

Better yet did you notice if there were any trim pots on the boards which may be used to correct the sensed voltage?
 
Although I appreciate all the effort and engineering that went into this build, a simple V2H setup would have been much easier. It's a shame it's not available. Hopefully some day soon. I have 8.4 kw of solar in my backyard and a Model 3 with a 75 kw battery sitting in my garage. I want to do a DIY Powerwall so badly but it just doesn't make economic sense just for backup. Our grid goes down about 3 times a year for short periods. Plugging in a fully charged Model 3 for power outages would be awesome (and cost effective).

Agreed, but Tesla will never willingly support this. For one it's a direct competition to their PowerWalls. Secondly, it means more cycles on a vehicle battery which they have to cover under a warranty which includes degradation, I have the feeling even if someone figured out how to use a Tesla as a V2G it'll void your warranty.

Hi Freds,

Similar to L-P-G I receive no response from the inverter over the serial port. I have tried with terminal software and writing my own software. As I have no issue connecting to 2 Morningstar devices over rs232 (modbus) tomy setup I do not believe the problem is at my end.

Did you use the exact params from the Sigineer RS232 doc (see below) or did you have to modify any of them?
BAUD RATE............... : 2400 bps
DATA LENGTH.......... : 8 bits
STOP BIT..................... : 1 bit
PARITY........................ : NONE

COMPUTER UPS
========================
RX <---------- TX (pin 2)
TX ----------> RX (pin 3)
GND <-------> GND (pin 5)​

I ended up figuring out the issue, I was using an extension cable that was bad. When I plugged in my USB to Serial adapter directly into the remote (after removing the screw nuts) I was able to use Putty and the settings below to send Q1 to the console and get data back.

Hi L-P-G,

My sigineer inverter reads approximately a volt lower than my fluke meter reads at the terminal with no load. I am hoping to correct this.

When you had your inverter apart to do some soldering (post 41) did you take any pictures of the power or logic boards and if so could you either post them of pm they to me?

Better yet did you notice if there were any trim pots on the boards which may be used to correct the sensed voltage?

I didn't notice any pots, The only pic I have is this one
https://cdn.discordapp.com/attachments/615691205912559616/635183543231840312/image1.jpg