Hi guys,
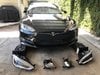
I've been lurking the forums for quite some time and have learned a lot from all the members contributions here on TMC. I just finished installing the face lift LED headlights onto my P85 last week - so I decided to go ahead start a build thread. I've already completed all the upgrades below and I'll upload pictures when I get the chance and answer any questions you guys have. The MS has been such a great everyday car, and its fun to tinker with after the kids go to bed!


RETROFITS
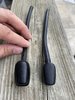
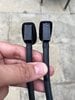
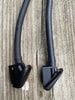
2017 LED Headlight w/ UP LEVEL 1053571-00-D & 1053570-00-D
2016 Next Gen Recaro Front Seats w/ adapter harness
2018 Tesla Fog Lights w/ UP LEVEL 6005913-00-G & 6005914-00-G
Refresh Front bumper conversion
Rear bumper trim 1057321-00-C (in progress)
Rear diffuser 1057320-00-C (in progress)
Rear bumper 1057319-S0-A (in progress)
Tesla Rear Camera 1061269-00-C
Front Bumper Under tray
2018 Tesla Rocker panel 6005874-00-J & 6005875-00-H
AUDIO
BLAM S165.300A Signature 3 way Component Speakers
Light Harmonics Amp ver. 2
Sound Qubed 8" 2ohm dual voice coil subwoofer
BADesign Works 6.5 Rear Speakers
Noico 80mil Sound Deadener (in process)
Light Harmonics 6.5" Speaker Bracket
SUSPENSION / WHEELS
21’ Powdercoated Turbine wheels 21x9 +40 front and rear
Unplugged Performance Air Suspension Bracket
Motorsport Tech Type iii Hub centric Spacers Black 20mm
Tesla Lug Nut Covers 1027010-00-B
Tesla Matte Black Center Caps
ITM TPMS Sensors 433MHz
EXTERIOR
Maxton Designs Splitter V1 Kit (in process)
CF Rear Trunk SpoilerSpoiler
Gtechniq Crystal Serum Light Kit
EXO v4 Coating
CBond NanoShield Windshield Strengthener & Repellent
INTERIOR
Rusty Mechanic v2 Gloss Carbon on Black Alcantera Steering Wheel
Spectra Photosync Tint
EVamped Cubby Drawer Piano Black
Stainless Rear Bumper Sill Plates
LIGHTING
T-CAN HID LED Emulator harness
RPM Tesla LED lights
Tesla Footwell Light Brackets
Abstract Ocean LED License Plate Bulb
LED Trunk Light Strips by NORM
ACCESSORIES
Blackvue DR900S-2ch
Samsung Pro Endurance 128gb micro SD
Seatbelt Extender Pro 8" rigid Black
Abstract Ocean USB Charger
Autoamerics Windshield Shade
Tesla Frunk Cargo Net 1009087-00-A
Tesla Pano Roof Shade
Tesla Rear Hatch Shade
Tesla Trunk Foot Mat
Tesla Storage Bag for charger
iOttie Phone Mount
OPolar fans for 3rd row seats
Genius Boost GB40 and tire repair
REPAIRS / MAINTENANCE
Lexani 245/35/21
Wurth SBS Caliper Paint
Rhino Air Wedge
Titan Tools 21093 21mm 1/2" Non Marring Deep socket
Bosch Icon Wipers
DETAILING
Worx WG520 600cgm blower
Optimum No Rinse
P&S Beadmaker
Chemical Guys Spayer 3 Pack
Chemical Guys Microfiber Wash
Kirkland Mircofiber Towels 36 pack
Turtle Ice Spray Wax
Leatherique Cleaner & Oil, brush, 303 Protectant
TESLA SERVICE
Lift Gate Drain Plug Bulletin
Contactor Replacement
Underbody Titanium Shield Skid Plate (partial)
New parking sensor
Front bumper Harness 1004420-03-H
Replaced Touchscreen 1084333-00-A
Steering rack bolts
Replaced drive unit
12v Battery Replacement
I've been lurking the forums for quite some time and have learned a lot from all the members contributions here on TMC. I just finished installing the face lift LED headlights onto my P85 last week - so I decided to go ahead start a build thread. I've already completed all the upgrades below and I'll upload pictures when I get the chance and answer any questions you guys have. The MS has been such a great everyday car, and its fun to tinker with after the kids go to bed!
RETROFITS
2017 LED Headlight w/ UP LEVEL 1053571-00-D & 1053570-00-D
2016 Next Gen Recaro Front Seats w/ adapter harness
2018 Tesla Fog Lights w/ UP LEVEL 6005913-00-G & 6005914-00-G
Refresh Front bumper conversion
Rear bumper trim 1057321-00-C (in progress)
Rear diffuser 1057320-00-C (in progress)
Rear bumper 1057319-S0-A (in progress)
Tesla Rear Camera 1061269-00-C
Front Bumper Under tray
2018 Tesla Rocker panel 6005874-00-J & 6005875-00-H
AUDIO
BLAM S165.300A Signature 3 way Component Speakers
Light Harmonics Amp ver. 2
Sound Qubed 8" 2ohm dual voice coil subwoofer
BADesign Works 6.5 Rear Speakers
Noico 80mil Sound Deadener (in process)
Light Harmonics 6.5" Speaker Bracket
SUSPENSION / WHEELS
21’ Powdercoated Turbine wheels 21x9 +40 front and rear
Unplugged Performance Air Suspension Bracket
Motorsport Tech Type iii Hub centric Spacers Black 20mm
Tesla Lug Nut Covers 1027010-00-B
Tesla Matte Black Center Caps
ITM TPMS Sensors 433MHz
EXTERIOR
Maxton Designs Splitter V1 Kit (in process)
CF Rear Trunk SpoilerSpoiler
Gtechniq Crystal Serum Light Kit
EXO v4 Coating
CBond NanoShield Windshield Strengthener & Repellent
INTERIOR
Rusty Mechanic v2 Gloss Carbon on Black Alcantera Steering Wheel
Spectra Photosync Tint
EVamped Cubby Drawer Piano Black
Stainless Rear Bumper Sill Plates
LIGHTING
T-CAN HID LED Emulator harness
RPM Tesla LED lights
Tesla Footwell Light Brackets
Abstract Ocean LED License Plate Bulb
LED Trunk Light Strips by NORM
ACCESSORIES
Blackvue DR900S-2ch
Samsung Pro Endurance 128gb micro SD
Seatbelt Extender Pro 8" rigid Black
Abstract Ocean USB Charger
Autoamerics Windshield Shade
Tesla Frunk Cargo Net 1009087-00-A
Tesla Pano Roof Shade
Tesla Rear Hatch Shade
Tesla Trunk Foot Mat
Tesla Storage Bag for charger
iOttie Phone Mount
OPolar fans for 3rd row seats
Genius Boost GB40 and tire repair
REPAIRS / MAINTENANCE
Lexani 245/35/21
Wurth SBS Caliper Paint
Rhino Air Wedge
Titan Tools 21093 21mm 1/2" Non Marring Deep socket
Bosch Icon Wipers
DETAILING
Worx WG520 600cgm blower
Optimum No Rinse
P&S Beadmaker
Chemical Guys Spayer 3 Pack
Chemical Guys Microfiber Wash
Kirkland Mircofiber Towels 36 pack
Turtle Ice Spray Wax
Leatherique Cleaner & Oil, brush, 303 Protectant
TESLA SERVICE
Lift Gate Drain Plug Bulletin
Contactor Replacement
Underbody Titanium Shield Skid Plate (partial)
New parking sensor
Front bumper Harness 1004420-03-H
Replaced Touchscreen 1084333-00-A
Steering rack bolts
Replaced drive unit
12v Battery Replacement