valkeriefire
Member
Getting the back plate off the car was easy (for me), getting the goo off was the problem. As long as your glue sticks to the mounting plate, you won't have half the trouble I did.


You can install our site as a web app on your iOS device by utilizing the Add to Home Screen feature in Safari. Please see this thread for more details on this.
Note: This feature may not be available in some browsers.
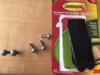
Anyone try "Un-Du Adhesive Remover"? I use it to remove sticky labels. Might be worth a try- Amazon sells
Lot of speculation/incorrect information floating around. I removed the front plate bracket today and it was fairly painless. Wanted to share what works and what doesn't.
Why couldn't you just use dental floss or fishing line to cut through the tape? The same way you would take badging off.
I should be getting mine in the next few weeks, I don't like the idea of just pulling it off, I will try both.
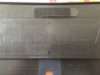
 . About half the double-stick tape came off on the mounting plate and the other half remained on the car. I used a slow/gradual pull and roll up method for the tape that remained on the car. I was able to get the tape off completely without the need for goo-gone or any sort of solution. I did use my heat gun to heat the bracket before I pulled it off the car. I'm not certain if that was necessary though.
Excellent information Zero! Took me less than a half hour start to finish. Pulling the bracket off the painted surface was the creepiest part for me
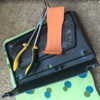
I finally removed mine yesterday without any tools other than a screwdriver and hair drier, and it was a piece of cake. I first removed the outer plate holder from the block on the front of the bumper by removing the screws attached to the block glued to the front of the bumper. After removing the horizontal screws, the mount droops down so that it is suspended by the two vertical safety screws under the bumper. The license plate mount is made from a flexible vinyl-like substance. I simultaneously pulled down on the mount both behind the safety screws and in front of the safety screws, and the mount popped right off . The screws pulled through the holes in the mount because the mount material is very flexible. The mount was totally undamaged, and could easily be reinstalled.
I then heated the block glued to the front of the bumper, and pulled it off by lifting the top right corner and pulling out and down. No prying mechanism is needed other than your fingers. Finally, using my thumb, I removed the residual glue on the bumper by starting at one end and rolling it up on itself.
All in all, it took less than five minutes and was easy peasy.
Great to hear. I pick up my car today and this will be what I do as soon as I get home.