


Hi All,
Disclaimer: Some of the photos are mine however the rest belong to the web and its respective owners. Credits due at the end of the writeup.
Please proceed with caution. The install worked out for me and I hope it does for you if you choose to tackle it. Good luck!
I wanted to take the time to write up my experience installing the Hansshow Model 3 SR Premium Audio Upgrade, specific to 2021+ Model 3 SR+. For $80-$90, I do find the speaker-enabling harness to be worth the value as it did show significant improvement to the current speakers. I did not take the photos with respect to the diy, but just to reference as I went along.
This DIY for the 2021 Model 3 Standard Range Plus will enable 4 additional speakers to the current 8-speaker setup. This will allow for a more crisp sound on the higher frequency range in addition to what you are currently enjoying.
Product:
Hansshow Website
Amazon
Some notes before we get started:
-Duration 1 1/2 hours to 3 depending on how you work
-Difficulty is 3/10 in my opinion, biggest difficulties being to remove all panels and unplug/plug the cables.
-Tools (3) - The provided plastic pry bar, a flathead, zip ties & something to cut it with.
-There are some posts that mention a weaker bass sound after installation. This is not true if you have installed it properly.
-I don't think we have rear shelf speakers, only 2 rear door speakers as illustrated below by Hansshow:

1. Review the wiring harness. Image taken from Hansshow manual- I added letters to try to make it more understandable.

2. Panel Removals. Remove the following from both Driver & Passenger sides:


3. With all panels removed, Identify the connectors to be worked on.


After harness install:


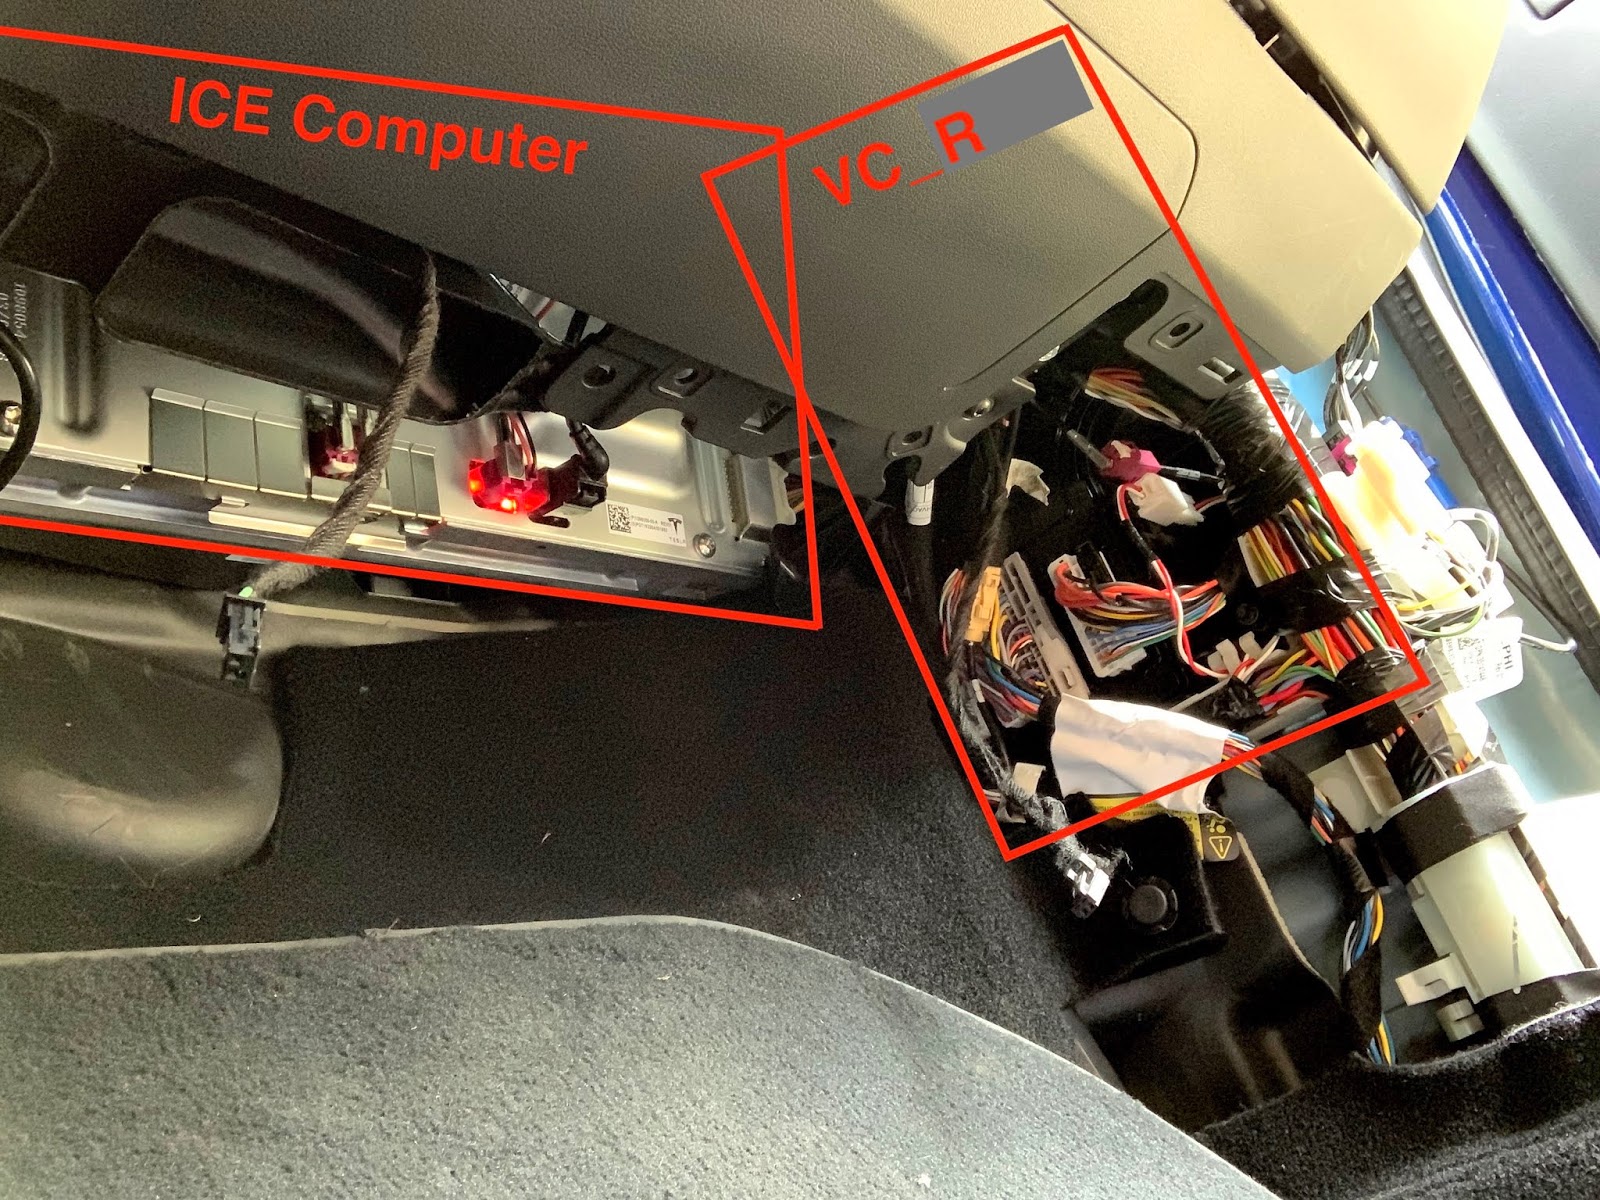
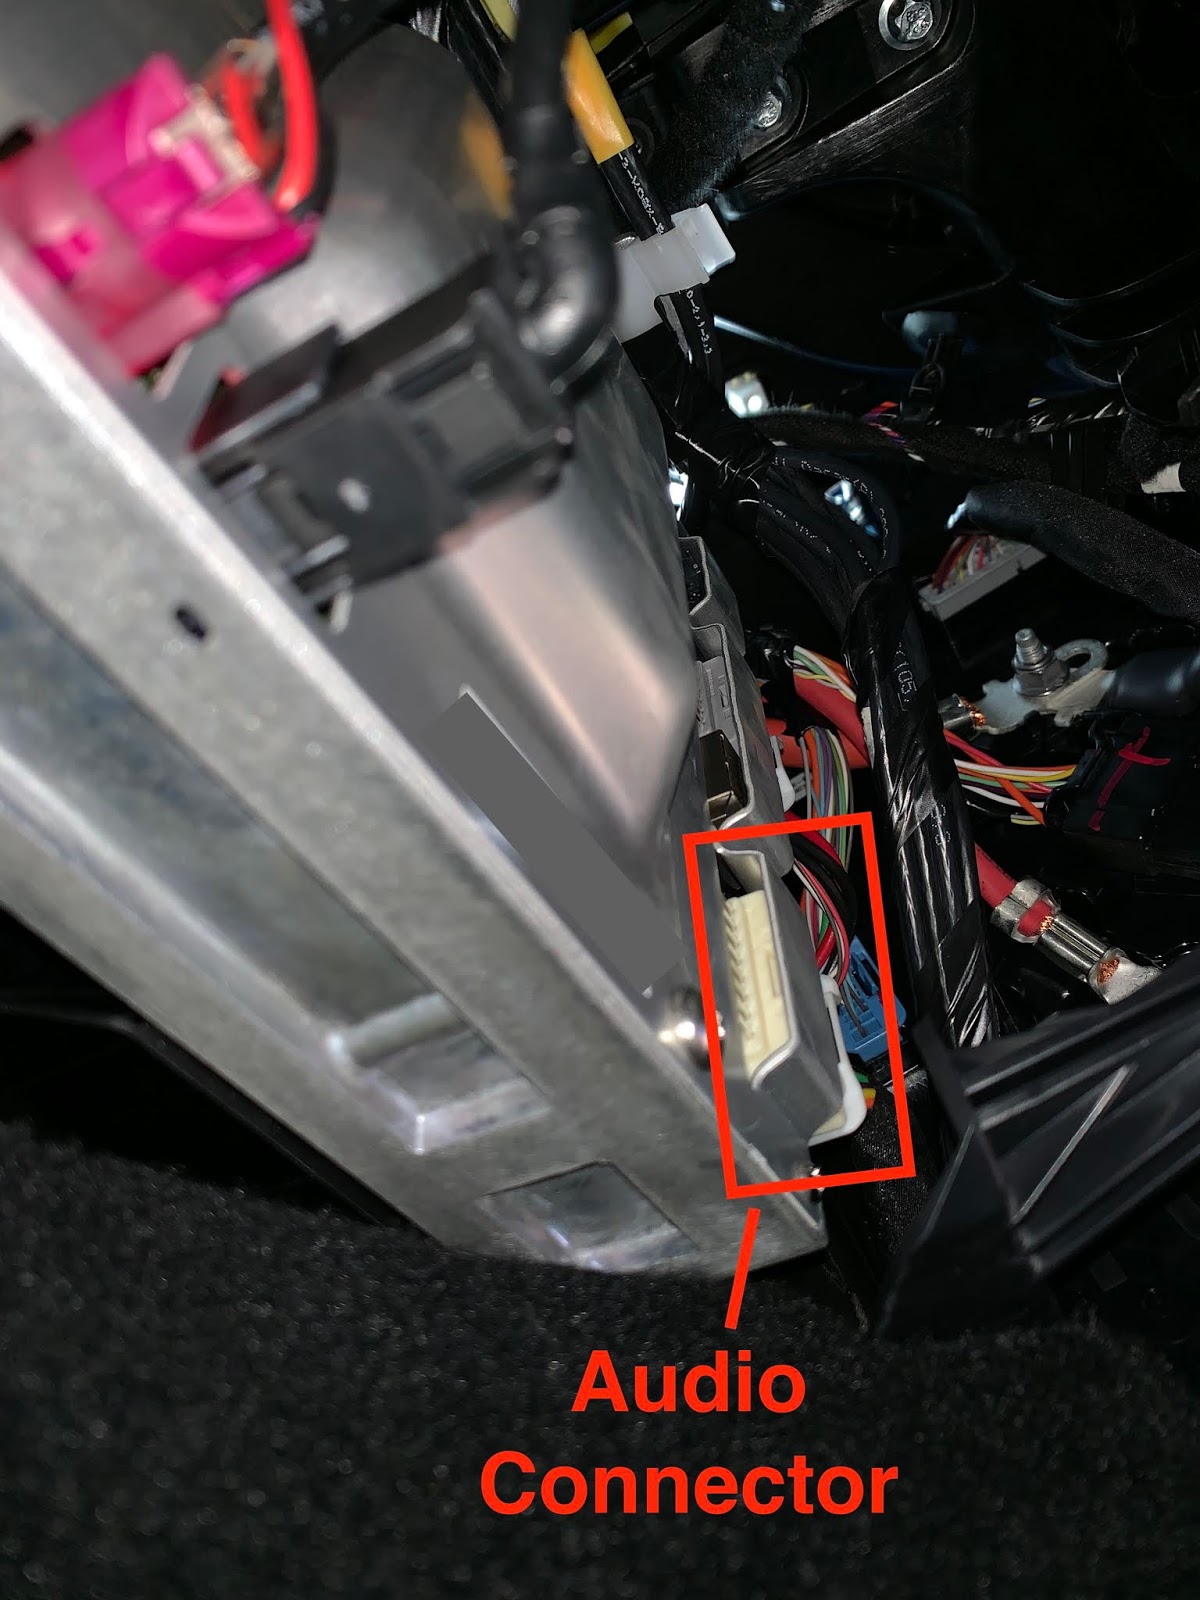
Passenger side A2 location is higher up into the glove compartment area. Please refer to these photos:
1st photo: Bottom right of where it says ICE Computer. --- 2nd photo: the same connector labelled 'Audio Connector'
4. Zip Tie / Cable Management
Have a good one!
Photo Credits:
Hansshow
Tesla North
barjohn
travisllado
Disclaimer: Some of the photos are mine however the rest belong to the web and its respective owners. Credits due at the end of the writeup.
Please proceed with caution. The install worked out for me and I hope it does for you if you choose to tackle it. Good luck!
I wanted to take the time to write up my experience installing the Hansshow Model 3 SR Premium Audio Upgrade, specific to 2021+ Model 3 SR+. For $80-$90, I do find the speaker-enabling harness to be worth the value as it did show significant improvement to the current speakers. I did not take the photos with respect to the diy, but just to reference as I went along.
This DIY for the 2021 Model 3 Standard Range Plus will enable 4 additional speakers to the current 8-speaker setup. This will allow for a more crisp sound on the higher frequency range in addition to what you are currently enjoying.
Product:
Hansshow Website
Amazon
Some notes before we get started:
-Duration 1 1/2 hours to 3 depending on how you work
-Difficulty is 3/10 in my opinion, biggest difficulties being to remove all panels and unplug/plug the cables.
-Tools (3) - The provided plastic pry bar, a flathead, zip ties & something to cut it with.
-There are some posts that mention a weaker bass sound after installation. This is not true if you have installed it properly.
-I don't think we have rear shelf speakers, only 2 rear door speakers as illustrated below by Hansshow:
1. Review the wiring harness. Image taken from Hansshow manual- I added letters to try to make it more understandable.
- A1 & A2 are similar or the same. One should be tagged Left Driver, the other Right Passenger.
- B1 & B2 are similar or the same.
- C1 & C2 are similar or the same. These plugs will not be used.
- D1. Should be tagged as rear speakers. These plugs will not be used.
- Driver side: A1, B1.
- Passenger side: A2, B2.
- C1 (2018-2020 Model 3), C2 (2018-2020 Model 3), D1 (Rear Speakers)
2. Panel Removals. Remove the following from both Driver & Passenger sides:
- Any floor mats
- Rubber Door seal grommet (just enough for accessibility)
- Pull away from door sill, easy off, easy on
- Plastic bolt cover
- With the provided plastic Pry tool, pry at the top to release it from the single clip
- Plastic Kick panel
- With the Pry tool, remove 1 plug at the top of the kick panel, then begin pulling at the bottom of it, the clips will easily release
- Center console carpeted kick panel
- With the Pry tool, begin prying outwards from the bottom-most edge of the panel. Once one clip releases, it will be easier to pull the panel away.
- Once one panel is removed, extend your hand into the center console opening to push the opposing panel loose.
- Be sure to collect any loose clips and reinstall back onto panel
- Passenger side only: Remove the black plastic cover panel from under the glove box
- 3 plugs to be removed, gently pry away and after it releases, remove the 2 connectors attached to it.
3. With all panels removed, Identify the connectors to be worked on.
- On the vehicle's touchscreen, go to settings, safety & power off the vehicle.
- Complete the connection on one side, then route the remainder of harness to the other side through the opening in the center console (since we removed the kick panels)
After harness install:
Passenger side A2 location is higher up into the glove compartment area. Please refer to these photos:
1st photo: Bottom right of where it says ICE Computer. --- 2nd photo: the same connector labelled 'Audio Connector'
4. Zip Tie / Cable Management
- Before closing up shop, ensure that all necessary connections are complete, then try out the sound. The tweeters up top and surround speakers should be working now!
- Route loose wiring behind the carpet, zip tying as needed. I tucked the Hannshow box upwards into the glove box area, it being held by the black drop panel we removed earlier.
- Reinstall the center console carpeted panels, plastic kick panel, bolt cover, door sill grommet, passenger glove box panel, and the floor mats.
Have a good one!
Photo Credits:
Hansshow
Tesla North
barjohn
travisllado

