Welcome to Tesla Motors Club
Discuss Tesla's Model S, Model 3, Model X, Model Y, Cybertruck, Roadster and More.
Register

DIY paint chip repair step by step

This site may earn commission on affiliate links.
Not a detailer and this is my first time trying it, comments welcome but please don't roast me :)

Had 5 rather noticeable rock chips on the front right fender, was able to get it 90-95% fixed going the DYI way. All of the materials I was able to source on Amazon. Over all took 2-3 days, mainly because of waiting to dry, and each "step" took about 5-10 minutes.

1. Cleaned the fender, wiped with rubbing alcohol, and wet sanded around the rock chip with 3000 grit sandpaper.
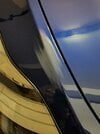
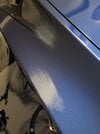
20220228_224456.jpg20220228_224447.jpg

2. Purchased paint matched base coat + clear coat pen. Dabbed 2-3 tiny layers of base coat, waiting about 20 minutes in between. Then dabbed 2-3 layers of clear coat until a "dome" formed. Let sit overnight.
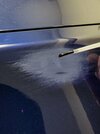
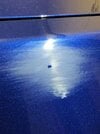
20220228_230402.jpg20220228_231322.jpg

3. Wet sand again with 2000 grit until the "dome/pimple" is flush with the immediate area. Then wet sand with 3000 grit sandpaper to smooth out.

4. Took a 3" polishing pad mounted onto a cordless drill with 2-3 drops of "cutting polish" compound and hit it for 20-30 seconds each time (repeated 1-2 times until the sanding marks disappeared)

5. The sanding marks will be replaced by swirls from the cutting pad. I then took a 3" finishing pad with 2-3 drops of "final polish" compound and polished the area 20-30 seconds at a time, repeated a couple of times until swirls were gone.

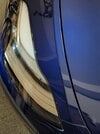
Final pic below - overall I was fairly pleased with the result and went from a rock chip visible from 6ft away to barely visible from 2-3 inches away.
20220228_230817.jpg

One final note - Clearcoat - was not able to notice any noticeable amount of clear coat "removed"... Meaning that, consistent amounts of "orange peeling" were still present after the task was finished.
 
Nice work! And THIS is why I dont spend thousands on PPF, especially to protect the front. (Although I did PPF my own hood myself, but not attempting the curvy bumper as I dont have that level of skill). If you take your time, you can make the small nicks/chips almost disappear. (my wife has a total of 3 that are TINY on her front bumper cover of her Y after 19k miles of driving. So glad I didnt spend hundreds to PPF that bumper cover).

Couple of notes:
- The remaining paint will not last (no matter how tightly you seal the container) more than a couple months or so after opened, as its acrylic based. Regardless of brand.
- Place the dab of touch up to the side of the chip, then smooth into the chip with a gloved finger. Let dry (heat gun or hair dryer is great) and repeat several times until you build up the paint to same level as surrounding area. This reduces the amount of sanding thats needed.
-Small piece of sandpaper taped to a pencil eraser can reduce the amount of area on the car that gets/needs sanding
- Be VERY careful with drills and the small foam attachments as they can burn through the clearcoat easily (you may be surprised at the amount of heat that builds up QUICKLY with non orbital rotation action) since the drill head isnt doing orbital movements. I'd almost recommend hand polishing to be safe.

But nice work in the end
 
Last edited:
Nice work! And THIS is why I dont spend thousands on PPF, especially to protect the front. (Although I did PPF my own hood myself, but not attempting the curvy bumper as I dont have that level of skill). If you take your time, you can make the small nicks/chips almost disappear. (my wife has a total of 3 that are TINY on her front bumper cover of her Y after 19k miles of driving. So glad I didnt spend hundreds to PPF that bumper cover).

Couple of notes:
- The remaining paint will not last (no matter how tightly you seal the container) more than a couple months or so after opened, as its acrylic based. Regardless of brand.
- Place the dab of touch up to the side of the chip, then smooth into the chip with a gloved finger. Let dry (heat gun or hair dryer is great) and repeat several times until you build up the paint to same level as surrounding area. This reduces the amount of sanding thats needed.
-Small piece of sandpaper taped to a pencil eraser can reduce the amount of area on the car that gets/needs sanding
- Be VERY careful with drills and the small foam attachments as they can burn through the clearcoat easily (you may be surprised at the amount of heat that builds up QUICKLY with non orbital rotation action) since the drill head isnt doing orbital movements. I'd almost recommend hand polishing to be safe.

But nice work in the end
Can you please advise Dr Color Chip vs Tesla which is better for the blue paint ? I got a rock chip on my fourth day and I am very very upset. I think I will do a diy ppf as these things bother me a lot.
 
Nice work! And THIS is why I dont spend thousands on PPF, especially to protect the front. (Although I did PPF my own hood myself, but not attempting the curvy bumper as I dont have that level of skill). If you take your time, you can make the small nicks/chips almost disappear. (my wife has a total of 3 that are TINY on her front bumper cover of her Y after 19k miles of driving. So glad I didnt spend hundreds to PPF that bumper cover).

Couple of notes:
- The remaining paint will not last (no matter how tightly you seal the container) more than a couple months or so after opened, as its acrylic based. Regardless of brand.
- Place the dab of touch up to the side of the chip, then smooth into the chip with a gloved finger. Let dry (heat gun or hair dryer is great) and repeat several times until you build up the paint to same level as surrounding area. This reduces the amount of sanding thats needed.
-Small piece of sandpaper taped to a pencil eraser can reduce the amount of area on the car that gets/needs sanding
- Be VERY careful with drills and the small foam attachments as they can burn through the clearcoat easily (you may be surprised at the amount of heat that builds up QUICKLY with non orbital rotation action) since the drill head isnt doing orbital movements. I'd almost recommend hand polishing to be safe.

But nice work in the end

Bumper isnt that hard. Drive Protected on youtube has incredible DIY videos for the Y PPF install thats very easy to follow along to. If you can do a hood you can do a bumper. The slip and tack solution is key. Once you tack your first spot down and stretch to the next spot and then tack you realize how easy it is. Getting edges 100% perfect is the hard part but stretching the bumper is pretty dang easy overall.
 
Bumper isnt that hard. Drive Protected on youtube has incredible DIY videos for the Y PPF install thats very easy to follow along to. If you can do a hood you can do a bumper. The slip and tack solution is key. Once you tack your first spot down and stretch to the next spot and then tack you realize how easy it is. Getting edges 100% perfect is the hard part but stretching the bumper is pretty dang easy overall.
I just ordered ppf from Northern Tints full front. Any tips to make the job easier ?
 
I just ordered ppf from Northern Tints full front. Any tips to make the job easier ?
Look up Drive Protected on youtube and follow their videos.


They have videos on making slip and tack solution so make sure to follow those. Get a few different squeegees and buy nicer spray bottles (not the dollar store ones). Do NOT let the bumper PPF hit the floor, it will be ruined. Clean your floor very well and get it wet before install. This will minimize dust and dirt particles getting behind your ppf. PPF stretches very well, don't be afraid to muscle it into place.

Buy a hypodermic needle from a drug store pharmacy counter. Tell them you want thin thinnest one possible. This helps get water trapped behind the ppf. The sun will take care of most of it, I just like to help it out. But if you use the needle be careful not to go in at too sharp of an angle because you can cause a mark in the ppf. Hopefully that makes sense??
Please send link of squeegees. I plan to blow out all dust with left blower in garage and then mop the area where I will be working . Do I buy sprayer bottle for both slip and tack solution or for just the slip solution? Tack solution in the video is used sparingly only when needed.

For the drive protected video is there any part 2 video for the hood where the expert ( forgot his name) works on wrapping the edges of the hood ?

For the bumper did you use hot water as shown in his videos ?
You want three bottles. Tack, slip, and clean. I bought a squeegee from the company I bought the PPF from which was North Tints I believe. I also had some lying around my house from other things. Amazon will have a good selection. You dont need a bunch, but from the few I had I definitely had a favorite.