Welcome to Tesla Motors Club
Discuss Tesla's Model S, Model 3, Model X, Model Y, Cybertruck, Roadster and More.
Register

Ear pain/Pressure help

This site may earn commission on affiliate links.
It's very interesting we appear to still not have a smoking gun when it comes to the root cause of the booming sound of the model y. I feel ear pressure just by closing my door. Why does this happen? Are the cabin pressure relief valves not working the way they're supposed to and so there's always an air bubble inside the car? does anyone know where they're located?
I think that it is actually the core design of the vehicle. I think it is either a resonance or an airflow issue due to the design and shape of the body. Probably did not do enough wind tunnel, airflow testing or computer modeling before running with it. Remember that MY is just a stretched M3 so they probably did not pay enough attention when they were stretching it.
 
I think that it is actually the core design of the vehicle. I think it is either a resonance or an airflow issue due to the design and shape of the body. Probably did not do enough wind tunnel, airflow testing or computer modeling before running with it. Remember that MY is just a stretched M3 so they probably did not pay enough attention when they were stretching it.
I don’t think this is the case. If you look at the hatch design in the original cars they showed, their door went straight down. The production hatch goes out and has the pads (that we put the covers on).
You can still see it on the video on their website with the Blue Model Y.

Looks like they knew it was an issue and did what they could. Probably caught it too late to make any meaningful change, but then again, who knows how bad it was originally.

DD672EE0-0FB6-4106-8293-3BCD29F252A7.png
 
I don’t think this is the case. If you look at the hatch design in the original cars they showed, their door went straight down. The production hatch goes out and has the pads (that we put the covers on).
You can still see it on the video on their website with the Blue Model Y.

Looks like they knew it was an issue and did what they could. Probably caught it too late to make any meaningful change, but then again, who knows how bad it was originally.

View attachment 911080
Thanks for the info! I can't exactly tell what you mean is different from this picture to now. What do you mean by it used to go straight down and now goes out and has pads? Would like to learn more.
 
Thanks for the info! I can't exactly tell what you mean is different from this picture to now. What do you mean by it used to go straight down and now goes out and has pads? Would like to learn more.
Follow the hatch line down between the tail lights in the picture.

In the production model, the hatch goes to the outside of the tail light (where the hatch stop is).
 
  • Like
Reactions: woolymammoth17
So, I was at HD today and decided to try replacing the 3/8” backer rod with the 3/8” vinyl tubing that @ilovecoffee recommended in the hatch seal. Taking out the backer rod was pretty easy.

I put the new tubing everywhere except where Tesla had installed some from the factory.

I readjusted the 4 hatch stops and replaced the driver side PETG stop support with one 1mm shorter.

The hatch didn’t close the first time, so I helped it the second time. It must have seated better because it closes fine now.

I will go for a test drive later on as I ran out of time now, but the hatch is definitely tighter now.

Of note: The backer rod had compressed quite a bit and was probably no longer doing anything.
The vinyl tubing was much easier to install since you could push it instead of having to run and secure a fish.
Went out for a drive on bad roads. The bass sound is completely gone. Should have gone with the vinyl tubing from the start.
 
There's a pretty long thread here about ear pain/pressure in the Model Y. I think some people have solved the issue by redoing the seals in the trunk. I think some say a cargo divider in the trunk also helps. This might be a good starting point.
What is a Cargo Divider?
 
So I haven't had much luck with the fixes here UNTIL today. I took a flashlight and carefully looked at the upper stops. The lower plastic pieces (attached to the tail light) required an adjustment to ensure there is a flat surface which makes contact with the rubber/rigid stop. After I did this I noticed an immediate improvement! There is still a tiny bit of booming on certain roads/bumps, but I'm convinced the trunk sits better on the seal because I also have less road noise in general. For those of you that are still having issues, give it a try. They don't rotate much, but there's enough play to make a difference. Just yesterday I literally couldn't stand driving the car more than 10-15 minutes.
 
So I haven't had much luck with the fixes here UNTIL today. I took a flashlight and carefully looked at the upper stops. The lower plastic pieces (attached to the tail light) required an adjustment to ensure there is a flat surface which makes contact with the rubber/rigid stop. After I did this I noticed an immediate improvement! There is still a tiny bit of booming on certain roads/bumps, but I'm convinced the trunk sits better on the seal because I also have less road noise in general. For those of you that are still having issues, give it a try. They don't rotate much, but there's enough play to make a difference. Just yesterday I literally couldn't stand driving the car more than 10-15 minutes.
How did you adjust them? Aren't they just a solid hard plastic pieces?
 
Actually I just checked and the two above the taillights can be adjusted. Why would Tesla make the adjustable?
Might they be the reason that rigid stoppers are needed, especially for these two upper stoppers above the taillights?
Did someone try replacing them with rigid ones? They do seem to have some travel even though might grab an envelope...
 
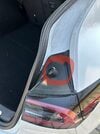
So the foam on the rear wheel well doesn't have to be fully removed to install the butyl, you can simply peel it back out of the way, it just rests on top.

Calibration constitutes making sure they are only extended as much as required (meaning the bare minimum) in order to grip paper tightly so you can't pull it out. Here's how I'd do it:

1) Tighten up the ones in the middle all the way in (the ones not at the tail lights, with no plastic nuts),
2) Check the ones on the tail light are gripping paper tightly so you can't pull it out.
3) If no, extend them, the same amount of turns and close the door and see if it grips paper. You will have to open/close many times.
4) If yes to step 2, screw them in and work back outwards until they grip paper at the bare minimum extension.
4) Make sure the plastic nut is against the body of the door (screwed all the way in).
5) After it grips paper, extend the other ones without the plastic nut until they make reasonable grip (sometimes these ones it's easy to slip out paper no matter what you do, so just do it until you see reasonable gripping force.
6) Re-check the other stoppers that they are still gripping paper (i.e. the ones you just adjusted didn't push away the others above the tail lights).

Here's a quick link:

And here's a quick link to the correct time in my video:

I get that my instructions look verbose, I'm sorry, but it's not quite so difficult other than probably consuming 20 minutes of your time. It'll be worth it hopefully once it's done.

I wanted to thank you for taking the time to write up such thorough instructions and the link to the video, which was a great explainer on the problem.

I got the bottom hatch stops to grip an envelope to the point I can't put it out, and the upper/light hatchstops to grip to the point where it's very difficult to remove the paper. I would say that low speed boominess seems notably worse, though it seems like 50mph+ boominess may actually be reduced. I'm probably crazy and it's just a total wash.

I have a 2023 MY which has a significant booming over uneven road surface (the hatch stoppers are adjusted) and I'm planning to do the tubing method and eventually hard stoppers if neeeded.
Lately though, I've noticed that if my trunk is full with items it's reducing the booming significantly. It doesn't even have to be heavy or really bulky items but just many items that are covering most of the trunk area. Which probably means that the cause of the booming is not just the hatch movement that creates an air movement but actually an interaction between the hatch movement and that big trunk cavity with a rigid and actually a noisy and boomy surface which acts like a boombox. When filled with items, then probably the air movement / sound waves that are created by the hatch movement are absorbed and not being bounced into the cabin, or something like that.
This might also explain why some people had success reducing the boominess with a parcel shelf, which I don't use and I don't recall that it had any significant effect on the booming but maybe it depends on some additional factors like the composition and length of the parcel shelf which I think Tesla changed over the years.
I'm curious if anyone tried to line the trunk with some heavy duty moving blankets to see if it helps reducing the booming, an additional positive effect of it might be that items will stay more secure as the carpeted surface is too slippery and unsecured items inside not a full trunk always move around.

I've found the parcel shelf to be about the only thing that really helps with the boominess, which also leads me to believe that sound coming up through the trunk area is the primary culprit for what I and some others are noting. I also believe that the hatch can create a sort of buffeting, and it seems likely that in these discussions there's actually two different groups of people discussing two different but similar sounds coming from the same area.

I'd rip the whole trunk apart and install butyl except that it sounds like @ilovecoffee already tried this and didn't see any improvement, so I'm kind of at a loss for the entry point of what we're hearing. It might be that purchasing some legitimate sound deadening blankets could help troubleshoot the problem.
 
Is there a recommendation for exactly how tight the hatch stops should grip the paper? Just tested mine set so tight that an envelope couldn't be removed on any, and I'm quite convinced that it has made things worse to the point of offsetting the positive effect of the parcel shelf.

Just twist them. They have some resistance to them but they do turn.
What model year do you have? Those look convex on top. My 2023 is a completely flat top, and they appear to be only quarter turnable or so - can't see how it would make a difference.
 
Just twist them. They have some resistance to them but they do turn.
Those plastic pieces above the tail light are not adjustable. They are just plastic covers for the metal rod that sits underneath. They can be removed but they are not adjustable. They have to be positioned at the correct angle, don't twist them.
Is there a recommendation for exactly how tight the hatch stops should grip the paper? Just tested mine set so tight that an envelope couldn't be removed on any, and I'm quite convinced that it has made things worse to the point of offsetting the positive effect of the parcel shelf.
A rule of thumb is maximum grip with minimum extension. Start entirely screwed in and work outwards until the ones at the tail lights grip paper very tightly. Then start extending the other ones a bit at a time until they mostly grip paper (these ones are hard to tightly grip paper). Then finally re-check tail light stoppers to make sure they weren't affected by the others you just extended.
 
  • Helpful
Reactions: JonB65
Those plastic pieces above the tail light are not adjustable. They are just plastic covers for the metal rod that sits underneath. They can be removed but they are not adjustable. They have to be positioned at the correct angle, don't twist them.
I had to adjust mine because they were not making good contact with the upper stops. For me it resulted in a huge improvement to the booming. It was previously hitting it at an angle and using less surface area to rest on the lower plastic pieces.