Welcome to Tesla Motors Club
Discuss Tesla's Model S, Model 3, Model X, Model Y, Cybertruck, Roadster and More.
Register

Ear pain/Pressure help

This site may earn commission on affiliate links.
In case this is of interest:

Edmunds on ID.4 "Impact harshness is kept at bay, and there's no floaty rebounds either. In the absence of a conventional gasoline engine, some EVs suffer from this boomy sounding interior, but that's not the case with the ID.4. It remains blissfully quiet, even on the roughest of surfaces"

As an Audi e-tron owner, this has my attention. I LOVED the Model Y test drive, but like with e-tron the Body Boom is a dealbreaker for me. My second Model Y test vehicle was only marginally better than e-tron for booming.
 
  • Like
Reactions: gundarx
I second what @MY-Y says about the buffeting, at least for my car, making sure the catch is lowered (mine was already low but was able to adjust for a few more mm) and adjusting the 4 stops.

What was harder to address was the booming coming from the back. I ordered sheets of Noico from Amazon some time ago, and got to do this today:
Butyl sheets: https://amzn.to/2NH3sCK
PE foam sound deadener: https://amzn.to/3sC6qqY
roller: https://amzn.to/3q43IZA

I had been experimenting by putting very heavy books in the rear subtrunk area and noticed how weighing down that area reduced unwanted noise. I suspect that repeated contact with the foam board and the bottom of the semi-rigid subtrunk liner was producing a pounding noise. Weighing down the subtrunk likely reduced movement and unwanted banging and the additional mass also reduced noise.

This is the first time I've applied sound deadener to a car, but after repeatedly driving our Model 3 and the Y, it was clear that the Y produced too much noise from the back, even though I've already changed tires and to MPP comfort coilovers. I also have used the butyl sheets for my home theater to reduce vibrations in some aluminum shelves and window roller shade facia covers that would become distracting on loud movies, and have noticed the big improvements from using these sheets. I'll probably use extra sheets for my washer/dryer.

This is just DIY, so it's an amateur application, though I did my best to roll each sheet with multiple passes as well as I could; it's going to be a workout and would cost about $130 in amazon supplies. It took me about 3 hours to do all of these today.

First applying the thinner, but heavy butyl sheets. Need to use a roller with this. Wear gloves, otherwise butyl will stick to your fingers. Used scissors to cut the sheets, but you can also use a knife.

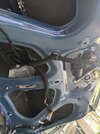
To determine what needed application and how much, I knocked each surface and listened for resonating noise. The metal portions I left alone for the butyl sheets were either sufficiently solid (ex. the diecast structures) or needed to be left exposed for fasteners or potentially ventilation (would not want to introduce further ear pressure issues). I also applied under the smaller sub trunk area (butyl + PE foam), which already has 2 strips of sound material from the factory, but there was still plenty of resonating noise; pretty sure Tesla did not want to expend too much material, time and add weight to the car (and get less range) for comfort improvements.

Afterwards I topped it with the PE foam which can simply be stuck on like a sticker; no roller involved. I made sure to especially apply this thoroughly in the subtrunk area as I suspect that's where most of the booming sound is coming from. As I was applying this and continued pounding the panels, I noticed less and less resonating noise, and the metal pieces were sounding much more substantial and solid.

After I took these photos I made a few incisions in the PE foam corners in the subtrunk area to relieve some pressure and allow the subtrunk to be inserted more flush. I probably over-applied and had overlapping PE foam which caused the subtrunk liner to crease a bit after I was done; might revisit that and cut out the overlapping foam another day.

Applying just 2 sheets of butyl to the frame made a surprising sound difference on what is a very rigid metal frame; made this short video clip:

View attachment 640801
View attachment 640805 View attachment 640802 View attachment 640803 View attachment 640804

After a good drive and deliberately driving over rough patches (potholes, rutted portions of road, road reflectors), there's a significant improvement in reduced noise from the back. I'm very happy with the outcome. Can focus more on driving and driving fast than always minding the large increase in noise that usually comes with it.
I ordered the stuff from Amazon you mentioned and did something similar. A few thoughts.

1. I put the foil butyl on the outside of the trunk bucket. It allowed me to cover the bottom as well.
2. I didn't put butyl where you did on the crash supports (shown in your video) because I think it will significantly impact their sliding in during a crash.
3. I put both sound sheets inside the 1/4 panels. I think this was the main benefit.

Overall, the low frequency is a little better. The road noise is quite a bit better - so much that I notice wind noise now. I just ordered the two RPM Tesla kits.

1/4 panel under charge port
20210308_203207.jpg

1/4 panel on passenger's side with sub.

20210308_203141.jpg


Up inside driver's side 1/4. Note, no foam block from Sandy video - quite the echo chamber before I added the material.
20210308_203054.jpg

Butyl on outside of bucket .
20210308_203033.jpg
 
  • Like
Reactions: TNGuy99 and gundarx
I ordered the stuff from Amazon you mentioned and did something similar. A few thoughts.

1. I put the foil butyl on the outside of the trunk bucket. It allowed me to cover the bottom as well.
2. I didn't put butyl where you did on the crash supports (shown in your video) because I think it will significantly impact their sliding in during a crash.
3. I put both sound sheets inside the 1/4 panels. I think this was the main benefit.

Overall, the low frequency is a little better. The road noise is quite a bit better - so much that I notice wind noise now. I just ordered the two RPM Tesla kits.

1/4 panel under charge port
View attachment 642785
1/4 panel on passenger's side with sub.

View attachment 642786

Up inside driver's side 1/4. Note, no foam block from Sandy video - quite the echo chamber before I added the material.
View attachment 642787
Butyl on outside of bucket .
View attachment 642788

Nice job!

I had trouble removing the subfrunk bucket so just sealed things on the side facing the cabin. Did you also apply sound deadener foam material on top of the styrofoam insulator on top of the bucket? Without that, it might still be adding some low frequency pounding into the cabin, at least that’s what I suspect.

Good point on the crash structure. Might revisit that on mine when I also remove the side panels to apply more butyl/foam.

The MY is actually pretty good on wind noise as-is though need to apply 303 rubber seal conditioner https://amzn.to/3btwPl1 on all doors and the rear hatch rubber every 3 months or so to keep the noise isolation good.
 
  • Like
Reactions: N..8
Nice job!

I had trouble removing the subfrunk bucket so just sealed things on the side facing the cabin. Did you also apply sound deadener foam material on top of the styrofoam insulator on top of the bucket? Without that, it might still be adding some low frequency pounding into the cabin, at least that’s what I suspect.

Good point on the crash structure. Might revisit that on mine when I also remove the side panels to apply more butyl/foam.

The MY is actually pretty good on wind noise as-is though need to apply 303 rubber seal conditioner https://amzn.to/3btwPl1 on all doors and the rear hatch rubber every 3 months or so to keep the noise isolation good.
I haven't added insulation to the top of the Styrofoam; I'll do that. If you ever need to remove the bucket, remove the 4 13mm bolts on the corners, one inverted Torx (I had the socket, but needle nose pliers would work), and the five 10mm bolt that hold the belly pan (from under the car).

Thanks for the idea and inspiration. I think you'll be pleased with the difference treating the 1/4 panels makes. I considered pulling the sub to treat behind it, but didn't. I also didn't treat behind the amp so it wouldn't impact its cooling.

BTW, I never noticed any wind noise before doing this job. I think the tire noise drowned it out. Now that the tire noise is muted, the wind noise is more prevalent.

I did one interesting test while doing this project. I wanted to see how much noise the trunk bucket kept out, so I drove without it. That was very loud, with all kinds of annoying high frequency motor noises. I didn't notice more boominess, although it may have been drowned out by the great increase in road noise without the bucket. That is why I focused on the 1/4 panels. I think the low frequency noise is primarily from hatch movement, but am not certain (yet). For sure, my initial subsonic noise was from incorrectly adjusted hatch stops.

One more thing, I unclipped the rear 3/4ths of the side panels dropped the rear seats, and flexed the panels out of the way. I didn't remove the rear seat belts nor the clips by the rear doors.
 
So I took advantage of the warm weather over the past couple days and spent a bunch of time refining my adjustments of the liftgate stops. I'm pretty sure that previously I had the upper passenger side one adjusted out too far. Here is what I did to get a better adjustment:

1. Adjust all of them in (clockwise) until none of them would hold an envelope placed between them and the liftgate.
2. Adjust them all out until they all applied just a little holding pressure on the envelope. This required several liftgate open/close cycles, and for the stoppers on the bottom of the liftgate I climbed inside the back of the vehicle so I could place the envelope from the inside where it wouldn't contact the liftgate seal (I used the phone app to open/close the liftgate while back there). This is also an important step because if you adjust any one of them out to the point that it is applying firm pressure to the liftgate, it will influence the adjustments of the others and you will be iterating endlessly.
3. Once they were all at a uniform adjustment where each one held the envelope just slightly, I adjusted all of them one quarter turn out (counter clockwise) and re-tested.
4. I then iterated on step 3 until I reached the first position where they all held the envelope firmly. I then backed them all out one additional quarter turn counter clockwise for good measure.

I think the whole process took about 20-30 minutes and a lot of climbing in and out of the back of the vehicle. Watch your head when the liftgate comes down while you're back there!

So now that all four stops are contacting the liftgate firmly and with equal pressure, I'm happy to say that the high speed pulsating ear pressure is gone completely, and the booming when going over bumps is reduced by about 90%. I'm actually a little surprised about that last part, but also relieved. I told my wife that I adjusted it, and after her first drive in it she confirmed that it is no longer causing her any ear problems. This is such a relief because I was seriously wondering if we were going to be able to keep the vehicle before this adjustment. I feel like we're finally accepting our new Model Y into our family and starting to enjoy it after a rough first week. (My Model 3, BTW, continues to be perfect).

I am a bit baffled that these vehicles are escaping the factory this way. I also can imagine that many people will never make these relatively simple adjustments. As a loyal Tesla owner, I have to admit that Tesla really needs to address this situation by fixing their liftgate adjustments at the factory and training their service techs on how to make this adjustment for customers experiencing this problem.
Just wanted to follow up on this. I followed these exact instructions and reset all of my stoppers and then adjusted them out until they were all balanced. I think this got me to about 90% reduction in pressure issues as well. It's not completely gone, but it's drastically improved to the point where I didn't even notice it on a 120-140 mile trip.

What I found was one stopper was definitely not as tight as another...and that may have caused some imbalance in the tightness of the hatch. All 4 stoppers need to have the same amount of contact to work properly to reduce the ear pressure in the cabin.

Thanks again, friend! This was a big win!
 
  • Love
Reactions: coselectric
Just wanted to follow up on this. I followed these exact instructions and reset all of my stoppers and then adjusted them out until they were all balanced. I think this got me to about 90% reduction in pressure issues as well. It's not completely gone, but it's drastically improved to the point where I didn't even notice it on a 120-140 mile trip.

What I found was one stopper was definitely not as tight as another...and that may have caused some imbalance in the tightness of the hatch. All 4 stoppers need to have the same amount of contact to work properly to reduce the ear pressure in the cabin.

Thanks again, friend! This was a big win!
...and to properly keep the hatch stable. I'm amazed that Tesla QC is so casual about this. The twisting/torquing on the hatch could cause issues: premature wear on the hinges/latches, stress on the glass, for instance.
 
  • Like
Reactions: polyphonic54
I have to say, now that I've stabilized the hatch, and the tires/dampers have almost 3k miles, I'm thoroughly enjoying the car. Absolutely ZERO rattles/buzzes in my car, minimal wind noise (ordered the "noise" suppression gasket kits). Yes, the ride is still harsh over lousy pavement, but no more harsh than the various VW/Audis I've owned, with Bilstein dampers.
 
After driving with the epoxy putty pads I made for a while I believe They have made a significant difference. I took them out without telling my wife and she quickly noticed a difference. The intensity and duration of the boom is less, which seems consistent with the fact that I stopped 1/2 the movement (downward). The hatch can still move up over a bump. I’m also trying to make foam inserts but still working out the process of making them. I’m using expanding spray foam inside of a pouch, letting it expand with the tailgate closed so it forms to the shape of the void.
 

Attachments

  • 422F01C0-7DD2-48AD-B137-BFA26CD79427.jpeg
    422F01C0-7DD2-48AD-B137-BFA26CD79427.jpeg
    450 KB · Views: 357
  • Helpful
Reactions: angus[Y]oung
After driving with the epoxy putty pads I made for a while I believe They have made a significant difference. I took them out without telling my wife and she quickly noticed a difference. The intensity and duration of the boom is less, which seems consistent with the fact that I stopped 1/2 the movement (downward). The hatch can still move up over a bump. I’m also trying to make foam inserts but still working out the process of making them. I’m using expanding spray foam inside of a pouch, letting it expand with the tailgate closed so it forms to the shape of the void.
You guys are right! A major source of the booming is the hatch itself! I was able to take the hatch cover off after watching this video:

Model Y kick sensor install

Once I took the cover and banged on the metal with my hand it was clear to me this could definitely be a potential source of the booming. So, I added the sound proofing materials that gundarx posted and wow! The volume of the booming sound is quite a bit lower! I'm very happy with the result! :) I can enjoy driving the car now without that loud booming sound bothering me on rough roads.

gundarx thank you so much for sharing the sound proofing materials!
PXL_20210312_163148152.jpg
PXL_20210312_163152681.jpg
PXL_20210312_163600872.jpg
 

Attachments

  • PXL_20210312_153659399.jpg
    PXL_20210312_153659399.jpg
    414.5 KB · Views: 250
  • PXL_20210312_161624005.NIGHT.jpg
    PXL_20210312_161624005.NIGHT.jpg
    624.3 KB · Views: 237
  • PXL_20210312_161634522.NIGHT.jpg
    PXL_20210312_161634522.NIGHT.jpg
    600.5 KB · Views: 246
  • PXL_20210312_163206805.jpg
    PXL_20210312_163206805.jpg
    362.6 KB · Views: 247
A word of caution on soundproofing the hatch. I put butyl and foam on the entire back and just had to pull ~40% of it back out (glad I got it before the butyl become one with the steel). The extra weight prevented the hatch from lifting up automatically.

Treating the hatch did reduce the low frequency noise a lot though. Definitely worth doing IMO.
 
Last edited:
  • Like
Reactions: gundarx
Would be curious if we can devise an optimum treatment plan, since as you said, adding weight to the hatch will be problematic. I ordered a bunch of soundproofing as well to see what I can do to tighten things up.
 
So I just picked up my car today and have a new theory... think the root cause is the hatch hinges are weak and allow for a lot of movement... I noticed that if I opened my hatch and wiggled it up and down (and side to side but less though) the hinges would flex quite a bit. Not just the hinges but where they attach flexes a ton and does not look very strong.

With the way the latch engages, it should let no movement happen at all so the adjustments that people have had success with are making up for the poorly designed hinge area.
We went for a drive with me squeezing in the 3rd row and I felt the hatch moving/bouncing a little bit (but it only takes the smallest amount to cause pressure waves) right at the top.

Thoughts?
I agree there is a lot of movement at the hinges and with the hatch closed they don’t appear to prevent vertical movement very much. I think it would benefit from additional bumper stops at the top, but adjustable ones could stress the hinges if they were adjusted too far out, from the potential leverage here. I’m planning on improving on my upper molded putty stops from my previous post, replacing it with a sandwich of rubber/molded putty/rubber.
 
Anyone else test drive an ID.4? I thought it was boomy too. Now I’m wondering if that’s just how all SUVs are and removing the ICE makes it apparent. Or my ears are too sensitive to it. I have no problem whatsoever in the EV sedans and small hatchbacks.
 
  • Informative
Reactions: PNWLeccy
Hello, everyone.

I have a Long Range Model Y, January 2021 build date, VIN 100XXX. Stock 19" wheels, tires, suspension. It has the premium interior. I picked it up on February 12. The VIN seemed too low, but I did not find any problems during my initial inspection, so I accepted the vehicle. If this car was someone else's reject, I could not see the reason.

I noticed buffeting and booming right away driving it home from the dealership. I read this thread with interest. Over the last few days, I finally had a chance to try out some of the techniques you all have presented.

Hatch Stops​


First of all, my hatch stops were screwed "in" all the way (not making contact with the pads at all). It seems Tesla did not adjust them during assembly. I adjusted the stops until they held an envelope, and the buffeting went away - except perhaps a tiny bit, at a very specific speed, around 45-55 miles per hour, with a tolerance/range of perhaps 2 miles per hour. It is also possible that I am making that up or hearing something else. I no longer experience any ear pressure or pain.

The booming took me longer to address. I ordered gundarx's recommended butyl and foam from Amazon.

First of all, a tip while working with this stuff. If you are planning on using it to insulate your car, wear heavy gloves. The butyl has jagged metal on top that will cut your hands open. The foam might be even worse, with an adhesive that is less like that of mailing tape and more like oil-based paint. Once it gets on something, it does not come off without a fight.

Hatch​


I started with the hatch. First I removed the two pieces of trim. This video was useful:


As you can see, removing the two pieces of trim is not difficult. You can use either an automotive clip remover tool or simply a flathead screwdriver to pop the heads of the clips up, then pull them out. If you break any of the clips, they are standard automotive clips available anywhere. Be careful to unplug the power connector from the large piece of trim, as shown in the above video.

By the way, I am not 100% sure that the plastic latch stopper is supposed to be installed on the inside of the large hatch trim piece, as Minh says in the video above. My car's latch stopper was also installed on the outside, and it does look "wrong" that way, so I also moved mine to the inside of the trim (where it still looks wrong, but maybe less wrong). I doubt moving the latch stopper affected the booming either way. I'm curious whether anyone can explain why Tesla might be installing these latch stoppers "inside out." Is it just faster/easier to assemble cars with them that way? Are the line workers confused? Or is there a technical reason?

With the hatch trim pieces removed, I applied pieces of butyl, then foam (layered on top of the butyl) to every large interior metal surface of the hatch. This is the silver surface you can reach through the holes in the painted metal closer to you (when standing with your back to the car, with the open hatch pulled down in front of you). I did not attempt to cover 100% of these surfaces, as MY-Y had warned against adding too much weight to the hatch. I covered perhaps 75% of what I could see, leaving small gaps between the large pieces of butyl/foam to reduce weight.

Insulating the hatch in this way improved the booming, but not by much. It was just enough that I am confident in saying that deadening the hatch made a difference. Perhaps I could have squeezed out some additional improvement by weighing down the hatch more, but I am not willing to live without the automatic open/close.

Verdict: ~10% reduction in booming

Subtrunk​


I moved on to the subtrunk. I continued to reference Minh's video above for removing the pieces of trim surrounding the bucket trim and the bucket trim itself. I did not remove the bucket from the car, because I did not want to get down under the car for what seemed like a problem I had already solved by deadening the top of the bucket.

By the way, like gundarx, I also had to make "incisions" around the inside base of the bucket in order for the bucket trim to seat back down inside the bucket. It seems the foam doesn't like to curve flush across a 90 degree turn, i.e. from the side of the bucket to its base or vice versa.

I discarded the OEM piece of styrofoam that goes below the bucket trim, because it was also interfering with the bucket trim going back in, and I figured butyl+metal+foam is a better insulator than styrofoam anyway.

Knocking on the bottom of the stock/uninsulated bucket with my hand had produced a loud, low frequency boom. I was sure I had solved my booming problem by applying butyl and foam until I could no longer produce the boom by hitting the bucket. But testing afterward was a disappointment. If there was any improvement, I could not be sure it was not placebo. I decided to try insulating the inside of the quarter panels, as in MY-Y's report, before taking out the bucket and insulating under it.

Verdict: No perceptible reduction in booming

Quarter Panels​


Also called "trunk side trim." I completely removed the passenger's side lower trim panel (no need to touch the smaller, upper part). The lower trim is a big part. Taking it out and especially putting it back in are awkward. I spent over two hours trying to get the part to fit back in by the passenger's side rear seat. I think I either bent or broke one or more of the small metal clips, so the panel would not meet flush with the other side of the trim under the gasket.

You can't tell there's anything wrong with my attempt at reinstalling the panel unless you look closely, but because of this experience, I do not recommend completely removing the quarter panels when insulating behind them. Instead, begin by prying the panels away from the rear/hatch side. They are held on only with toolless clips. Again, you can reference Minh's video above. Rotate the partially disconnected panel so that the part of the panel that goes into the well can lift up out of the well. Then you should be able to pull the panel back enough to get your hands behind it without disconnecting the clips holding the front part of the panel by the passenger seat. When I later insulated the driver's side, I did not disconnect the panel up by the passenger seat, and this made getting the panel back on a "snap," so to speak. It's a little awkward working behind the panel with it in your way, but that is much better than trying to get the thing back on by the passenger's seat.

Following MY-Y's example, I applied some large and some small pieces of butyl and foam to the copper-colored metal interior of the vehicle body behind the quarter panels. On the passenger side, you will encounter the subwoofer and what I believe to be a power junction box. I did not remove either the subwoofer or the power junction box, simply rolling on butyl and foam around them.

On the driver's side, you will need to disconnect two power cables as you pull back the panel. One is for the 12V power "cigarette lighter" and the other is for the two rear seat fold buttons. The 12V connector was easy, but I had to use needle nose pliers to disconnect the little connector on the seat fold button assembly. I could not for the life of me figure out where a release tab would be on that connector, if there is one.

Anyway, with the driver's side panel pulled back, I reached in as far as I could trying to find the block of foam Sandy Munro pulls out at 6:37 in the below video:


... but I could not find the foam in my car. Was leaving the foam out of my car an oversight on Tesla's part? I noticed in the comments of the above video that a Model 3 owner also reported finding a block of foam in his car. But MY-Y reported in this thread that his Model Y did not have one. And both he and I experienced excessive booming until we insulated behind the quarter panels.

After I applied butyl and foam to as much of the inside of the driver's side quarter panel as I could reach, I put the panel back on and went for a drive. I was, in fact, pleased with the improvement. I thought: "Maybe this is what the car is supposed to sound like."

Verdict: 50-80% reduction in booming

I guess if I'm bored or want to squeeze out even more improvement, I might try removing the subtrunk bucket and insulating under it. But I'm satisfied with the improvement for now. A lot of research, a lot of labor for a missing block of foam, if indeed that was the root cause of the booming in my car.

Thanks again to all the contributors here.


Pictures​


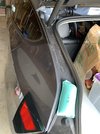
Subtrunk bucket (facing into the car, with hatch latch at bottom):
IMG_2923.jpeg


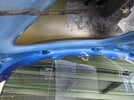
Passenger side, with quarter panel totally removed:
IMG_2927.jpeg


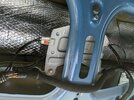
Driver's side, with quarter panel tilted out:
IMG_2929.jpeg


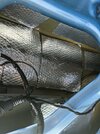
Inside the driver's side quarter panel, facing the front of the vehicle. No foam:
IMG_2931.jpeg
 
Hello, everyone.

I have a Long Range Model Y, January 2021 build date, VIN 100XXX. Stock 19" wheels, tires, suspension. It has the premium interior. I picked it up on February 12. The VIN seemed too low, but I did not find any problems during my initial inspection, so I accepted the vehicle. If this car was someone else's reject, I could not see the reason.

I noticed buffeting and booming right away driving it home from the dealership. I read this thread with interest. Over the last few days, I finally had a chance to try out some of the techniques you all have presented.

Hatch Stops​


First of all, my hatch stops were screwed "in" all the way (not making contact with the pads at all). It seems Tesla did not adjust them during assembly. I adjusted the stops until they held an envelope, and the buffeting went away - except perhaps a tiny bit, at a very specific speed, around 45-55 miles per hour, with a tolerance/range of perhaps 2 miles per hour. It is also possible that I am making that up or hearing something else. I no longer experience any ear pressure or pain.

The booming took me longer to address. I ordered gundarx's recommended butyl and foam from Amazon.

First of all, a tip while working with this stuff. If you are planning on using it to insulate your car, wear heavy gloves. The butyl has jagged metal on top that will cut your hands open. The foam might be even worse, with an adhesive that is less like that of mailing tape and more like oil-based paint. Once it gets on something, it does not come off without a fight.

Hatch​


I started with the hatch. First I removed the two pieces of trim. This video was useful:


As you can see, removing the two pieces of trim is not difficult. You can use either an automotive clip remover tool or simply a flathead screwdriver to pop the heads of the clips up, then pull them out. If you break any of the clips, they are standard automotive clips available anywhere. Be careful to unplug the power connector from the large piece of trim, as shown in the above video.

By the way, I am not 100% sure that the plastic latch stopper is supposed to be installed on the inside of the large hatch trim piece, as Minh says in the video above. My car's latch stopper was also installed on the outside, and it does look "wrong" that way, so I also moved mine to the inside of the trim (where it still looks wrong, but maybe less wrong). I doubt moving the latch stopper affected the booming either way. I'm curious whether anyone can explain why Tesla might be installing these latch stoppers "inside out." Is it just faster/easier to assemble cars with them that way? Are the line workers confused? Or is there a technical reason?

With the hatch trim pieces removed, I applied pieces of butyl, then foam (layered on top of the butyl) to every large interior metal surface of the hatch. This is the silver surface you can reach through the holes in the painted metal closer to you (when standing with your back to the car, with the open hatch pulled down in front of you). I did not attempt to cover 100% of these surfaces, as MY-Y had warned against adding too much weight to the hatch. I covered perhaps 75% of what I could see, leaving small gaps between the large pieces of butyl/foam to reduce weight.

Insulating the hatch in this way improved the booming, but not by much. It was just enough that I am confident in saying that deadening the hatch made a difference. Perhaps I could have squeezed out some additional improvement by weighing down the hatch more, but I am not willing to live without the automatic open/close.

Verdict: ~10% reduction in booming

Subtrunk​


I moved on to the subtrunk. I continued to reference Minh's video above for removing the pieces of trim surrounding the bucket trim and the bucket trim itself. I did not remove the bucket from the car, because I did not want to get down under the car for what seemed like a problem I had already solved by deadening the top of the bucket.

By the way, like gundarx, I also had to make "incisions" around the inside base of the bucket in order for the bucket trim to seat back down inside the bucket. It seems the foam doesn't like to curve flush across a 90 degree turn, i.e. from the side of the bucket to its base or vice versa.

I discarded the OEM piece of styrofoam that goes below the bucket trim, because it was also interfering with the bucket trim going back in, and I figured butyl+metal+foam is a better insulator than styrofoam anyway.

Knocking on the bottom of the stock/uninsulated bucket with my hand had produced a loud, low frequency boom. I was sure I had solved my booming problem by applying butyl and foam until I could no longer produce the boom by hitting the bucket. But testing afterward was a disappointment. If there was any improvement, I could not be sure it was not placebo. I decided to try insulating the inside of the quarter panels, as in MY-Y's report, before taking out the bucket and insulating under it.

Verdict: No perceptible reduction in booming

Quarter Panels​


Also called "trunk side trim." I completely removed the passenger's side lower trim panel (no need to touch the smaller, upper part). The lower trim is a big part. Taking it out and especially putting it back in are awkward. I spent over two hours trying to get the part to fit back in by the passenger's side rear seat. I think I either bent or broke one or more of the small metal clips, so the panel would not meet flush with the other side of the trim under the gasket.

You can't tell there's anything wrong with my attempt at reinstalling the panel unless you look closely, but because of this experience, I do not recommend completely removing the quarter panels when insulating behind them. Instead, begin by prying the panels away from the rear/hatch side. They are held on only with toolless clips. Again, you can reference Minh's video above. Rotate the partially disconnected panel so that the part of the panel that goes into the well can lift up out of the well. Then you should be able to pull the panel back enough to get your hands behind it without disconnecting the clips holding the front part of the panel by the passenger seat. When I later insulated the driver's side, I did not disconnect the panel up by the passenger seat, and this made getting the panel back on a "snap," so to speak. It's a little awkward working behind the panel with it in your way, but that is much better than trying to get the thing back on by the passenger's seat.

Following MY-Y's example, I applied some large and some small pieces of butyl and foam to the copper-colored metal interior of the vehicle body behind the quarter panels. On the passenger side, you will encounter the subwoofer and what I believe to be a power junction box. I did not remove either the subwoofer or the power junction box, simply rolling on butyl and foam around them.

On the driver's side, you will need to disconnect two power cables as you pull back the panel. One is for the 12V power "cigarette lighter" and the other is for the two rear seat fold buttons. The 12V connector was easy, but I had to use needle nose pliers to disconnect the little connector on the seat fold button assembly. I could not for the life of me figure out where a release tab would be on that connector, if there is one.

Anyway, with the driver's side panel pulled back, I reached in as far as I could trying to find the block of foam Sandy Munro pulls out at 6:37 in the below video:


... but I could not find the foam in my car. Was leaving the foam out of my car an oversight on Tesla's part? I noticed in the comments of the above video that a Model 3 owner also reported finding a block of foam in his car. But MY-Y reported in this thread that his Model Y did not have one. And both he and I experienced excessive booming until we insulated behind the quarter panels.

After I applied butyl and foam to as much of the inside of the driver's side quarter panel as I could reach, I put the panel back on and went for a drive. I was, in fact, pleased with the improvement. I thought: "Maybe this is what the car is supposed to sound like."

Verdict: 50-80% reduction in booming

I guess if I'm bored or want to squeeze out even more improvement, I might try removing the subtrunk bucket and insulating under it. But I'm satisfied with the improvement for now. A lot of research, a lot of labor for a missing block of foam, if indeed that was the root cause of the booming in my car.

Thanks again to all the contributors here.


Pictures​


Subtrunk bucket (facing into the car, with hatch latch at bottom):
View attachment 648440

Passenger side, with quarter panel totally removed:
View attachment 648441

Driver's side, with quarter panel tilted out:
View attachment 648442

Inside the driver's side quarter panel, facing the front of the vehicle. No foam:
View attachment 648443

Great and thorough post!

One observation I had for the butyl tape is it appears to take many hours, likely overnight for it to become hardened and sort of fuse with the surface, and make a real improvement. When I applied it to my rear hatch and foam above it, I went for a drive and hardly noticed an improvement, but the next day and afterwards it definitely made a big effect. Definitely do not over-apply the heavy butyl tape on the rear hatch or the lifting mechanism struggles; I cut mine in small rectangles, with many gaps, and apply the nearly-weightless foam panels liberally.

I used scissors to cut the butyl tape pieces and I guess that dulls the edges enough that using nitrile disposable gloves is just fine. Don’t forget to clean/brush off the butyl from the scissors though or it gets stuck.

Application to the rear hatch also noticeably improved music sound quality, especially with bass. Turn up your audio on your favorite tracks and give it a listen.
 
Last edited:
  • Like
Reactions: tribhuvanji
If you apply the butyl between 65 and 70 degrees, you don't even need gloves. Also, I don't recommend butyl on the rear hatch. As I mentioned above, I had to remove much of it, and even now, sometimes my hatch won't open. The biggest difference is treating the 1/4 panels anyway.

One more thing, I'm not sure covering my sub-trunk's bucket outside with butyl helped much.
 
  • Like
Reactions: ElectricAnt54
If you apply the butyl between 65 and 70 degrees, you don't even need gloves. Also, I don't recommend butyl on the rear hatch. As I mentioned above, I had to remove much of it, and even now, sometimes my hatch won't open. The biggest difference is treating the 1/4 panels anyway.

One more thing, I'm not sure covering my sub-trunk's bucket outside with butyl helped much.
If your hatch still won't open sometimes, you will need to remove more of the butyl. When I first over did the application of the butyl, my hatch would slowly open and it did so until it finally wouldn't open anymore. So, I removed quite a bit of butyl like you did and then my hatch would open. However, sometimes it would not, and I was like crap did I break something! :( At this point I figured I might as well remove more of it to verify weight is not the issue and sure enough the hatch opens every time. I ended up just applying small pieces far apart like gundarx described in his post. Probably only have 10-15% of the amount of the original butyl applied and the rest is that light foam. I agree that we definitely have to be careful with any weight added to the hatch.
 
  • Like
Reactions: gundarx