Welcome to Tesla Motors Club
Discuss Tesla's Model S, Model 3, Model X, Model Y, Cybertruck, Roadster and More.
Register

Fixing a paint chip costs $1,700??!!!

This site may earn commission on affiliate links.
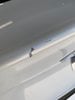
I got my new model y on Monday, long range. This morning( two days after delivery), when I tried to open the trunk, it went all the way up to hit the metal piece of the garage door, and a small piece of paint on the back chipped. And then I went to a Tesla certified body shop, they gave me an out of pocket quote :$1,700!!!
Anyone has a better suggestion to fix it?
 

Attachments

  • 2306ECA2-9BFD-4F93-AC61-1E5D105D9C92.jpeg
    2306ECA2-9BFD-4F93-AC61-1E5D105D9C92.jpeg
    68 KB · Views: 1,804
  • D0136EEF-75C8-4DA8-8F5B-5D4CD24837F6.jpeg
    D0136EEF-75C8-4DA8-8F5B-5D4CD24837F6.jpeg
    56.5 KB · Views: 1,488
I would go with touch up paint.....Direct Touchup has a great kit for pearl white paints.....the gouge looks deep but primer will build that up easily. Next will be a base coat (3-5 layers is ideal ) and then 1-2 coats of mid layer and finally a few coats of clear.....it will still be there but much less noticeable. Be sure to wetland it when applying the primer and pain so it is smooth instead of goopy. Also give it ample time to dry, this probably will need a few days due to the many coats required. Be patient, go slowly and if you dont want to use wet sand paper of 2500-4000 grit, then you can use a paint leveler product....goood luck and take pictures !
 
I would go with touch up paint.....Direct Touchup has a great kit for pearl white paints.....the gouge looks deep but primer will build that up easily. Next will be a base coat (3-5 layers is ideal ) and then 1-2 coats of mid layer and finally a few coats of clear.....it will still be there but much less noticeable. Be sure to wetland it when applying the primer and pain so it is smooth instead of goopy. Also give it ample time to dry, this probably will need a few days due to the many coats required. Be patient, go slowly and if you dont want to use wet sand paper of 2500-4000 grit, then you can use a paint leveler product....goood luck and take pictures !
Thank you so much for the step by step instructions. I am gonna print it out and follow them. If I end up doing it correctly, for sure I will post pictures lol
 
  • Like
Reactions: GeezerSquid
Thank you so much for the step by step instructions. I am gonna print it out and follow them. If I end up doing it correctly, for sure I will post pictures lol

I have a Model S and it is pearl white metallic....it needs 2 different paints, the first is a base coat and the second contains the pearlescent stuff.......it doesn't hurt to find a piece of metal and scrape it and then practice your touch up skills. Im referring to a piece of painted scrap metal that you have laying around.

The second picture does show very thin paint, you might have to skip the primer and just go with base coat and mid coat and clear. My experience is the primer is really thick. Ideally you dont want a raised hump. This is why u wet sand or use paint leveler.
 
Thats a GREAT idea
I may need both of the repair kit and a spoiler
I have a Model S and it is pearl white metallic....it needs 2 different paints, the first is a base coat and the second contains the pearlescent stuff.......it doesn't hurt to find a piece of metal and scrape it and then practice your touch up skills. Im referring to a piece of painted scrap metal that you have laying around.

The second picture does show very thin paint, you might have to skip the primer and just go with base coat and mid coat and clear. My experience is the primer is really thick. Ideally you dont want a raised hump. This is why u wet sand or use paint leveler.
testing on a metal piece is really a good idea!