


Here are some pix installing T's without removing any front panels and removing only upper trim in the back. Rear power source from license plate light. Connected to bulb. Extra LED module for rear blinking. Still brightens w braking.
some notes.
For front T, can pop the front cone and run wires without removing it.
Wires tuck under the plastic covers on the driver's side without removal.
Good to cover w split loom to protect wires.
Easy to plug into the OBD port for power w Evannex kit.
LED module tucks into pocket on driver left dash.
Can program onboard homelink to control on/off.
For rear T power, I soldered onto the left license light bulb and tucked the wire into the hatch.
The rear brake wire is a blue wire in the right upper bundle. I ran it across to tuck under the covers.
I reached inside the rear hatch to run the brake connection to module.
The LED wires I hooked down to the left hatch opening.
I kept the black adhesive from the stock T and stuck the LED T onto it, to keep the positioning. Seems to stick well.
I bought a spare LED blinking module to have the red T blink.
Wiring the brake light to module power gives brake brightening of T.
To turn the rear T on during the day, I turn the parking lights on.
Attachments
-
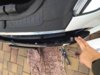 image.jpeg649.4 KB · Views: 163
 -
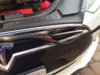 image.jpeg673.5 KB · Views: 132
 -
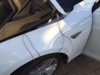 image.jpeg500.9 KB · Views: 155
 -
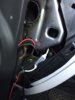 image.jpeg266 KB · Views: 127
 -
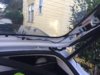 image.jpeg679.2 KB · Views: 130
 -
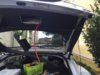 image.jpeg634.9 KB · Views: 135
 -
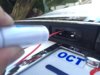 image.jpeg434.8 KB · Views: 128
 -
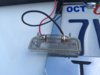 image.jpeg461.6 KB · Views: 121
 -
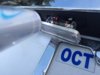 image.jpeg501 KB · Views: 126
 -
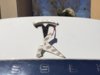 image.jpeg467.9 KB · Views: 136
 -
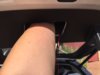 image.jpeg424.1 KB · Views: 128