Welcome to Tesla Motors Club
Discuss Tesla's Model S, Model 3, Model X, Model Y, Cybertruck, Roadster and More.
Register

Has anyone installed a radar detector in a updated 2021 model S?

This site may earn commission on affiliate links.
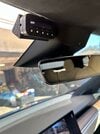
I have installed V2 right of rear view mirror and ran cord hidden all the way to lighter socket at back of console. Fished wire between carpet and console with small wire. Wire completely hidden except for 2 in around passenger’s pillar to dashboard junction because to tight to tuck in. Looks great and functional as all get out. Today I found radar 2 miles away.
image.jpg
image.jpg
image.jpg
 
Not sure why people just don’t wiretap the mirror. It not switched to turn off immediacy but goes to sleep when the car is done charging or after an hour-ish of idle time. 5 min install and it’s clean
Which car(s) are you referring to? I've had dashcams installed on all 4 of our Model S's (2013-2018), all of them use power from under the microphone next to the mirror, all of them have power 24/7.
 
Yea theres another thread on this going on.. Mid way you can see my post with pictures of the green wire tap and get a breakdown of the install. Good luck!

 
The black green wire from the mirror/interior cam panel on a 2022 MS Plaid
Then the answer to you question is, "because not everyone feels comfortable tapping into existing wires, as it has the potential to mess up whatever the black green wire is powering today (e.g. may blow fuses since the fuse was chosen not accounting for the additional load, potentially cause brownouts and/or add noise to the power rail, etc). Note the install by @Craig Cazenave was 100 non-invasive. Can easily remove when selling the car, or if Tesla service blames whatever problem you come with on your aftermarket device.

I've personally done a bunch of aftermarket installations on my cars, dashcams, radar/laser defense systems, etc. A lot of those involved taking apart parts of the car, such as dropping bumpers (front/rear aprons), removing interior panels, etc. Even so, I rarely tap into existing wiring for power, unless I know exactly what I'm tapping into, what else runs on that, what fuse it is on, is there enough headroom in the fuse/cable size, etc. For power I most often run my own wiring from the battery, with my own dedicated fuse, unless one of the 12V cigarette lighter cabling happens to be available AND I want the 12V to be switched (most things I install want 12V unswitched, with a 12V switched input to tell it to go to sleep when car is off).
 
  • Like
  • Love
Reactions: 4SUPER9 and Bull
I guess some of us are way past worrying about the possibility of blowing a fuse. I’ve never had a car that is 100% stock. Not one and I’ve owned close to 80. A few of my cars don’t have the OEM internals in the engine and one car is about to change engines, transmissions, transfer case, and ECU. Regardless, it’s a non issue. This is the most mild of modifications. Tried it first with my Gen 1 V1, then a escort max 360 and now it has a Uniden R8. No problems. I get it, for many here the Tesla is their first “enthusiast car”. For many of us, we’ve been “gear heads” our whole lives, if we opined ad nauseam over wire tapping a radar detector, there would be no such thing as tuner cars or hot rods.

btw, in the off-chance the worst case scenario happens something had a permanent issue, the Amazon wire tap kit I used doesn’t leave a trace either. There are no holes left in insulation or cut wires.
 
  • Like
Reactions: FlatSix911
This is not a power question. I have an installed radar, Escort 9500ci, for which I am considering putting the display inside/behind the mirror. Has anyone done that with a Tesla, particularly an MS? I do not know if the mirror's are similar from one model to another, though I can check my wife's car later.
I have seen many examples of this online, where they take apart the mirror assembly, and etch out the backing behind the glass. This way, the display is seen when on, and otherwise invisible.
To be honest, I really do not need to do this, but it seems like a fun project!
 
Well, no one got back to me, but I went ahead and did it by doing some research on other car forums. It was actually pretty simple. It took me a a few hours, but knowing what I know now, I could do it again much faster. Here were my steps
  1. I pulled the mirror off from the windshield (rotate it clockwise)
  2. I slowly separated the mirror from of the housing. The mirror is glued to a bracket, and that bracket is what latches to the main housing.
  3. I separated the bracket from the mirror itself. I just did this by very slowly and gently working my way around the glass/bracket untll they were free from each other.
  4. I found an area where the LED board would fit, and scraped away the black material on the back of the glass (this is the material that was glued to the bracket). The LED board cannot go close to the edge of the mirror as I would have liked, as there is not enough room within the housing at the edges. The space behind gets deeper the further from the edges you get. That's okay, because the visibility in the rear view mirror is limited by the trunk window, which is a small viewing area. The LED does not interfere with my view.
  5. I hot-glued the LED board in place.
  6. Using a Dremel and a small saw, I cut away the bracket material to make room for the board, then glued the board back onto the mirror (this is going to fall off in the heat, I know it. Going to buy some better glue). I made a small notch with my Dremel in the back of the housing so that the cable would fit.
  7. I ran the cable into the front camera housing, into the headliner along the windshield, down the A-pillar, and plugged it into the interface which I have under the dash, near the door jamb
Pictures attached. The LED did not show up well in my photos, but it is crystal clear in person, and completely hidden with no signs of it when off.


Radar On:
radar on.jpeg


Radar off:
Radar off.jpeg


LED Board attached to back of mirror (I cut away too much of the bracket, as I did not realize where the LED board would fit:

LED board on mirror.jpeg


Notch in the back of the mirror housing:
Notch.jpg
 
Well, no one got back to me, but I went ahead and did it by doing some research on other car forums. It was actually pretty simple. It took me a a few hours, but knowing what I know now, I could do it again much faster. Here were my steps
  1. I pulled the mirror off from the windshield (rotate it clockwise)
  2. I slowly separated the mirror from of the housing. The mirror is glued to a bracket, and that bracket is what latches to the main housing.
  3. I separated the bracket from the mirror itself. I just did this by very slowly and gently working my way around the glass/bracket untll they were free from each other.
  4. I found an area where the LED board would fit, and scraped away the black material on the back of the glass (this is the material that was glued to the bracket). The LED board cannot go close to the edge of the mirror as I would have liked, as there is not enough room within the housing at the edges. The space behind gets deeper the further from the edges you get. That's okay, because the visibility in the rear view mirror is limited by the trunk window, which is a small viewing area. The LED does not interfere with my view.
  5. I hot-glued the LED board in place.
  6. Using a Dremel and a small saw, I cut away the bracket material to make room for the board, then glued the board back onto the mirror (this is going to fall off in the heat, I know it. Going to buy some better glue). I made a small notch with my Dremel in the back of the housing so that the cable would fit.
  7. I ran the cable into the front camera housing, into the headliner along the windshield, down the A-pillar, and plugged it into the interface which I have under the dash, near the door jamb
Pictures attached. The LED did not show up well in my photos, but it is crystal clear in person, and completely hidden with no signs of it when off.
Nice! Which detector? where is the radar unit? How do you control it?
 
Well, no one got back to me, but I went ahead and did it by doing some research on other car forums. It was actually pretty simple. It took me a a few hours, but knowing what I know now, I could do it again much faster. Here were my steps
  1. I pulled the mirror off from the windshield (rotate it clockwise)
  2. I slowly separated the mirror from of the housing. The mirror is glued to a bracket, and that bracket is what latches to the main housing.
  3. I separated the bracket from the mirror itself. I just did this by very slowly and gently working my way around the glass/bracket untll they were free from each other.
  4. I found an area where the LED board would fit, and scraped away the black material on the back of the glass (this is the material that was glued to the bracket). The LED board cannot go close to the edge of the mirror as I would have liked, as there is not enough room within the housing at the edges. The space behind gets deeper the further from the edges you get. That's okay, because the visibility in the rear view mirror is limited by the trunk window, which is a small viewing area. The LED does not interfere with my view.
  5. I hot-glued the LED board in place.
  6. Using a Dremel and a small saw, I cut away the bracket material to make room for the board, then glued the board back onto the mirror (this is going to fall off in the heat, I know it. Going to buy some better glue). I made a small notch with my Dremel in the back of the housing so that the cable would fit.
  7. I ran the cable into the front camera housing, into the headliner along the windshield, down the A-pillar, and plugged it into the interface which I have under the dash, near the door jamb
Pictures attached. The LED did not show up well in my photos, but it is crystal clear in person, and completely hidden with no signs of it when off.


Radar On:
View attachment 898003


Radar off:
View attachment 898005


LED Board attached to back of mirror (I cut away too much of the bracket, as I did not realize where the LED board would fit:
View attachment 898006


Notch in the back of the mirror housing:
View attachment 898007
Nice job! This will come in handy. Thank you.
 
  • Like
Reactions: 4SUPER9
Nice! Which detector? where is the radar unit? How do you control it?
All excellent questions! Sorry for not posting details.

I am using an old Escort 9500ci. This device has served me well for many years, through 4 different Model S's. I have not installed the laser defense system. For one, they are illegal in California (only an infraction, but I don't want to rock the boat), and secondly, it is a big project to do right, and I really don't have that much of a need, as I don't speed much anyway. This radar project is more for fun.

The radar receiver is placed behind my front bumper. I had to remove the frunk bucket to access it, but that was easy. It picks up signal there very easily. There is also a GPS sensor I have in the frunk under one of the panels.

All the workings of the detector (interface unit, speaker) are behind the driver's left sided wall panel.. Everything meets and plugs in there.

The controller is mounter on the left side of the dash for easy access. Pic attached. The Escort controlled cannot be flush mounted, because there is a power button on the top. I am open to suggestions though!

The unit used to be powered by the OBD, but I eventually tapped a consistent source of power by wrapping 5" of bare 16G wire around the battery post under the hood. That wire goes to a voltage reducer, and that voltage reducer sends 12V power to a 6 panel fuse block, all under the hood. Currently, I only have the radar plugged into that fuse block, but hopefully will add other things to it in the future.

Controller.jpg
 
  • Like
Reactions: cmarshack
Hello,

I was wondering how did you route the wires from the ALP heads through the bumper to the frunk area? I am considering getting the ALP system, but I couldn't see any holes or gaps where the leads could be routed from that lower intake area up to the frunk area (albeit I just took a quick look and felt around). It seems like that intake goes into an enclosed box housing a radiator? Did you have to take off the front bumper to route the wires? Or does taking the frunk tub out give enough access perhaps to fish the wires from the heads through to the frunk area? Thanks!

No idea. Paid Earmark in Plano to install it. 2 day job.
 
Hello,

I was wondering how did you route the wires from the ALP heads through the bumper to the frunk area? I am considering getting the ALP system, but I couldn't see any holes or gaps where the leads could be routed from that lower intake area up to the frunk area (albeit I just took a quick look and felt around). It seems like that intake goes into an enclosed box housing a radiator? Did you have to take off the front bumper to route the wires? Or does taking the frunk tub out give enough access perhaps to fish the wires from the heads through to the frunk area? Thanks!
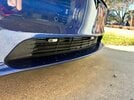
I did my own install and was able to route the wires for the heads from the lower intake to the frunk area. There is a small access hole on the passenger side of the intake area if I remember correctly. I think it had a small cover on it that is removable.. Getting through the firewall to the inside of the passenger area was the harder part…but also doable. I used the grommet on the passenger side behind the glove compartment area.

IMG_5166.jpeg
 
  • Like
Reactions: 4SUPER9