


I wanted to share how I replaced the paddle for the door handle in my 2013 Model S. I did a similar write up for headlights here. I figured if I can do that I could tackle a door handle. Pretty sure most of my handles have been replaced more than a few times under warranty and out. I'm not your mechanic so do this at your own risk but thought it would help someone. I'll attach it as a pdf below but thought this page would help people on a web browser and with pics.
Chad from @uscgreel had the microswitches and paddle for sale. I got my lightbulbs from him and have been happy as can be so I ordered these from him. Still working up the courage to do that behind the wheel bubbly screen replacement part I purchased from him!
I did not install the microswitches supplied because mine looked fine for age and wear. But if I had do them in the future then I have them at the ready. So pick either paddle or combo as you see fit.
Guide:
Problem: Door handle does not present when unlocked. Will open from inside. Motor making sound when the door is trying to open heard. Replacing paddle only, not microswitches in this guide
Tools needed: Replacement paddle gear and microswitches, trim removal tools, T30, T20, T25, 9mm, 10mm rachet, 10mm crescent wrench, flathead screwdriver, pick tool, trim screw remover blade, Socket extender, magnetic wand, magnetize sockets if possible, masking tape, small zip ties, sharpie, blanket so nothing falls and breaks on concrete, nitrile gloves, climate controlled workspace, good lighting
Tips from which video: RR- Rich Rebuilds, RD- Reel Deal Ev, EG- Electrified Garage KW- Me
RR Video Link:
EG Video Link:
RD Video Link:
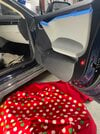
Put blanket/padding down below open door to help prepare place for door trim to rest, cables not long enough to fall to the ground

Put window down (EG)
Remove chrome trim at top of door. Twist and lift gently on the outside toward the mirror EG

Remove 10mm nut on the handle (seen between the supports of the door handle) EG
BE CAREFUL NOT TO SCRATCH GLASS WITH WRENCH (maybe tape lightly the edge toward the window KW)
When nut is almost out use magnet to grab nut (EG- Different than RR order of operations)
Tape up interior chrome trim KW
Open door latch and remove trim piece behind door trim with T30 (2 screws) RR
Remove trim piece from small pocket below window, will be either 9 or 10mm RR
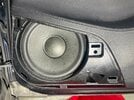
Remove speaker grill which has four clips, one at each corner, by gripping firmly from larger portion toward the inside of the door RR

Bottom part will probably come off first (EG), if not opened before it will require a lot of force
Use door handle cutout out to help with top (EG)
With fingers inside the above part grab firmly and pull off the door panel trim DO NOT LET FALL as power cords will still be attached RR

Put window up all the way before disconnecting switch (EG)
Consider labeling with tape each wire harness that connects together for easier assembly.
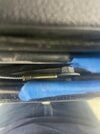
Unlatch cable release cord, plastic connectors for lights, puddle lights, door sensor. Some might be behind padding and some might be black, blue, white
Inside door trim is disconnected, stow away safely
Removing door handle assembly
Disconnect three power connectors on the black box that is screwed into the door shielding

Use T20/25 depending on age of car to open up door access kidney shaped panel. There are six screws. RR
There will be a wire connected through the panel
Rubber handle seal may fall down into the opening that is sound dampening RR
Move rubber grommet with wire connected out with flathead screwdriver. Wire will stay the door. RR
Trick car to thinking door is closed with this step to move up window farther: use screwdriver to push in latch on side of door. Window will move up. RR
Use trim screw removal tool just below an inside QR code and above where the window regulator was you just pushed. Remove screw from door by pulling into the door cavity.
Help push with fingers of other hand (CAUTION: It is connected to wiring.) RR
Unplug handle harness from door handle wiring EG
Remove black glued NVH pressure sensors. May not be very sticky anymore. Two of them above the opening. Ignore the three grouped together. RR
Use 10mm socket and go to the side opening. Remove nut out from opening. It may fall in side the door so have hand under it if not going well or magnet arm. Repeat for top opening. Then do the one you can see in the big empty part. RR
If door handle is presented push it in RR (not my problem)
Work the handle down at an angle towards the opening RR

Tesla Door Handle Replacement steps
Will have wire harness trailing it (the one that you popped out from the door above) RR
Repairing handle harness
Remove rubber backing, take picture of wiring for reference, may be held with adhesive and metal washers on top. Careful, removing with tool may bend the washers. I just used my fingers

Continued...
Chad from @uscgreel had the microswitches and paddle for sale. I got my lightbulbs from him and have been happy as can be so I ordered these from him. Still working up the courage to do that behind the wheel bubbly screen replacement part I purchased from him!
I did not install the microswitches supplied because mine looked fine for age and wear. But if I had do them in the future then I have them at the ready. So pick either paddle or combo as you see fit.
Guide:
Problem: Door handle does not present when unlocked. Will open from inside. Motor making sound when the door is trying to open heard. Replacing paddle only, not microswitches in this guide
Tools needed: Replacement paddle gear and microswitches, trim removal tools, T30, T20, T25, 9mm, 10mm rachet, 10mm crescent wrench, flathead screwdriver, pick tool, trim screw remover blade, Socket extender, magnetic wand, magnetize sockets if possible, masking tape, small zip ties, sharpie, blanket so nothing falls and breaks on concrete, nitrile gloves, climate controlled workspace, good lighting
Tips from which video: RR- Rich Rebuilds, RD- Reel Deal Ev, EG- Electrified Garage KW- Me
RR Video Link:
Put blanket/padding down below open door to help prepare place for door trim to rest, cables not long enough to fall to the ground
Put window down (EG)
Remove chrome trim at top of door. Twist and lift gently on the outside toward the mirror EG
Remove 10mm nut on the handle (seen between the supports of the door handle) EG
BE CAREFUL NOT TO SCRATCH GLASS WITH WRENCH (maybe tape lightly the edge toward the window KW)
When nut is almost out use magnet to grab nut (EG- Different than RR order of operations)
Tape up interior chrome trim KW
Open door latch and remove trim piece behind door trim with T30 (2 screws) RR
Remove trim piece from small pocket below window, will be either 9 or 10mm RR
Remove speaker grill which has four clips, one at each corner, by gripping firmly from larger portion toward the inside of the door RR
Bottom part will probably come off first (EG), if not opened before it will require a lot of force
Use door handle cutout out to help with top (EG)
With fingers inside the above part grab firmly and pull off the door panel trim DO NOT LET FALL as power cords will still be attached RR
Put window up all the way before disconnecting switch (EG)
Consider labeling with tape each wire harness that connects together for easier assembly.
Unlatch cable release cord, plastic connectors for lights, puddle lights, door sensor. Some might be behind padding and some might be black, blue, white
Inside door trim is disconnected, stow away safely
Removing door handle assembly
Disconnect three power connectors on the black box that is screwed into the door shielding
Use T20/25 depending on age of car to open up door access kidney shaped panel. There are six screws. RR
There will be a wire connected through the panel
Rubber handle seal may fall down into the opening that is sound dampening RR
Move rubber grommet with wire connected out with flathead screwdriver. Wire will stay the door. RR
Trick car to thinking door is closed with this step to move up window farther: use screwdriver to push in latch on side of door. Window will move up. RR
Use trim screw removal tool just below an inside QR code and above where the window regulator was you just pushed. Remove screw from door by pulling into the door cavity.
Help push with fingers of other hand (CAUTION: It is connected to wiring.) RR
Unplug handle harness from door handle wiring EG
Remove black glued NVH pressure sensors. May not be very sticky anymore. Two of them above the opening. Ignore the three grouped together. RR
Use 10mm socket and go to the side opening. Remove nut out from opening. It may fall in side the door so have hand under it if not going well or magnet arm. Repeat for top opening. Then do the one you can see in the big empty part. RR
If door handle is presented push it in RR (not my problem)
Work the handle down at an angle towards the opening RR
Tesla Door Handle Replacement steps
Will have wire harness trailing it (the one that you popped out from the door above) RR
Repairing handle harness
Remove rubber backing, take picture of wiring for reference, may be held with adhesive and metal washers on top. Careful, removing with tool may bend the washers. I just used my fingers
Continued...
Attachments
Last edited:
