Would you install the illuminated metal speakers? They look incredibly ugly in my opinion...For me.....it's between these two options...I like one because it replaces the center dash with a touch screen, and the other is quite nice as well, but both are the real deal full replacements one of them actually replaces the metal with perforated dash... been eying these for a while:
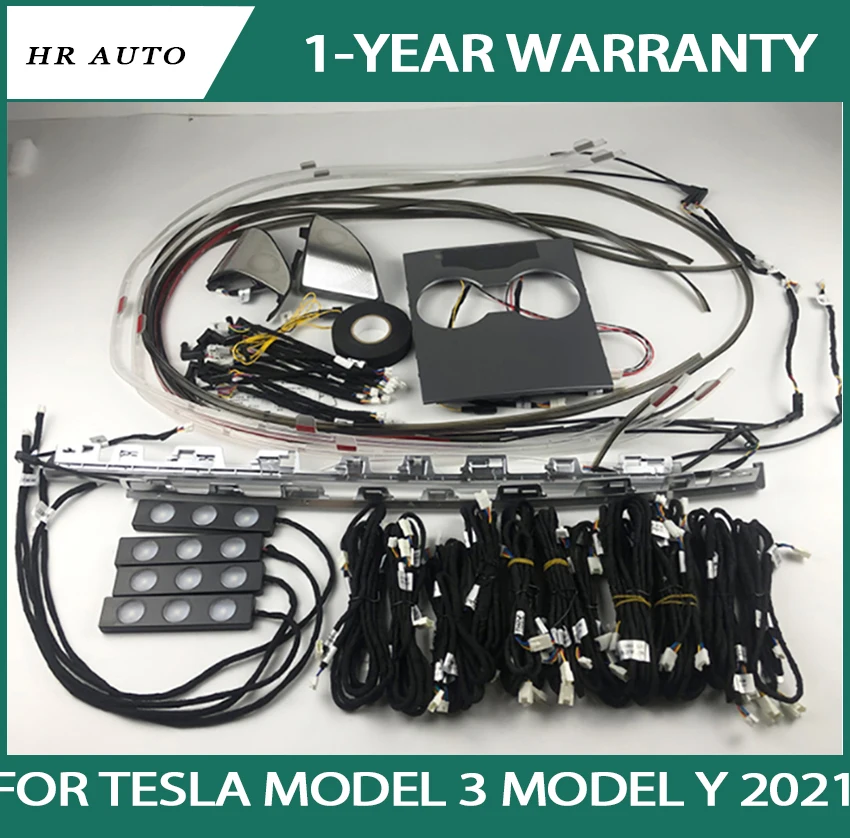
640.0US $ 20% OFF|App control inter car Light Center pillar horn cover app control Decorate inter Ambient lamp fit for Tesla Model 3 model Y 2021|Decorative Lamp| - AliExpress
Smarter Shopping, Better Living! Aliexpress.comwww.aliexpress.com

430.0US $ 50% OFF|Aroham Laser Engraved Hollow Out Atmosphere Light For Tesla Model 3 Model Y 2021 2022 Led Speaker Cover Saddle Lamp - Decorative Lamps & Strips - AliExpress
Smarter Shopping, Better Living! Aliexpress.comwww.aliexpress.com


Welcome to Tesla Motors Club
Discuss Tesla's Model S, Model 3, Model X, Model Y, Cybertruck, Roadster and More.
Register
Install the app
How to install the app on iOS
You can install our site as a web app on your iOS device by utilizing the Add to Home Screen feature in Safari. Please see this thread for more details on this.
Note: This feature may not be available in some browsers.
-
Want to remove ads? Register an account and login to see fewer ads, and become a Supporting Member to remove almost all ads.
You are using an out of date browser. It may not display this or other websites correctly.
You should upgrade or use an alternative browser.
You should upgrade or use an alternative browser.
Model 3 DIY Light kits: Review and installation tips, with pics
- Thread starter GreenHokie
- Start date
PauliePucks
3rd Party Accessory Junkie
Eh. I personally would skip it. What’s the back look like? Is it something you could possibly fit in the OEM grill?Would you install the illuminated metal speakers? They look incredibly ugly in my opinion...
View attachment 856291
Ask E.Potter when he gets the kit.Eh. I personally would skip it. What’s the back look like? Is it something you could possibly fit in the OEM grill?
 I wouldn't install it on the OEM grill either...
It worked!You’re welcome! Actually, I do have an install tip that may help with the corners on your gen 2 console.
As shown in the photo below, make a triangular shaped “relief” cut in the flat part of your light strip, where it will sit/bend around each corner of the console. A relief cut is a common technique used to run/install things around bends and corners.
View attachment 856158
 Now I can't notice it sticking out when entering the car. Unfortunately it's still not completely flush with the trim, but only noticeable if you look in the right angle, so almost never. Maybe I didn't make the triangle big enough?
 It worked!
Well done! I‘m guessing to prevent that last bit from sticking out/up, you can try two things.
1. Start with the additional cut shown below in photo “A”.
2. If the above doesn’t do the trick, then modify the ANGLE of the cut as shown below in photo “B”.
Will do tomorrow! Thank you for being so helpful!Well done! I‘m guessing to prevent that last bit from sticking out/up, you can try two things.
1. Start with the additional cut shown below in photo “A”.
2. If the above doesn’t do the trick, then modify the ANGLE of the cut as shown below in photo “B”.
View attachment 856680
View attachment 856681
By the way, what do we think about this mod? Custom "EQS" Style Ambient Dash LED Lighting Added
Apparently this person hates the look of our kits, and came up with that. I think it would look great in person, although it's ridiculously expensive since the bluetooth controller alone is $80
By the way, what do we think about this mod? Custom "EQS" Style Ambient Dash LED Lighting Added
Apparently this person hates the look of our kits, and came up with that.
Honestly, I don’t think that particular mod looks very good. It may be difficult to tell from those photos, but I think there are some very noticeable variations in the light output and some shadowing effect around where he installed the LED strip. I think this varying light output/effect is the simple result of placing LED’s in an “open” area. It’s sort of like the effect that you have/see with LED footwell lights…the light spreads out across a larger area and any objects/trim around those LED lights will cause the light to deflect & bounce around... creating a lighting effect that is more diffused & varying in brightness. Some may like/prefer this type of lighting effect. But for me, I prefer that any accent lighting that is intended to highlight a specific piece of trim (like the line along a dashboard or a trim line around a center console) have a very focused, well defined light, instead of a more diffused/varying light pattern. Just my opinion, of course…
I do like the accent lighting without any glowing, but I also really like the bouncing lights, maybe even more than the focused lights. Apparently the LED strip is completely hidden, so it might even look OEM which I like, especially compared to the ugly nestour strips on the dashboard. The only problem is the LED strip + controller makes the mod much more expensive than ours for just a single spot of light. Maybe there are cheaper options out there?Honestly, I don’t think that particular mod looks very good. It may be difficult to tell from those photos, but I think there are some very noticeable variations in the light output and some shadowing effect around where he installed the LED strip. I think this varying light output/effect is the simple result of placing LED’s in an “open” area. It’s sort of like the effect that you have/see with LED footwell lights…the light spreads out across a larger area and any objects/trim around those LED lights will cause the light to deflect & bounce around... creating a lighting effect that is more diffused & varying in brightness. Some may like/prefer this type of lighting effect. But for me, I prefer that any accent lighting that is intended to highlight a specific piece of trim (like the line along a dashboard or a trim line around a center console) have a very focused, well defined light, instead of a more diffused/varying light pattern. Just my opinion, of course…
I’m almost positive you’ll be able to find kits consisting of a simple LED light strip + controller for well under $25 delivered on AliExpress.
PauliePucks
3rd Party Accessory Junkie
Might be a shot in the dark (seriously no pun intended), but something similar to the frunk LED strips could do the trick here. Might require some small splicing work, but nothing exorbitant. You can find them on AliExpress for $18-$30 bucks.
I'm starting to worry that if I do more cutting, the light strip might not sit in the corners since there's nothing holding it there. It already seems to stick out a little...Well done! I‘m guessing to prevent that last bit from sticking out/up, you can try two things.
1. Start with the additional cut shown below in photo “A”.
2. If the above doesn’t do the trick, then modify the ANGLE of the cut as shown below in photo “B”.
View attachment 856680
View attachment 856681
Yeah, that is definitely a valid concern. So, may be best to just keep things the way they are and accept a little poke of the light tube around the corner(s). One last (non-destructive) option that you could try is to apply a thin coating/layer of adhesion promoter to the flat areas of the light strip (directly to the left and right of where you previously made the relief cuts). The 3M adhesion promoter liquid is clear, non-staining and may provide just enough extra grip between the flat part of the light strip and the inside surface of your console to keep everything in-place and tight up against that aluminum trim/border.I'm starting to worry that if I do more cutting, the light strip might not sit in the corners since there's nothing holding it there. It already seems to stick out a little...
I'm just gonna leave it there... I don't have any adhesion promotorYeah, that is definitely a valid concern. So, may be best to just keep things the way they are and accept a little poke of the light tube around the corner(s). One last (non-destructive) option that you could try is to apply a thin coating/layer of adhesion promoter to the flat areas of the light strip (directly to the left and right of where you previously made the relief cuts). The 3M adhesion promoter liquid is clear, non-staining and may provide just enough extra grip between the flat part of the light strip and the inside surface of your console to keep everything in-place and tight up against that aluminum trim/border.

The RGB versions are more expensive but that could probably work.Might be a shot in the dark (seriously no pun intended), but something similar to the frunk LED strips could do the trick here. Might require some small splicing work, but nothing exorbitant. You can find them on AliExpress for $18-$30 bucks.
E.Potter
Member
probably not, but it may look different in person...but yes I mat skip itWould you install the illuminated metal speakers? They look incredibly ugly in my opinion...
View attachment 856291
PauliePucks
3rd Party Accessory Junkie
Yeah. Another option would be to tap into the footwells (if you have them, if not, disregard the rest of this), using a y-coupling (abstract ocean makes and sells them) and connecting the frunk light strip under the dash. It’s been a while since i installed my strip but I believe the connector type is the same.The RGB versions are more expensive but that could probably work.
Only downside is you would have 2 apps controlling color and effects which would drive me crazy for sure lol
(moderator note)Has anyone added an ambient light kit? I have Ambient lighting in my Mercedes S class and love it I wish Tesla would add this option. Can I add it? ANY GOOD KITS? or should I just leave it alone?
New thread merged with existing thread on light kits.
Similar threads
- Replies
- 178
- Views
- 7K
- Replies
- 0
- Views
- 303
- Replies
- 14
- Views
- 4K
- Replies
- 14
- Views
- 5K