Welcome to Tesla Motors Club
Discuss Tesla's Model S, Model 3, Model X, Model Y, Cybertruck, Roadster and More.
Register

Model 3 subwoofer install.

This site may earn commission on affiliate links.
Finally got a sub installed. Based on some other posts, I actually tried hooking up and aftermarket sub (10" RF DVC sub in a sealed box) to the stock amp. It didn't work very well even with the bass turned up all the way. Just not enough power to drive the sub effectively. I don't like to have too much bass. I just want the music to be accurately reproduced.

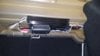
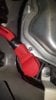
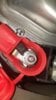
Crutchfield had a great sale on a 500 watt (300 watt RMS) Alpine amp (it was only $10 more than their 250 watt amp) and I installed that with a 10" Inifinity Kappa in a sealed box that I had from a previous install. It made all the difference in the world. The gain is set just a notch over minimum, with no additional bass boost and I have the head unit equalizer at 5 (so I can fine tune the bass to a certain extent without a remote boost controller). As mentioned above, the 12v post under the back seat made the install very easy and I also used the same ground point as the stock amp.

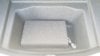
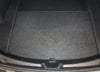
If I had to do it over, I'd probably go with a smaller amp, power wise, as I don't think I'm using more than a 1/3 of the power. I would also consider using an 8" sub as both the custom and the mass produced enclosures for the 10's I have do not completely fit under in the lower trunk. They're both slightly too tall, regardless of orientation, so the cover sits up just slightly. A good 8", properly powered would work just fine, IMO.
 
Last edited:
I'm interested in seeing how you wired the amp up, do you think replacing the sub in the factory enclosure with something a bit more powerful, and sealing up the box would work?
I can take some pics one of these coming weekends when I have a sec to clean up all the wiring, etc. I don't use this car for hauling anything besides a couple small plastic bags of groceries so I never use the frunk/trunk.

I don't think the stock amp has enough juice to do much more with a different 8" sub unless the stock is very inefficient and the aftermarket is very efficient. Member TEG put an 8" into the rear deck using the stock amp and I could see how that might work as it's pointing directly into the cabin with no barriers. Sealing up the stock enclosure will actually reduce the output/SPL. The stock enclosure might not have the right/optimal internal volume for a sealed application to work well either.
Yea, need to measure the volume of the enclosure sealed and find a suitable woofer. But typically ported boxes take up more room than sealed boxes require. New amp would be necessary to get the same output in a sealed box, but it you might be able to clean up the sound some going sealed and higher power.
 
I put a 10" in the trunk cubby thing. Bought a shallow mount sub woofer and faced it down. Didnt take up too much of the cubby space and I can still stack stuff on top of it. Amp is so small you cant even tell its there. Bass control is still handled by the OEM slider on the screen. Did not need to run a remote wire to switch the amp on and off as the PAC LP7 is controlled by audio input and has a 12V remote output to control the amp. Just tapped into the subwoofer feed from the stock amp and regulated it with the PAC and the gain on the amp.

https://www.amazon.com/gp/product/B00JQTU3QC/ref=ppx_yo_dt_b_asin_title_o03_s00?ie=UTF8&psc=1

https://www.amazon.com/gp/product/B000FKP7TY/ref=ppx_yo_dt_b_asin_title_o02_s01?ie=UTF8&psc=1
https://www.amazon.com/gp/product/B00F0YASQ2/ref=ppx_yo_dt_b_asin_title_o02_s01?ie=UTF8&psc=1
https://www.amazon.com/gp/product/B00UG7ATIA/ref=ppx_yo_dt_b_asin_title_o02_s00?ie=UTF8&psc=1
https://www.amazon.com/gp/product/B077YB123S/ref=ppx_yo_dt_b_asin_title_o01_s00?ie=UTF8&psc=1

This sounds like a great solution. Would you mind posting pics of your install and wiring?
 
Someone needs to come up with sub box plans for a 3D printer that will fit perfectly where the stock sub is.
Is the area where the stock sub is big enough for a good sub? Looking at the size of the magnet in the stock sub, it seems like any decent sub would not fit in that area. I'm way more interested in an enclosure that perfectly fits the cubby under the trunk cover.
 
Is the area where the stock sub is big enough for a good sub? Looking at the size of the magnet in the stock sub, it seems like any decent sub would not fit in that area. I'm way more interested in an enclosure that perfectly fits the cubby under the trunk cover.
I'm going to make myself one out of fiberglass for the under-trunk. I suppose I could try to 3D print something instead.. I just hate making large prints that have to be put together. Doesn't seem sturdy enough for the kind of pressure you're putting on it in an application like this.

To answer your question, if you converted to a sealed box, you might be able to get enough volume for a good 8" and MAYBE a 10". A ported box is typically much larger, and I don't think you'd be able to fit anything larger than 8" in that space. I've never been a fan of ported enclosures anyway. Just my .02, I haven't actually measured anything.
 
  • Like
Reactions: Glamisduner
I'm going to make myself one out of fiberglass for the under-trunk. I suppose I could try to 3D print something instead.. I just hate making large prints that have to be put together. Doesn't seem sturdy enough for the kind of pressure you're putting on it in an application like this.

To answer your question, if you converted to a sealed box, you might be able to get enough volume for a good 8" and MAYBE a 10". A ported box is typically much larger, and I don't think you'd be able to fit anything larger than 8" in that space. I've never been a fan of ported enclosures anyway. Just my .02, I haven't actually measured anything.

Thanks. I am hoping my Elemental Designs sub I had in previous car would fit in the 3 w/o losing any trunk space/access.
Here's specs on the sub I still have: Elemental Designs - Product Info
 
  • Like
Reactions: Glamisduner
This sounds like a great solution. Would you mind posting pics of your install and wiring?

I dont have any pics of the wiring. Putting the trunk seal on was a pain in the butt so I dont want to rip it apart if I dont have to.

However here are pics of the subwoofer and the amp. Also where I hooked the positive for the amp under the back seat.
 

Attachments

  • 20190204_142746.jpg
    20190204_142746.jpg
    431.8 KB · Views: 1,576
  • 20190314_071618.jpg
    20190314_071618.jpg
    311 KB · Views: 1,554
  • 20190314_072407.jpg
    20190314_072407.jpg
    296.7 KB · Views: 1,473
  • 20190314_072414.jpg
    20190314_072414.jpg
    269.2 KB · Views: 1,501
Sunday evening, I got the 'Cannot maintain vehicle power' error message and the car had to be towed to the SC.
"Cannot maintain vehicle power" error message

Here's a copy and paste of the situation: So I just heard back from the SA. He said the tech traced the issue back to my amplifier and sub install. (Like others,) I ran the power wire for the amp from the 12v post under the back seat as it is very convenient. I insulated the power wire with additional plastic/rubber conduit, wrapped the fuse holder in neoprene, used the stock ground point for the ground wire, etc. but... I'm not sure this is the actual reason for the error code but I will remove the amp and sub and see if the issue returns. I'll ask if they think it's OK to run a power wire off the actual battery in the front. It'll be a bummer if I can't use the sub, but not the end of the world.

Just FYI.
 
I'm a new lurker on this thread, as I'm switching from my 2014 Model S to a Model 3 Performance later this week. One of the features I especially liked about the Model 3 vs. S was the sound system.

I just had to respond to the OP's claim that the Model S subwoofer hit harder -- I have never heard any such compliments of the Model S sub, nor was it warranted for mine. The UHFS in my 2014 S is FAR inferior to the premium sound in Model 3. No comparison.

But I totally get the itch to upgrade (big reason I'm selling my S!!)
hmmm I thought the UHFS sound system was much better in the 2014 loaner S I had...
 
Not sure why some cars get this error msg and some do not. I'm tapping my 12v in the same spot pulling 800W to drive 12" speakers. I have not had this error.
That's what the tech said as well. He said that some are having issues. Some aren't. The Alpine is rated at 300 watts rms @4 ohms and I had the gain turned down almost to the min. I don't want huge, mirror shaking bass. Just want accurate reproduction of the low frequencies. I already miss the bass... Thinking about a 10" bazooka to run off the stock amp and putting it inside the cabin behind the rear seat (covered up from prying eyes with an old towel or something...)
 
Everyone -
Just completed a sub-woofer upgrade installation to my 2 week old Model 3. Yes, the premium audio system is amazing, though certainly lacks enough low-end to satisfy the discerning ear. After reviewing videos and scouring the boards for ideas, I undertook the install which only lasted a couple of hours. That said, the install is fairly simple and you'll be amazed with the end result. Here are the steps:

Purchase the following items:
  1. Remove plastic trunk edge strip and the 3 connectors holding the trunk carpet in place. No need to remove the carpet section entirely as you'll be able to route the power wires (amp line & 12-volt for the LOC) easily underneath the carpet and up to the 12-volt connection under the rear seat on the right side of the vehicle. BTW - You'll need to remove the rear seat bottom as well. See the video on how to remove each of these item near the top of this thread.
  2. Once the power is routed, cut a small hole in the lower truck section of the carpet and pull the amp power line through as well as the amp ground and amp turn-on wire from the LOC, and finally, the RCA jack line.
  3. Prep the PAC LOC by installing butt connectors on the wires.
  4. On the LOC wire harness, you'll need to cut off 1 set of RCA jacks and strip the wires back about a 1/4".
  5. Locate the Model 3's sub-woofer and amp in the rear right corner (again, see the aforementioned video) and unplug the wire harness going into the sub-woofer box.
  6. Using the Posi Taps, install one on the green wire (pos) and one on the orange wire (neg).
  7. install the positive & negative speaker lines off of the LOC to the Posi Taps. This will carry you signal to the LOC.
  8. Connect the 12-volt line to the LOC.
  9. Splice on a couple feet of 18 gauge wire to the 12-volt turn-on on the LOC wire harness and run that line also through the lower trunk section with the other wires.
  10. In the rear, under the carpet section, grind off a 1"x1" section of the Model 3 metal to situate the ground for the amp & LOC. I used a Dremel tool with a grinder bit to perform this.
  11. Secure the ground lines with a self-tapping screw.
  12. Plug the RCA jacks from the amp, into the LOC.
  13. Situate the loaded sub-woofer enclosure into the lower trunk, as well as the amp. I installed my amp on top of the enclosure, as I had plenty of room.
  14. Finish wiring up the amp and re-install 2 of the clips to hold the carpet section to the body of the car.
  15. Check and double check your work, ensuring all connections are correct and secure.
  16. To make the final power connection; locate the 12-volt batter source (see video) and remove the red cap to provide access to the positive post.
  17. Using a ring connector, secure to the stripped end of the amp power cable & LOC 12-volt cable.
  18. Before installing on the positive power post, make sure that the interior lights are not on and that nothing is being displayed on the dash screen.
  19. Make the connection and secure with a properly sized nut.
  20. Back in the trunk, reconnect the Model 3 sub-woofer wire harness back into the OEM sub-woofer.
  21. Turn the LOC adjustment down all of the way.
  22. Adjust the amp controls to 12 o'clock.
  23. Play a song with some solid bass, as well as some quiet sections of the song and adjust the LOC until you have sound at the new sub-woofer.
  24. Adjust further until there's some distortion and then back off slightly until the distortion is gone.
  25. Make final adjustments on the Rockford Fosgate amp settings to your liking.
  26. Button up everything (rear seat bottom, carpet, etc.).
  27. Enjoy!
 

Attachments

  • Model 3 Subwoofer Installation 1.jpg
    Model 3 Subwoofer Installation 1.jpg
    1.1 MB · Views: 2,077
  • Model 3 Subwoofer Installation 2.jpg
    Model 3 Subwoofer Installation 2.jpg
    1.1 MB · Views: 1,458
Great details on your install! Thank you. Now that it's installed....How does the the sub sound with it being in the sub-trunk area? Does it thump pretty good? Can you feel the bass in the front seats?

Everyone -
Just completed a sub-woofer upgrade installation to my 2 week old Model 3. Yes, the premium audio system is amazing, though certainly lacks enough low-end to satisfy the discerning ear. After reviewing videos and scouring the boards for ideas, I undertook the install which only lasted a couple of hours. That said, the install is fairly simple and you'll be amazed with the end result. Here are the steps:

Purchase the following items:
  1. Remove plastic trunk edge strip and the 3 connectors holding the trunk carpet in place. No need to remove the carpet section entirely as you'll be able to route the power wires (amp line & 12-volt for the LOC) easily underneath the carpet and up to the 12-volt connection under the rear seat on the right side of the vehicle. BTW - You'll need to remove the rear seat bottom as well. See the video on how to remove each of these item near the top of this thread.
  2. Once the power is routed, cut a small hole in the lower truck section of the carpet and pull the amp power line through as well as the amp ground and amp turn-on wire from the LOC, and finally, the RCA jack line.
  3. Prep the PAC LOC by installing butt connectors on the wires.
  4. On the LOC wire harness, you'll need to cut off 1 set of RCA jacks and strip the wires back about a 1/4".
  5. Locate the Model 3's sub-woofer and amp in the rear right corner (again, see the aforementioned video) and unplug the wire harness going into the sub-woofer box.
  6. Using the Posi Taps, install one on the green wire (pos) and one on the orange wire (neg).
  7. install the positive & negative speaker lines off of the LOC to the Posi Taps. This will carry you signal to the LOC.
  8. Connect the 12-volt line to the LOC.
  9. Splice on a couple feet of 18 gauge wire to the 12-volt turn-on on the LOC wire harness and run that line also through the lower trunk section with the other wires.
  10. In the rear, under the carpet section, grind off a 1"x1" section of the Model 3 metal to situate the ground for the amp & LOC. I used a Dremel tool with a grinder bit to perform this.
  11. Secure the ground lines with a self-tapping screw.
  12. Plug the RCA jacks from the amp, into the LOC.
  13. Situate the loaded sub-woofer enclosure into the lower trunk, as well as the amp. I installed my amp on top of the enclosure, as I had plenty of room.
  14. Finish wiring up the amp and re-install 2 of the clips to hold the carpet section to the body of the car.
  15. Check and double check your work, ensuring all connections are correct and secure.
  16. To make the final power connection; locate the 12-volt batter source (see video) and remove the red cap to provide access to the positive post.
  17. Using a ring connector, secure to the stripped end of the amp power cable & LOC 12-volt cable.
  18. Before installing on the positive power post, make sure that the interior lights are not on and that nothing is being displayed on the dash screen.
  19. Make the connection and secure with a properly sized nut.
  20. Back in the trunk, reconnect the Model 3 sub-woofer wire harness back into the OEM sub-woofer.
  21. Turn the LOC adjustment down all of the way.
  22. Adjust the amp controls to 12 o'clock.
  23. Play a song with some solid bass, as well as some quiet sections of the song and adjust the LOC until you have sound at the new sub-woofer.
  24. Adjust further until there's some distortion and then back off slightly until the distortion is gone.
  25. Make final adjustments on the Rockford Fosgate amp settings to your liking.
  26. Button up everything (rear seat bottom, carpet, etc.).
  27. Enjoy!
 
Once the amp frequency, level and punch settings were adjusted to my liking, the sound in the cabin went from great to simply amazing! You don't have to rattle the mirrors to fill out the missing low-end, though if you wanted to...you can! With the sub in an up-fire configuration in the lower trunk with the cover on it, makes for perfect placement for the entire cabin.

Also, I haven't had any electrical error messages on the control screen.
 
  • Informative
Reactions: T3SL4AFBruh