Having now done a handful of towing trips with the M3, I felt some improvements could be made.
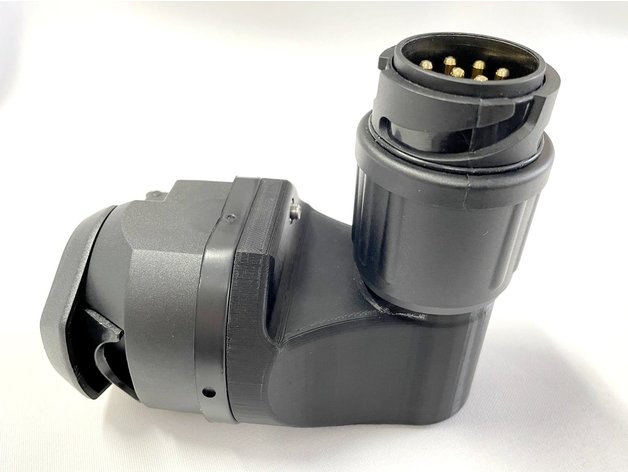
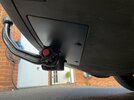
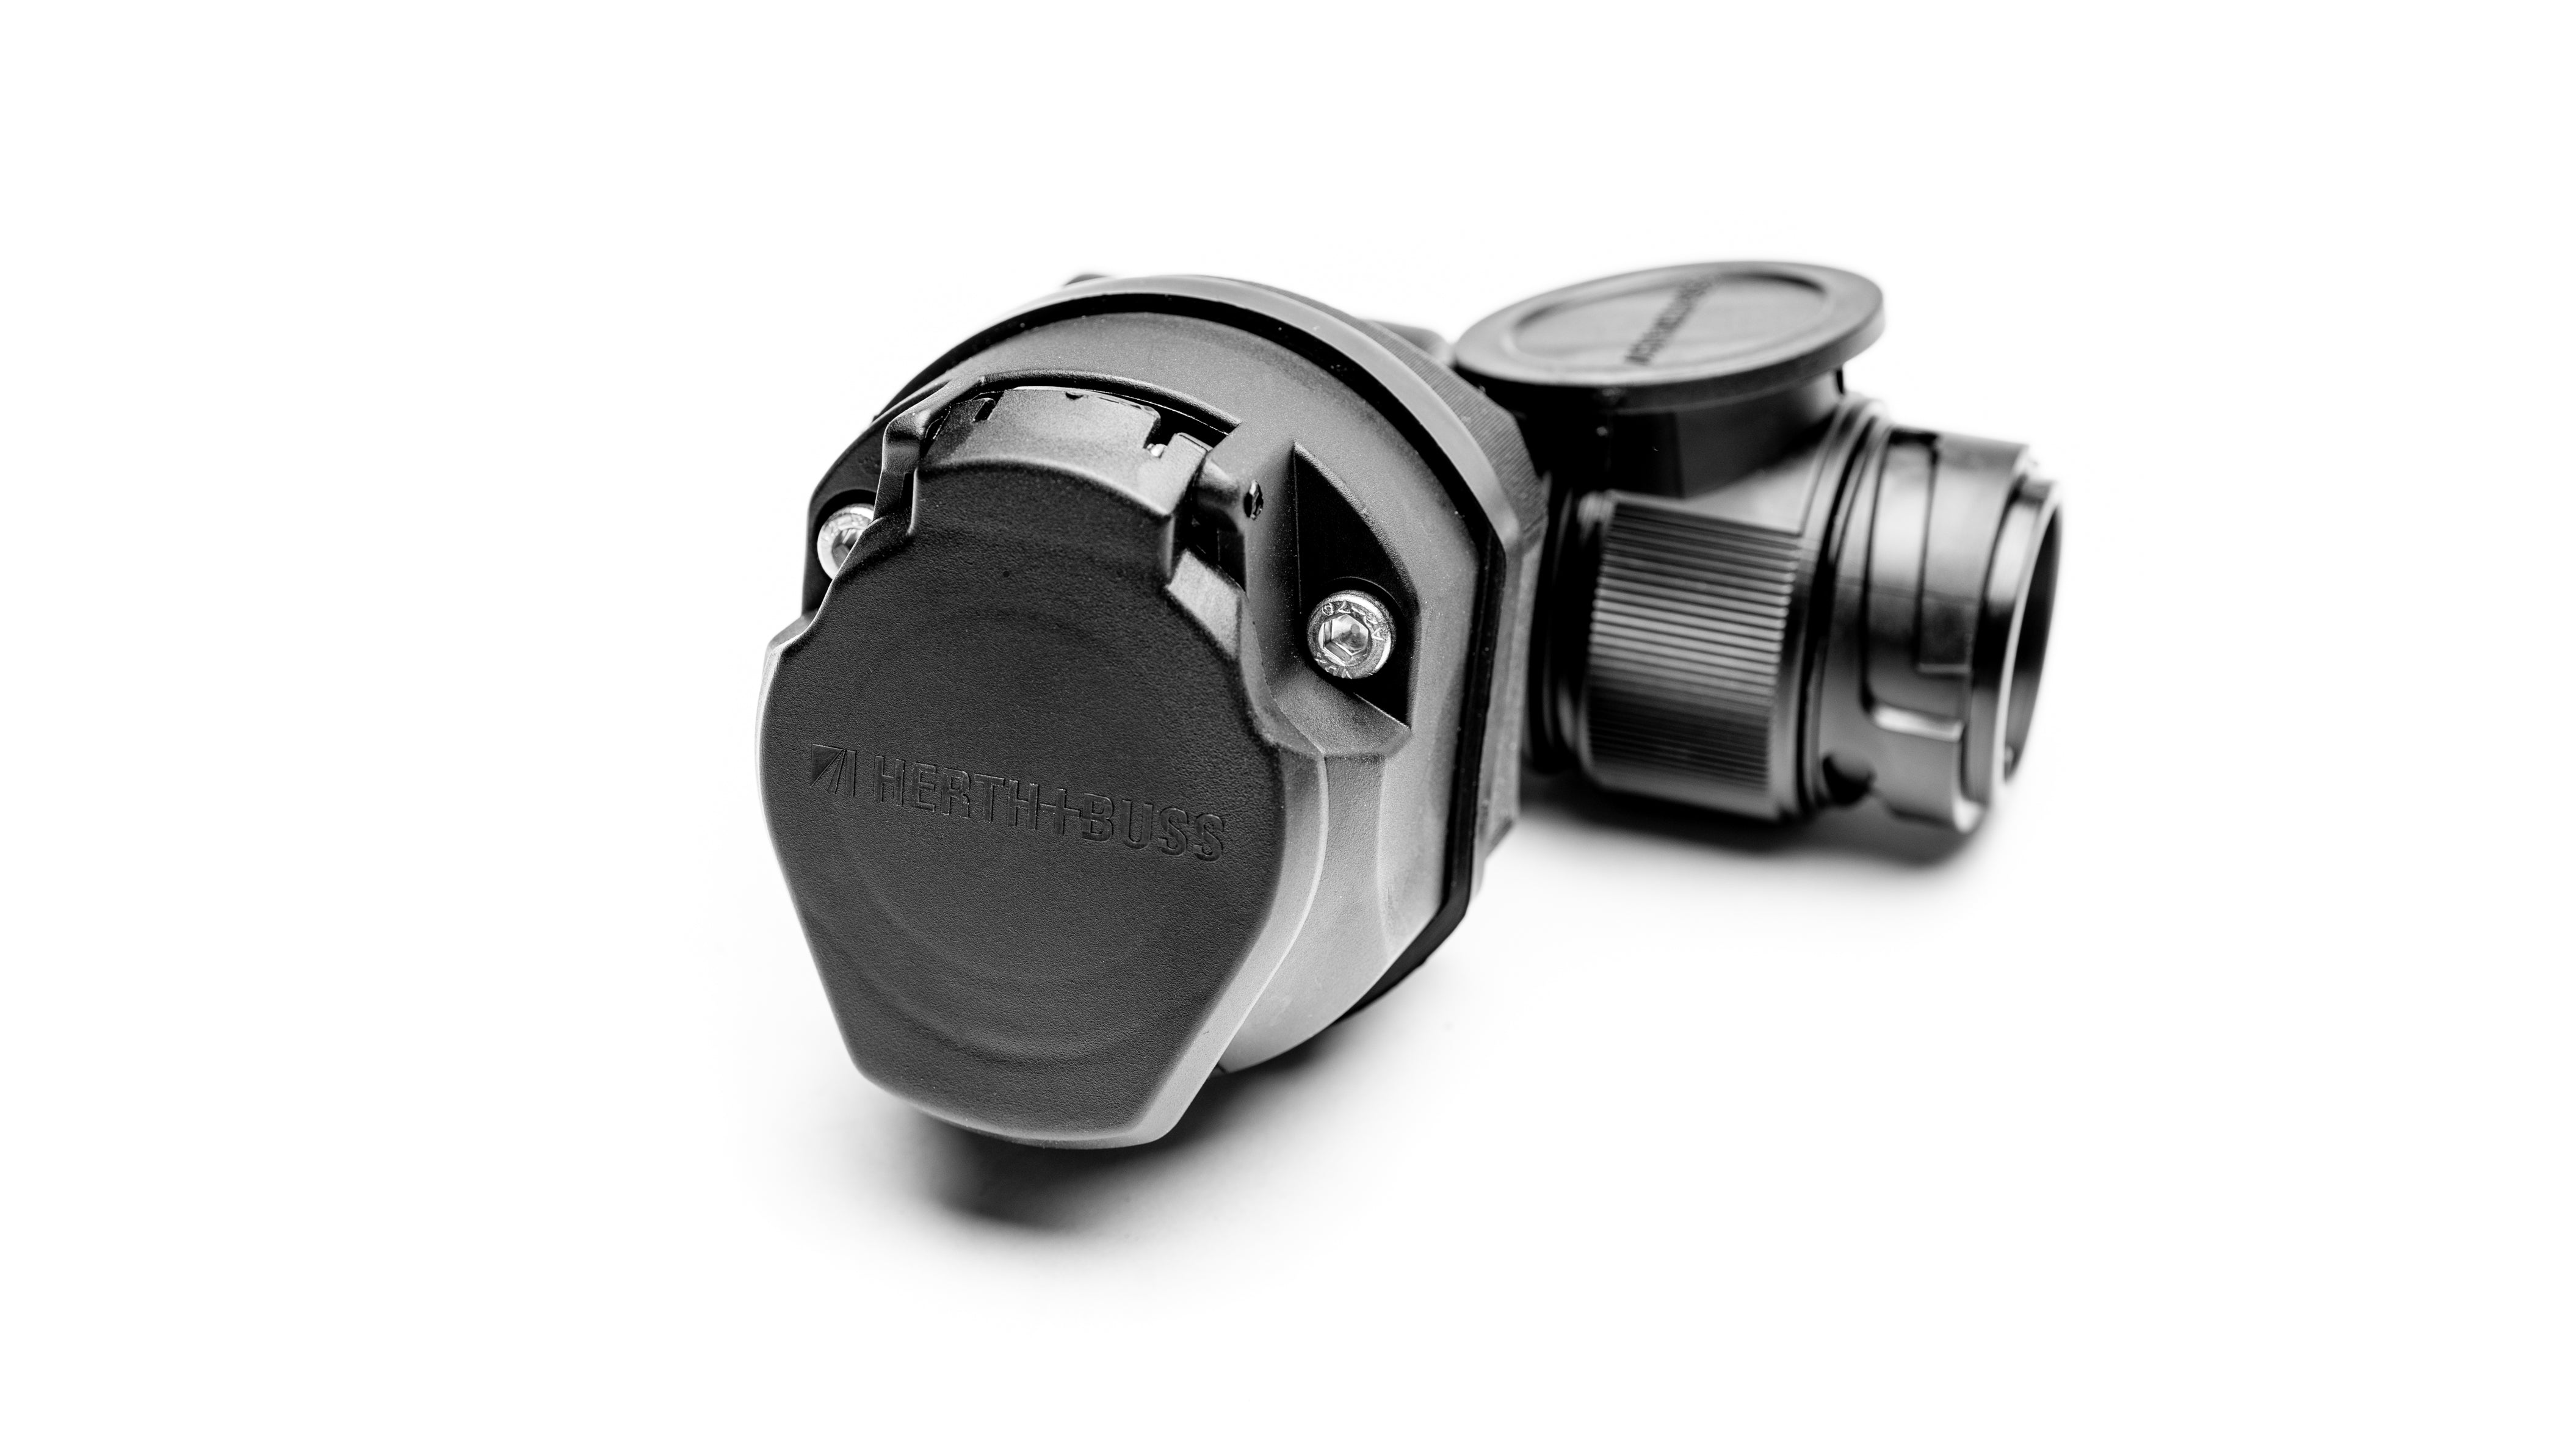
I saw a version of a 90º electrics adapter in another thread and stumped out for one from these guys:
 www.shop4tesla.com
It’s a bit steep at £90 including shipping, but having bashed my knuckles a handful of times already removing plugs, I was willing to pay the price. It is essentially an off the shelf plug/socket with a 90º bit that’s been 3D printed and all put together by them. There are 3D printer schematics for those who wish to save some pennies and make it themselves. In my younger days when I had more time and less money I probably would have gone that route… I haven’t yet tried it in anger, as it arrived whilst we were away during our latest trip.
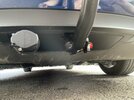
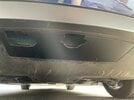
I also got a friend to 3D print a “towing cover” to stop dirt from getting in behind the bumper. I’m not sure why Tesla thought it would be a good idea to leave that entire area exposed as they could have simply provided another cover with the appropriate cutouts, but there we go…
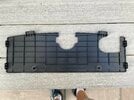
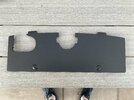
This is the schematic for the cover:

 www.thingiverse.com
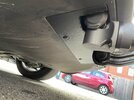
Despite being specifically designed for the M3, I had to dremel some bits off to make it fit properly.
www.thingiverse.com
Despite being specifically designed for the M3, I had to dremel some bits off to make it fit properly.
And here’s the result. I think it looks neat and should do nicely during longer trips:


I saw a version of a 90º electrics adapter in another thread and stumped out for one from these guys:
Angle adapter for the trailer hitch of the Tesla Model 3 (13-pin)
Exactly fit for Tesla Model 3 with trailer hitch,Exclusive at Shop4Tesla. By default, the Model 3 the 13pin socket of the trailer hitch goes down, so when the cable is plugged in, the ground clearance is greatly affected. Our angle adapter ensures that the cable protrudes to the rear, so that...
It’s a bit steep at £90 including shipping, but having bashed my knuckles a handful of times already removing plugs, I was willing to pay the price. It is essentially an off the shelf plug/socket with a 90º bit that’s been 3D printed and all put together by them. There are 3D printer schematics for those who wish to save some pennies and make it themselves. In my younger days when I had more time and less money I probably would have gone that route… I haven’t yet tried it in anger, as it arrived whilst we were away during our latest trip.
I also got a friend to 3D print a “towing cover” to stop dirt from getting in behind the bumper. I’m not sure why Tesla thought it would be a good idea to leave that entire area exposed as they could have simply provided another cover with the appropriate cutouts, but there we go…
This is the schematic for the cover:
Tesla Model 3 Tow Hitch Cover by Taiwantoni
When fitting the tow hitch in the Model 3, you have to remove the cover which leaves a big hole for lots of dirt to get in. This cover only spares the tow hitch itself and the plug for the electrical connection. Since the cover would be to big for my 3D printer, I made 2 halfs and a connector...
www.thingiverse.com
And here’s the result. I think it looks neat and should do nicely during longer trips: