Welcome to Tesla Motors Club
Discuss Tesla's Model S, Model 3, Model X, Model Y, Cybertruck, Roadster and More.
Register

Model S Refresh Mud/Splash Guards

This site may earn commission on affiliate links.
Remainnig batch #1 guys -- I ran out of hardware. :S I'm ordering more hardware from Carr for the rest of batch 1 -- as well as ordering the supplies for Batch #2. I'm still going to cut the rest of Batch #1's flaps shortly.

ALSO -- I'm showing 9 delivered Batch #1's so far, but no pictures posted here. :'(
In summary, I’m an idiot so was only able to install the fonts when they arrived last Thursday… but the day after install, I did a drive in gross, spitting winter weather… they were INCREDIBLE! Absolute night and day having the flaps on…

The fully story (Albeit slightly embarrassingly for me….)
I don’t have the rears installed yet because I can’t listen to directions and have to learn the hard way… (my wife was not surprised). In your video, you clearly and strongly suggest taking a moment to put a towel down so the well nut doesn’t disappear if my fingers are made of butter (spoiler alert… they are).

Anyway, I felt WAY too bad to ask you to send me a replacement well nut, so I went to 5 different hardware / auto stores with no luck, and finally ordered (several) online and received them today in the mail… am headed out of town for work tomorrow but will install back mudflaps this weekend when I’m home….

Long story short…. don’t be a 🤡 like me…. Listen to M4H4X and spend 6 seconds to put a fu*&ing towel down….


C11E500C-969C-40CE-949D-FD22A8FAEF35.jpeg


2BFC6EB7-EC4F-48DF-A80E-7E7EB1A184EA.jpeg
 
In summary, I’m an idiot so was only able to install the fonts when they arrived last Thursday… but the day after install, I did a drive in gross, spitting winter weather… they were INCREDIBLE! Absolute night and day having the flaps on…

The fully story (Albeit slightly embarrassingly for me….)
I don’t have the rears installed yet because I can’t listen to directions and have to learn the hard way… (my wife was not surprised). In your video, you clearly and strongly suggest taking a moment to put a towel down so the well nut doesn’t disappear if my fingers are made of butter (spoiler alert… they are).

Anyway, I felt WAY too bad to ask you to send me a replacement well nut, so I went to 5 different hardware / auto stores with no luck, and finally ordered (several) online and received them today in the mail… am headed out of town for work tomorrow but will install back mudflaps this weekend when I’m home….

Long story short…. don’t be a 🤡 like me…. Listen to M4H4X and spend 6 seconds to put a fu*&ing towel down….
Are you removing the rear wheels for install or trying it with them on? I don't have the ability to remove my wheels at home.
 
Last edited:
I have a question for those who bought the Tesla-made mudflaps. Were the lowest section (closest to the ground) made of solid plastic, or made of flexible rubber? I had ordered a set a looooooong time ago, and just now received them. I am wondering if Tesla is making them different now, as the lower section is a flexible rubber piece and might not break so easily.

Flexible however the issue isn't breaking per se. They end up getting ripped off the car unless you trim at least 2 full inches from the bottoms. The problem is primarily with speed bumps. Even when going super slow, as the front wheel rolls off the speed bump it's a near-vertical slam of the tip of the flap into the top of the speed bump.
 
  • Like
Reactions: pvdoug
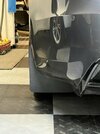
Got my fronts installed today! Definitely glad I put the towel down because I 100% dropped the first one, and the towel saved my butt. I had to move the 3m tape a bit like mentioned in the video, but was super easy. I think I have it in the right spots anyways. These are the best pics I have right now, but I did a quick test on my driveway hump, and not even close to rubbing! Granted, I use "very high" at my house, but the Tesla OEM ones scraped like crazy. Thanks @M4H4X !

IMG_3583.JPEG


IMG_3582.JPEG
 
It is super easy to do. A breaker bar makes removal of the nuts easy and ensure you have a torque wrench with a high enough rating as they are 129 lb.ft which is quite high. Suggest not using an impact gun and retighten the wheel lugs after about 30 miles of running. The wheels/tires are HEAVY !!! but the job is easy.
 
  • Like
Reactions: MFrunkerOG
It is super easy to do. A breaker bar makes removal of the nuts easy and ensure you have a torque wrench with a high enough rating as they are 129 lb.ft which is quite high. Suggest not using an impact gun and retighten the wheel lugs after about 30 miles of running. The wheels/tires are HEAVY !!! but the job is easy.
Not my wheel and tires :) they weigh in at a slim 45-50lbs each
 
  • Like
Reactions: Proppilot
Took me about 2 hours to install just the front ones of these. Made a couple of big mistakes. On one of the front wheels when using the multi-size drill bit I went too large. I tired to use that hole stil and managed to push the nut in and have been unable to retrieve it. Hope it's not going to rattle around constantly now :( Didn't have time to get to the backs today. Will tackle later in the week. The fronts for me at least we're probably a step in difficultly too far. I probably should have waited for the OEMs and had Tesla installl. Anyway, here's some shots of the front. Running 285 PIlot Sport As tires.

573FEEFA-DB83-4DDC-901C-A35A8998B5DE.jpeg
66E3E9D0-5B7F-4A4E-B5F7-AFF48730C02E.jpeg
2E22F982-4A04-4D7F-8DFC-C3AF5F1ED0F6.jpeg
 
Took me about 2 hours to install just the front ones of these. Made a couple of big mistakes. On one of the front wheels when using the multi-size drill bit I went too large. I tired to use that hole stil and managed to push the nut in and have been unable to retrieve it. Hope it's not going to rattle around constantly now :( Didn't have time to get to the backs today. Will tackle later in the week. The fronts for me at least we're probably a step in difficultly too far. I probably should have waited for the OEMs and had Tesla installl. Anyway, here's some shots of the front. Running 285 PIlot Sport As tires.

View attachment 772147View attachment 772149View attachment 772148
Looks awesome! OEM ones suck, so be glad you skipped them. Mine are in my trash can right now.
 
Yeah the well nuts are a B*TCH to deal with, I was not happy with it, but they hold very well and seal the holes against water intrusion. The holes on the front are just in this weird size-range where most nylon fasteners will just not work -- they will be too short, too tight, or too loose.

If you're having a ton of a hard time getting them in, I suggest sticking the drill bit in the hole and then angling it and rotating it just to round the edges of the hole on both sides, it helped me -- and if the hole just gets a "tad" bit too big, that's fine because the well nut will still swell up large enough to provide a tight fit when you're done.

Anyways, I had to take a break. It seems like I handle about 10 sets at a time and then have to rest a bit.

I just ordered hardware and material to finish the next 5 sets as well as produce the next 12ish sets.

Batch #1 will be completed this week (and hardware for it should be here Friday so I might be able to ship it Saturday):
Batch #2 supplies ordered.

Updated graphs:
1645583559571.png

1645583574610.png
 
Took me about 2 hours to install just the front ones of these. Made a couple of big mistakes. On one of the front wheels when using the multi-size drill bit I went too large. I tired to use that hole stil and managed to push the nut in and have been unable to retrieve it. Hope it's not going to rattle around constantly now :( Didn't have time to get to the backs today. Will tackle later in the week. The fronts for me at least we're probably a step in difficultly too far. I probably should have waited for the OEMs and had Tesla installl. Anyway, here's some shots of the front. Running 285 PIlot Sport As tires.

View attachment 772147View attachment 772149View attachment 772148
I know where that nut is, it's in your rocker panel hanging out by the front wheel. I did that too once and I retrieved it by slightly pulling loose the front of the rocker panel and reaching in from underneath.

If you drilled the hole out too big, I suggest installing the well nut onto the flap without tightening it -- then sticking it in the hole and holding it against the car then tighten it. It should swell up enough to grip/seal the hole anyways.

Oh and one last thing -- if the hole is so big that the well nut rotates in the hole instead of tightens down -- just put a few layers of tape or something around it to make it large enough to grip the hole -- once it starts threading on and swelling it will handle the rest.
 
Small update -- Hardware is out for delivery today, plastic is still trying to get out of Florida for some reason but delivery is expected between Wed-Fri. I have enough spare plastic to cut a few sets in the interim once the hardware gets here so expect a few orders to go out soon.

Yesterday I cut the first CNC rear flap tool for the new router table flush-cut flaps to match up with the fronts in the previous batch. So everything is ready to go now, I'm just waiting on parts.

IMG_0063.jpg
IMG_0064.jpg
IMG_0066.jpg
IMG_0065.jpg
IMG_0071.jpg
 
Looks awesome! I can't wait to have them on my S, but I'm in the camp of being hesitant about drilling/installing. Although it's probably justified as I'm completely useless with anything mechanical. Oh and you don't want to see any home "improvement" projects I've attempted. 😅

If I can do it, a blind monkey can! 🤣
 
  • Like
Reactions: DBV1