... My roadster seems to throw everything in the door sill.
Not quite everything. The rest ends up on top of the rear pan and/or in the fans/PEM.


You can install our site as a web app on your iOS device by utilizing the Add to Home Screen feature in Safari. Please see this thread for more details on this.
Note: This feature may not be available in some browsers.
... My roadster seems to throw everything in the door sill.
Thanks for posting this! How do you keep the bulb seal from scratching the sill when you open and close the door? There is always a little dust there and I haven't figured out a way to prevent that. Maybe a strip of clear paint armor or something similar? On my 2.5 there is already paint armor on the vertical side where the garage door seal will contact the paint.
Yea great question!
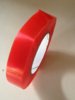
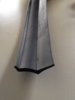
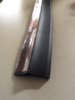
The fact is the bulb seal really doesn't make contact on my car, however, I did put a piece of clear contact paper on the vertical in anticipation. All cars are different so may want to gauge the clearance and make adjustments. The Lowes garage seal is soft so I have had no problem there but the harder seal I found at Ace would definitely be a problem without "star shield" or contact paper. I'm still figuring out what to do about the front of the door. I put some bulb seal, which is pretty soft, up there but the gap is just too big.
I thought the whole purpose of the bulb seal was to divert water coming from above to the outside where it can drain. If the bulb seal doesn't make contact then how do you keep water from collecting in the bottom of the door sill? Won't the garage seal trap it in there? The bulb seal will divert water that comes from the top of the door to the outside so it can drain, but only if it makes contact. There's a lot of water because the recess for the door actuator funnels it down so it drains onto the sill.
I thought the whole purpose of the bulb seal was to divert water coming from above to the outside where it can drain. If the bulb seal doesn't make contact then how do you keep water from collecting in the bottom of the door sill? Won't the garage seal trap it in there? The bulb seal will divert water that comes from the top of the door to the outside so it can drain, but only if it makes contact. There's a lot of water because the recess for the door actuator funnels it down so it drains onto the sill.
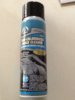
Be careful with the brake cleaner! I think that will take the paint off. It can damage plastic parts as well. I usually wash and dry, then wipe down with alcohol. I think I will use paint protector where ever it makes contact.
Paint protector where bulb seal rums ........... great idea!
I used clear contact paper. Do you have a better idea?
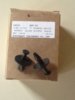
I really do not have much problem with mud or other gunk on my door sills. Two things I did were to add bigger mud flaps behind the front tires and I added a seal to the bottom of the door very similar to what is described earlier in the thread. Warning both require drilling as I could not get double faced tape to work on the seal and drilled 4 holes to secure and the mud flap extensions I drilled small holes in the existing mud guard. View attachment 37707View attachment 37708View attachment 37709View attachment 37710
I like this mud flap idea. It doesn't seem to increase drag because the profile appears to be within the wheel dimension and not sticking out. What kind of flap did you get? Generic Trak Auto trimmed with sheet metal shears or something special?
They were generic, lower cost all purpose mudflaps purchased at Advanced Auto. I think they were about $11. I had to trim and used some heavy shears. I then used some black sheet metal screws to tap into the existing mud flaps. I figure if I take them out the small holes can be filled in black silicone glue if need be.