Welcome to Tesla Motors Club
Discuss Tesla's Model S, Model 3, Model X, Model Y, Cybertruck, Roadster and More.
Register

My FWD door is stuck open due to a botched DIY adjustment

This site may earn commission on affiliate links.
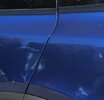
So the door is now aligned on the left with the a-pillar and on the rear with the rear quarter panel. Those are two anchor points that are not movable. Also, the gaps are at least parallel if not even. The gap between the front door and FWD is too large but that's because the gap between the front door and the front fender is nearly non existent, so this is an easy fix.

i-hftW9kK[1].jpg


The rear hatch is now not aligned with rear top of the FWD. Funny thing is on the day of delivery, when I complained about the FWD alignment and they made adjustments over 3 hours before left with it, rather than raising the rear of the FWD, they lowered the left side of the liftgate so that it would match the FWD yet the FWD was too low and not aligned with the rear quarter panel. I now have to re-adjust the liftgate back up about 1.5 mm which is where it was at delivery.

i-twhNWQ8[1].jpg


The also adjusted the fender trim under the quarter panel to align with the fwd trim when the lowered the liftgate hinge.
i-fhr6WgT[1].jpg


So now I need to also adjust the trim upward. You can see the gap above it. Once I move it back up, the gap will be closed and the bottom will match the fwd portion of the trim.

Essentially, Tesla unadjusted a bunch of things to try and cover up the thing that needed adjusting but didn't want to do the fwd adjustment because it takes far more time and labor to do so.
 
  • Informative
Reactions: henderrj
Also, all the roof mounted door stops on both sides were not properly adjusted. This resulted in the doors going too low before being pulled back up by the latching. This resulted in the seals on the roof bending back every time. THIS is what causes the seals to tear, not sun exposure. I've fixed all the stops now so that the doors rest on the inner roof frame rather than having all the door weight sitting on the latches which is not what they're for. The latches are to hold the door closed and take SOME of the weight but not all of it. Especially stressful on the latches when going over bumps because the weight of the door is accelerated quickly in sheering force on the latch.

i-pZ8XHNM[1].jpg

The above is a screen shot from the video when the door closes. Before the adjustment, it was only like this for the brief instant when closing right before the latch pulls it back up.
 
  • Informative
  • Helpful
Reactions: henderrj and croman
Was going to attempt a secondary hinge adjustment to improve the alignment today which requires propping the door open with a hoist so that you can disconnect the secondary strut on the secondary hinge.

Followed the service manual. Got to the point of disconnecting and removing the secondary strut. Disconnected the harness, and then released the c-clamp door side and pulled the strut back.

Suddenly the strut extended further...about another inch. This is beyond the hinge's extension limit. The problem is the strut is a servo motor that is designed to allow it to open without power but it cannot be forced closed. It can only close by the controller turning the motor inside to retract it.....period.

The service manual says nothing about it extending or what to do if it does extend.

I'm now going to attempt to use the calibration button on the screen to close the FWD with all the other strut harness disconnect except for the secondary strut that is removed. I'm going to plug that back in and hope that as it retract, I can tighten a zip tie that I have looped through strings tied to both ends that will hopefully hold it into place.

I can't believe this what would be required to shorten the strut back to a length that it can be installed. Perhaps the service centers have bench controller that allows them to retract the struts for installation but the service manual doesn't provide any such indication.

Wish me luck!
did you buy a $1,900 Ford Excursion 2000 or a $150k "luxury" electric suv? Outrageous that all this handyman work is required...Don't worry, i completely disassembled the interior of mine to get rid of the squeaks so you're not alone.
 
  • Like
Reactions: henderrj
did you buy a $1,900 Ford Excursion 2000 or a $150k "luxury" electric suv? Outrageous that all this handyman work is required...Don't worry, i completely disassembled the interior of mine to get rid of the squeaks so you're not alone.

I too removed nearly every panel to add felt or silicon grease to get rid of creaks and squeaks. It's nice and quiet now but spent probably 20 hours on it.
 
  • Like
Reactions: henderrj
I too removed nearly every panel to add felt or silicon grease to get rid of creaks and squeaks. It's nice and quiet now but spent probably 20 hours on it.
Hey Sorka- this is a bit elementary question compared to where you are now but now did you take out the FWD garnishes/alcantara trim? I attempted it with a trim tool but couldn't find a good spot to start. The service manual doesn't really go into a lot of detail either. Would you mind just taking a picture and marking where you started removing the clips from?

Thanks very much!
 
The three bolts holding the secondary rear hinge:
View attachment 885430

Popped out after I loosened hinge with primary strut still attached:
View attachment 885431

Propped up right before removing the rear primary strut:
View attachment 885432

Propping it back up before re-installing the primary strut:

View attachment 885434


Not really sure how to get around this next time. The secondary struts aren't manually compressible. Not a huge deal but it does mean you need a stable surface to put a standard 80" shop hoist on. Alternatively, someone could hold this just long enough to pop the primary strut back in place but they'd need to be standing on something unless they're like 6' 5".
I’m looking forward to your video. I’ve got mine to where I’m happy with them, EXCEPT on the passenger side door, at the rear of the doors roof glass the seal presses against the “spine”. Only that one door, and only on the rear. Bugs the crap out of me.
 
Hey Sorka- this is a bit elementary question compared to where you are now but now did you take out the FWD garnishes/alcantara trim? I attempted it with a trim tool but couldn't find a good spot to start. The service manual doesn't really go into a lot of detail either. Would you mind just taking a picture and marking where you started removing the clips from?

Thanks very much!

I shot videos just for removal and installation of lower garnish, interior roof cover, and the 3 brackets in the roof that hold that panel. The garnish is tricky. Tricky enough that Tesla service ripped off 4 of the 7 bracket towers that are glued into the garnish cover on the the back. They are fundamentally weak because their glued to a felt like backing. When I discovered this after an early service, they didn't bat an eye about replacing it promptly with a new one.

The service manual doesn't describe how to remove it. Basically you can't really get a tool in there. You need to yank it starting from the rear end that points down rather than the front. Reason is there is a tab on the front that sticks into a slot on the lower door panel so you can't start from this end. If you do you'll break something. Also the pillar parts of the cover pull out. The top of the garnish pulls down away from the roof.
Sorry I'm not understanding the rear vs front orientation. Could you take a look at the pic and let me know which spot I should start pulling from?
1671559815430.png
 
Sorry I'm not understanding the rear vs front orientation. Could you take a look at the pic and let me know which spot I should start pulling from?View attachment 887159

The numbers are over the roof interior cover. That just yanks away. You need to remove the lower garnish first which is slightly more complicated.

Rough unedited clip for removal:

 
Last edited:
Do these pics help? Is this worth messing with?

View attachment 887596

View attachment 887598

It's not super awesome but it won't destroy the seals. The kind of pinching I'm talking about really bends the seal one way or another.

Ideally there is no contact between the seals and the spine.

If you haven't already checked, there may be enough movement in the roof itself upon loosening the 10 nuts that hold into place to shift the roof outward 2 or 3 mm. You can check by undoing just a few nuts on opposite sides and seeing where the bolt is in the through hole of the roof frame. If it's currently centered, there's enough free play to move it out 3 mm. If it's already moved out, then the only option is to remove ALL struts, adjust both the primary hinges on the roof side and secondary hinges on the roof side.
How do I gain access to these bolts? Thanks for suggestion and help, by the way.
 
How do I gain access to these bolts? Thanks for suggestion and help, by the way.

Just realized the unanswered question. See the videos I posted above on how to remove the garnish and roof cover. After that, you'll need to unscrew the 3 brackets that hold the roof cover with a torx bit. That part is super easy. After that, you'll have access to all 10 nuts holding the glass roof on.
 
Just realized the unanswered question. See the videos I posted above on how to remove the garnish and roof cover. After that, you'll need to unscrew the 3 brackets that hold the roof cover with a torx bit. That part is super easy. After that, you'll have access to all 10 nuts holding the glass roof on.
Thanks. When I get back from Barbados I’ll check it out. How much time do you think one should allocate for this project? I just need to adjust the top glass on one falcon wing door.