This is a good read: tl:dr - rotors are not actually warped, rather they have inconsistent friction characteristics due to high and low spots on the surface of the rotor, due to improper installation of the wheel, and/or improper bedding of the pads on the new rotor.
Tesla tech's don't condition/bed in the new brakes, they just install, run around the block once to make sure the car stops, and hand it off to the customer, without giving instructions on how to condition the brakes. The seasoning of the rotors given below is the longest procedure I have read yet, most others just claim to brake gently over the first several hundred miles (but if one is on the highway, several hundred miles might mean very little braking)
The guys at
StopTech have the science of brake systems down.
So much so that they released a series of white papers that include everything from a basic glossary of brake terms to an in-depth look at the physics of braking. The topic that intrigued us the most was on common brake system myths. The paper covered six different myths, but three in particular caught our attention.
Myth #1: Brake Judder and Vibration Comes from Warped Rotors
StopTech says the term “warped brake disc” has been used in motorsports for years, but we’ve heard the same reference made on everyday passenger cars, too. In fact, brake vibration (and the warped rotor excuse) has led many cars to be returned to their manufacturer under lemon law rules.
But according to StopTech engineer Carroll Smith, brake vibration doesn’t come from warped brake discs.
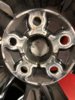
“Presuming that the hub and wheel flange are flat and in good condition and that the wheel bolts or hat mounting hardware is in good condition, installed correctly, and tightened uniformly and in the correct order to the recommended torque specification, in more than 40 years of professional racing…I have never seen a warped brake disc,” said Smith, who authored StopTech’s white paper on the topic. “I have seen lots of cracked discs, discs that had turned into shallow cones at operating temperature because they were mounted rigidly to their attachment bells or top hats, a few where the friction surface had collapsed in the area between straight radial interior vanes, and an untold number of discs with pad material unevenly deposited on the friction surfaces — sometimes visible and more often not.”
Smith says every vibration issue he’s seen attributed to a warped brake disc has actually turned out to be friction pad material that was transferred unevenly to the surface of the rotor. This uneven build-up results in thickness variation (TV) or run-out due to hot spotting that occurred at elevated temperatures.
Smith explains how the problem occurs by taking a
more in-depth look at the nature of braking friction in his white paper. The bottom line, though, is you must properly break in your brake pads and rotors to prevent materials from transferring between surfaces in a random fashion. This allows the bonding resins to be burned off slowly to prevent uneven deposits and fade. The right break-in procedure will also relieve any thermal stresses on new
brake rotors and will transfer a smooth layer of pad material onto the disc.
It’s also important to choose the right
brake pad materials for your driving style. According to Smith, there is no such thing as an ideal all-around brake pad. For example, a friction material that is quiet and functions at low temperatures around town won’t stop a car that’s being driven hard. A true racing pad, used under normal conditions, will be noisy and not work well at low temperatures around town.
So what pad should be used in high performance street cars?
“The answer is a high performance street pad with good low temperature characteristics,” Smith stated. “The reason is simple: If we are driving really hard and begin to run into trouble, either with pad fade or boiling fluid, the condition comes on gradually enough to allow us to simply modify our driving style to compensate. On the other hand, should an emergency occur when the brakes are cold, the high temperature pad is simply not going to stop the car.”
Again, the right pads, mounting procedures, and
pad/rotor break-in process are key to avoiding dreaded brake judder.
There are two very good reasons to bed-in brake pads—three, if not crashing ranks as a top priority:
- Transferring brake pad material evenly onto your brake rotors to avoid unwanted vibration and brake judder.
- To drive out resins used to bind brake pad material during manufacturing, but need to be cooked out in order for pads to produce proper brake friction.
We’re going to tell you how to do both, based on the collective wisdom of the brake system geniuses at StopTech and Baer.
Important Note: Don’t try to bed-in brake pads without seasoning your rotors. Also, when bedding your pads, give yourself a substantial coast-down zone that will give you plenty of room to stop the car safely in the event of brake fade.
(Image/Jim Brightly)
Bedding-in
brake pads, at its core, is about heating the brake system to the appropriate temperature to effectively transfer an even layer of pad material onto the brake rotor.
Uneven pad deposits on the rotor face are the #1 and almost exclusive cause of vibration and brake judder, according to Matt Weiss and James Walker Jr.’s StopTech white paper
Pad and Rotor Bed-In Theory, Definitions and Procedures.
“It only takes a small amount of thickness variation, or TV, in the transfer layer (we’re only talking a few ten thousandths of an inch here) to initiate brake vibration,” the white paper said. “While the impact of an uneven transfer layer is almost imperceptible at first… the high spots can become hot spots and can actually change the metallurgy of the rotor in those areas, creating ‘hard’ sports in the rotor face that are virtually impossible to remove.”
Street Brake Pads vs. Race Brake Pads
Your bed-in procedure will have to be application-specific if you want to do it right.
The adherent temperature range required to properly transfer pad material to the rotors varies widely depending on whether you’re bedding-in a street machine or race car—typically 100 degrees F-600 degrees F for street pads and 600 degrees F-1,400 degrees F for racing brake pads.
The 5-Step Bed-In Procedure for Street Pads
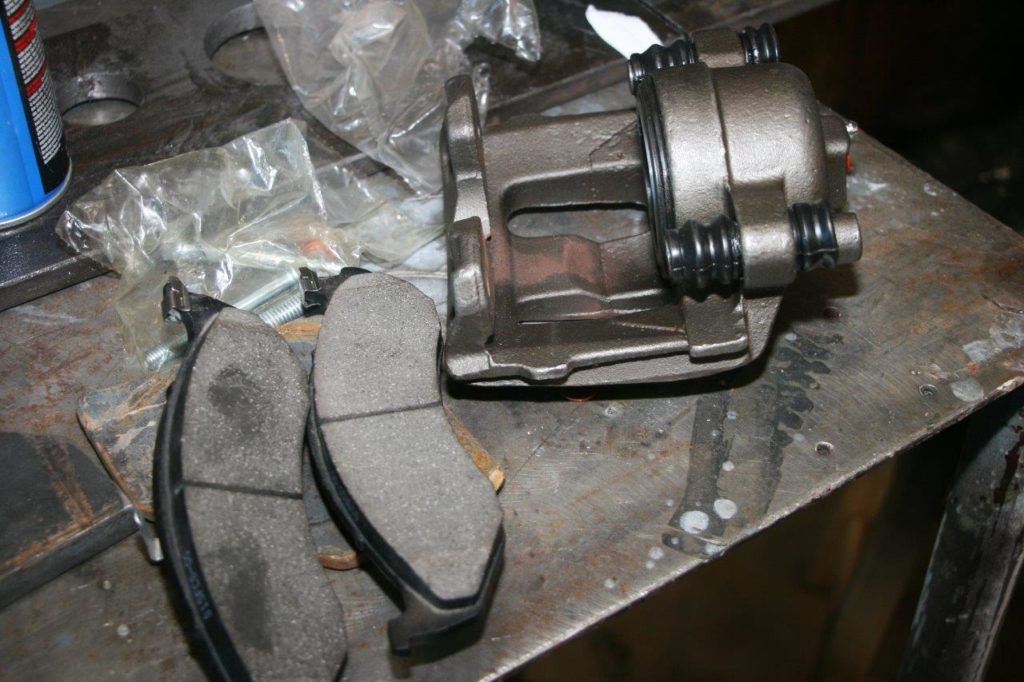
Baer recommends running your brake pads through normal commuting-type driving for at least 150-
(Image/Baer)
200 miles before using them aggressively.
- Perform four repeated light-to-medium stops—from 65 miles-per-hour down to 10 miles-per-hour, to bring the rotors up to temperature.
- Perform three light stops in succession. Then, perform eight heavy stops, back-to-back, at a point just short of wheel lock—from 65 mph down to about 5 mph.
- Drive for 10 minutes to cool off your brakes. Avoid braking as much as possible during this time. A 10-minute drive with zero braking is ideal.
- Perform three light stops in succession. Then, perform eight heavy stops, back-to-back, at a point just short of wheel lock—from 65 mph down to about 5 mph.
- Drive for another 10 minutes of cool-down time without using your brakes, if possible.
Repeating the process is encouraged to be on the safe side, but otherwise—mission accomplished.
How to Season Brake Rotors
From the mad geniuses at Baer
1. Use the vehicle for five or six days of gentle driving, using the brakes to the same extent you would in typical driving conditions.
[important]NOTE:
Zinc-plated rotors require a couple extra days of driving to wear through the plating before the rotor-seasoning process can begin.[/important]
2. After finding a safe location to drive your vehicle as fast as 70 miles-per-hour, perform four regular stops—from 60-70 miles-per-hour down to complete stops as you would during normal driving conditions.
3. Next, perform medium-effort partial stops (about 50 percent) from 60 miles-per-hour down to about 15 miles-per-hour. Once completed, drive for five minutes with little to no braking, allowing your rotors to cool.
4. Next, perform four medium- to hard-effort partial stops (about 75 percent), from 60 miles-per-hour down to about 15 miles-per-hour. Once completed, drive for 10 minutes with little to no braking, letting your rotors cool.
5. Park the car and let your brakes cool overnight. According to the experts at Baer, you’re now 50-percent complete with the seasoning process. To finish the job, you’re going to essentially repeat the procedure from the day before.
6. Return to your safe location for driving as fast as 60 miles-per-hour. Next, perform medium-effort partial stops (about 50 percent) from 60 miles-per-hour down to about 15 miles-per-hour. Once completed, drive for five minutes with little to no braking, allowing your rotors to cool.
7. Next, perform four medium- to hard-effort partial stops (about 75 percent), from 60 miles-per-hour down to about 15 miles-per-hour. Once completed, drive for 10 minutes with little to no braking, and let your rotors cool off.
8. Finally, make six hard partial stops, from 60 miles-per-hour down to about 15 miles-per-hour. Make every effort to perform these stops without locking your wheels. When you’re done, drive for 10 minutes with little to no braking, allowing your rotors to cool.
9. One more time, park your car and let your brake system cool overnight. If you just installed new brake pads as well, you are now ready to bed-in your brake pads. You can
read our How to Bed-In Brake Pads post here.