Welcome to Tesla Motors Club
Discuss Tesla's Model S, Model 3, Model X, Model Y, Cybertruck, Roadster and More.
Register

Power lift gate DIY possible?

This site may earn commission on affiliate links.
I got all the panels pulled off with relatively little difficulty. I was able to swap out the bars on both sides with the cables running towards the controller home. I was able to tap into the red/grey wire as part of the white connector shown in pictures earlier in the thread (with the ground on a nearby nut) and the wire has been run through the headliner over to the controller. Everything is connected into the controller securely.

However, when I double click the fob to unlock the trunk, the latch on the liftgate just clicks and no movement happens. Since the latch clicks, that means it's getting power, right? Could it be possible that I have a defective product? I'm really stumped as to what to do since the instructions are lacking and it seems like the manufacturer has communication issues. From the posts on this thread and the other one, it seems like I have everything set up correctly, so what would this mean? I'm wondering if the red/grey wire is the wrong one.

Help!

This may be related but does anyone know what purpose the little yellow wires serve? I have them connected near the controller (from where the purple power connects into the controller and where the button and latch connection comes from) but I'm not sure whether the other end (that connects to the power source) needs to be tapped into something; the other posts don't seem to say anything about it so is it safe to assume it's not needed?
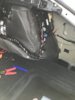
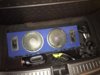
Are you sure the red gray wire is putting out power?
If you watch my walkthrough video, I did not have a grey red wire. I had to use the solid gray wire for power
 
I got all the panels pulled off with relatively little difficulty. I was able to swap out the bars on both sides with the cables running towards the controller home. I was able to tap into the red/grey wire as part of the white connector shown in pictures earlier in the thread (with the ground on a nearby nut) and the wire has been run through the headliner over to the controller. Everything is connected into the controller securely.

However, when I double click the fob to unlock the trunk, the latch on the liftgate just clicks and no movement happens. Since the latch clicks, that means it's getting power, right? Could it be possible that I have a defective product? I'm really stumped as to what to do since the instructions are lacking and it seems like the manufacturer has communication issues. From the posts on this thread and the other one, it seems like I have everything set up correctly, so what would this mean? I'm wondering if the red/grey wire is the wrong one.

Help!

This may be related but does anyone know what purpose the little yellow wires serve? I have them connected near the controller (from where the purple power connects into the controller and where the button and latch connection comes from) but I'm not sure whether the other end (that connects to the power source) needs to be tapped into something; the other posts don't seem to say anything about it so is it safe to assume it's not needed?

Ignore the yellow wire. Its for the obd 2 connector which isnt used.
 
  • Like
Reactions: 1tsla
murphy, I wish I could be of more help, but can't. But in your post you say when you double click the fob to unlock the trunk the liftgate just clicks. That would probably be just the trunk's latch activating, not the liftgate engaging to open. Think it through. It was probably doing that before the install, right? That's just the trunk lock opening action.

Have you performed a deep reboot of the car? Try that. Press the brake pedal and hold it while you are performing the normal reboot with the scroll wheels on the steering wheel. Maybe it needs a software reboot to see the new stuff.
 
Immediately after making that post, I thought I'd try another wire so I tried the thick white one and the controller started beeping so BINGO. It seems like it's working. The speed of the opening and closing seems slow though, watching the videos posted earlier again, it seems like like that's about to be expected. I think I'm a happy camper now? :)
 
Immediately after making that post, I thought I'd try another wire so I tried the thick white one and the controller started beeping so BINGO. It seems like it's working. The speed of the opening and closing seems slow though, watching the videos posted earlier again, it seems like like that's about to be expected. I think I'm a happy camper now? :)
Glad to hear it worked out. I do find the speed a bit slow but I think its a good feature in the end. Helps prevent any injuries by giving a fair amount of warning time.

Im still very happy with my unit and im glad I installed it. I like it more and more everytime I use it
 
Glad to hear it worked out. I do find the speed a bit slow but I think its a good feature in the end. Helps prevent any injuries by giving a fair amount of warning time.

Im still very happy with my unit and im glad I installed it. I like it more and more everytime I use it
Totally agree. I'm excited to finally be lazy! :D

BIG BIG thanks to @BigTonyTones and @AMPUP for leading the way on this.
 
IMG_0742.JPG
IMG_0741.JPG
OK, I got my package a have a question about power cable. If you look at the pictures it has black wire (ground) and red wire , with one big fuse, and the connector with 2 small green fuses, should I cut that connector in order to tap with posi-tap?
 
Just installed mine, took me 1 hour 30 minutes to disassemble and run wires, took 3 hours to put it all back, probably more the two hours spent on the big plastic panel. Probably easier if somebody can hold it. I decide do tap into original liftgate wiring for hot and ground and then hide everything back under parking break panel. Thanks a lot for the help :)
 

Attachments

  • IMG_0744.JPG
    IMG_0744.JPG
    308.3 KB · Views: 352
I installed mine bought from Autolease Che1 yesterday. Just great and fully functional, from screen etc.
Thanks for all the good Videos mentioned here. This one is really all you need
- incl this manual to remove the trunk covers inside - Lighted Rear Applique copy 2.

My "always-on" current came from the red-grey cable and not from a grey one as mentioned in the video.

It took me alltogether less than 3 hours. Greetings from Vienna, Austria! – and I did some sound improvement as well. ;-)
 

Attachments

  • IMG_1048.JPG
    IMG_1048.JPG
    485.3 KB · Views: 167
  • IMG_1049.JPG
    IMG_1049.JPG
    440.9 KB · Views: 161
Got mine installed today and it works like a charm:D
The installation went fairly well, a bit fiddly at times but nothing major to worry about..............except for that big plastic panel:mad:
What a royal POS to install :confused:
The wheel well seemed to be stuck so I didn`t lift it out completely, just pulled it away from the top so that I could reach the 12V cable to tap into.
This meant I had to find another attachment for the ground wire. I checked with my multimetre and found that a bolt that sits right above the seatbelt retractor would work perfect!

Getting the connectors through the rubber grommets was easy once I pulled out a pair of pliers and pried open the small hole I had made with a Phillips screwdriver!

Thanks for the vid, that really made things a whole lot easier:DIMG_0299.JPG
 
Installed mine over the weekend too. I agree the large panel was such a pain to put back on. But while I was there I was able to complete my blackvue rear camera installation by routing the cable through the large panel. This way I don't have to drill hole into the metal or cut and resolder the cable connector.

My liftgate does slam down really hard though, especially with car Windows open (less cabin pressure). I wonder if there is a way to adjust that.
 
Lord help me I'm going to take this on next weekend, if the kit arrives on time. I just ordered the OEM lift gate pull cup and button, to keep it stock looking. Not getting the power liftgate is the ONE thing I regret about the car - and the fact that this works with the existing trunk open buttons on screen & key makes it a no-brainer for me - though I hate taking off panels and fishing wire.
Wish me (and my back) luck, and if any new info has come up since March 20 let me know! ;)
 
  • Like
Reactions: childcarepro