Welcome to Tesla Motors Club
Discuss Tesla's Model S, Model 3, Model X, Model Y, Cybertruck, Roadster and More.
Register

PPF Recommendation

This site may earn commission on affiliate links.

2101Guy

Breaker of Ignore Buttons
Jan 6, 2020
4,972
7,661
USA
Wanted to provide info on a recent purchase, and will follow up on my install.
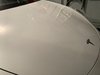
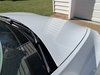
After much consideration, decided that I'd give a DIY shot at installing PPF on the hood of my wifes new Model Y. After watching a TON of youtube videos on the topic, the hood appears the easiest to DIY as long as you prep well and take your time. And using a pre-cut sheet appears to help as well. I may attempt the bumper later. But going to start with the hood and see where this goes.

I made a purchased using this company

Precut Window Film & Paint Protection for Vehicles | Buy Now

Found them on ebay. Had a couple of initial questions, and "Josh" (seller) responded literally within less than 3 minutes. I then placed the order and received a tracking number in maybe a couple hours tops. While the PPF was shipped in a very sturdy shipping tube, somehow UPS managed to damage it/bend it. I sent Josh a couple of pics asking if the contents would be ok (I had not opened it yet), and without hesitation he said it was going to be damaged, and that he would handle the issue with UPS but meanwhile, he was going to ship me a replacement immediately. He did, and the replacement arrived perfectly intact. I even asked (begged?) if he had a couple of smaller scrap pieces of PPF laying around so that I could do the small area just ahead of my rear wheels. He said "no problem", and included those pieces as well.

Great company/great service. Will followup with pics once I tackle the install sometime in the next few days
 
Completed. A few notes from my experience in doing this for the first time ever:
- Temp is important. I did this in my garage which was heated. Doing this outside and in the cold increases chances for things to go wrong. I really recommend that this be done in temps 70f or higher. The material is more pliable and it will adhere better at the end of your process.
- Make SURE to clean the hood AND underside where the film will wrap around to very well. I used the baby wash/water solution to clean, I wiped that off with a damp rag, then I wiped same surfaces down well with the rubbing alcohol/water solution. (both referenced below). There can be NO dirt/debris or else the film will not adhere properly.
- Josh at Opus provided me with the proper small, stiff squeegee. THIS is key. Using too large and too soft of a squeegee increases chances for air bubbles/poor install exponentially. Whomever you use/buy film from, just make SURE to have a pro level squeegee
- I used a 24 oz spray bottle with 3 pumps of baby shampoo from the Johnsons bottle for my install solution. I used maybe 12 ozs total.
-I used 70% ispropyl alcohol with distilled water in another 24oz spray bottle. 4 to 1 ratio and I only needed about 10 ozs total in the end.
-Keeping the surface of the PPF wet is key. You want the squeegee to slide and not grab/skid when you are working. So routine spraying the topside of the PPF is important.
-Use GOOD lighting. You need to see what you are doing at all times.
-When you get to the step of wrapping you edges around, go slowly and PUSH the water/film down and around or else water and air will push back upwards over on the edge of the film. You want to push over and down the edge as you tuck the film underneath the hood
-It will take a good 10-20 mins for the film to dry enough (after you spray the perimeter underside with your alcohol solution) for it to stick when you wrap it under. Maybe even longer. And thats fine. Gives you plenty of time to work out the "fingers" that develop underneath.
-If you HAVE to, can use hair dryer or heat gun on low to carefully heat the edges so that it sticks well when you wrap underneath. I advice being cautious with this approach and be gentle.
-Expect some small water bubbles, especially around edges. Totally normal. Takes 72hrs or longer for the moisture to evaporate from under the film. If possible, letting the car sit in the sun will help speed up drying.
-The pre-cut material (Xpel Ultimate) provided by Josh was a 100% perfect fit. But, if I did it again? Id opt for no cutout for the Tesla emblem and would have removed the emblem from the hood, then replaced the emblem on top of the film. That way there would be zero visible edges at all with the film.

Took me about 4 hours total, taking my time.

I'd do it again, but not ready to tackle the bumper without practice first. And considering the cost of the materials, practice can be costly.
 
Last edited:
  • Informative
Reactions: nnTsl and Itsuo-DC
Pics. note the pic of the fingers was before. Those are all smoothed out now/after letting the edges dry more hour or so post-install. The photo with the yellow highlight shows a typical post install water bubble. Will dissipate in a few days. If not, you use a hypodermic needle at 45 degree angle to withdraw water/air. The tiny hole will self heal with a heat gun
 

Attachments

  • 7E43957E-7C27-4271-B4CE-E3D8FBA97A8B.jpeg
    7E43957E-7C27-4271-B4CE-E3D8FBA97A8B.jpeg
    259.7 KB · Views: 185
  • 200773E1-4097-49AE-B8E5-B29E1351A973.jpeg
    200773E1-4097-49AE-B8E5-B29E1351A973.jpeg
    230 KB · Views: 148
  • 8E2C0326-5FC4-4F2F-8C29-0271F45E7A51.jpeg
    8E2C0326-5FC4-4F2F-8C29-0271F45E7A51.jpeg
    169.5 KB · Views: 144
  • F80A9955-CB8C-46F4-BB3A-6A294A090DD8.jpeg
    F80A9955-CB8C-46F4-BB3A-6A294A090DD8.jpeg
    187.7 KB · Views: 139
  • 7702D52F-CA01-4B03-9592-0446026AB2B2.jpeg
    7702D52F-CA01-4B03-9592-0446026AB2B2.jpeg
    234.7 KB · Views: 139
  • 92C45472-0BAD-4ECC-81C3-1133DF7AAFA3.jpeg
    92C45472-0BAD-4ECC-81C3-1133DF7AAFA3.jpeg
    93.5 KB · Views: 139
  • 75F04DD2-48C0-4DD2-B6FE-5EC7153C5869.jpeg
    75F04DD2-48C0-4DD2-B6FE-5EC7153C5869.jpeg
    399.2 KB · Views: 139
  • 5AF03BB8-F839-4983-9514-420199E501D5.jpeg
    5AF03BB8-F839-4983-9514-420199E501D5.jpeg
    279.5 KB · Views: 146
  • Like
Reactions: Itsuo-DC
Very informative, thank you for writing up!

I’m taking delivery it two weeks and based on how I saw things go over two years with my M3, I was thinking of installing a DIY PPF on both bumpers. I’m okay with it not being perfect and it would be on a white surface so I figured it would not be as noticeable?

The biggest issue I see now (based on your comments @2101Guy ) is that I do not have an indoor/heated place to do this work. I could put up a canopy or do it in a parking garage but I it would still be very cold. I could probably come up with a heat gun to use to just keep the film I’m working with warm but that sounds like it would add significant hassle to a job that would already try ones patience.

I’m excited to see how the bumper goes: good luck!
 
Hey there.
I definitely would NOT recommend attempting this in cold conditions. In fact, the very detailed (multi page) printout that the vendor (listed in my first post) tips and instructions recommend 70°F or warmer for install conditions. The tips do say you can use warm water in your bottles but and pour boiling water over the film/hood to warm it up, but for first attempt? I don’t recommend that. Indoors at 70degrees or better is my suggestion.

Again, the hood is easiest. Minimal curves/bends. Bumper might be exponentially more difficult to get just right. From all of the videos and things I’ve read the bumper typically involves at least a certain amount of stretching of the material to get it to fit just right. Also have to make sure it aligns over multiple parking sensors and that round tow hook. And have to be extra careful to not let it touch the ground because you are closer to the ground when you’re working on the bumper.
Screw it up? $190 down the drain.

Or, pay a shop ~ $500 to do it for certain.


Risk vs reward decision that I’m struggling with re: bumper.
 
I coughed up the $7k for paint correction, full PPF (every painted surface), and ceramic coating. Just absolutely didn’t want to mess anything up and really wanted the whole vehicle covered...

I literally can’t tell anything has been installed.

that’s a LOT of coin. That’s like a whole ‘nother (used) car. Lol.

But I get it/sound piece of mind.
 
  • Like
Reactions: Itsuo-DC
Great company/great service. Will followup with pics once I tackle the install sometime in the next few days

Thank you for this write up. Based on your recommendations and some other stellar reviews I read online, I took the plunge and ordered the full PPF kit for my Model Y. It will probably take a week or two to arrive and then I'll carve out some time to get to work. I'll post back with questions and updates along the way. Thank you.