Success! 2015 Model S 85D, Gen2 replacement screen from Chad ReelDealEV.
Chad was great with rapid email responses. The postal service tried their best to squash the box, but the screen is very tough, and Chad packed it well. We had a few email exchanges so Chad could evaluate the condition of the new screen. He immediately volunteered to replace it, but I felt it was low enough risk to try out the screen to see if it was OK. The videos made the dash disassembly/assembly look so easy - hey, no problem to just button it back up while waiting for the exchange... well, not so much if you're a dash clip hater like me. Read on:
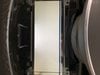
Old:
First light on the new screen - Yay! (protective film still in place):
I caught the leak early enough that there was just a small amount of goo inside the the screen's frame. Nothing had dripped out into the dash yet. A bit of "Goof Off" (mostly acetone) took care of the goo, and also dissolved the thumb of my vinyl glove... good life lesson there. The goo is really sticky, kind of like crystal clear 5-minute epoxy. Touch it and you'll be stuck. Pull loose and you draw a bunch of very fine threads of it just like that epoxy. It also has a faint earthy smell, like... patchouli oil? Whoa - for a moment there, the 60's were calling. Maybe Elon spec'ed the goo with patchouli oil scent to cover up the smell of the cannabis you'll be smoking to calm down after noticing your dash was dripping?
It took several minutes for the car to power up after I reconnected the screen. The car had been turned off for about an hour (I elected not to dive into the frunk to disconnect the 12-volt battery), so I suppose it was in a deep sleep? The MCU turned on after about 1 minute, but the IC stayed black while my anxiety level rose. I held the steering wheel top buttons down for a count of 10, then after another minute the IC just popped on, no big "T" boot-up screen.
At any rate, the disassembly took about 90 minutes, because I had to stop to make a couple repairs. I blame myself for this one (left air vent clip):
I let the lower panel swing outward before the left side clips were detached, then heard the crack. Good thing I'm handy with super glue and have plenty of wood scraps and clamps. (Rant: I really hate these clips and much prefer fasteners with releases on the "show" side. Form over function - invisible fragile fasteners vs visible robust fasteners).
I blame the Tesla SC for this one (lower right clip next to steering column):
The lower panel let go suddenly as I was pulling straight out on it just below the right air vent. I didn't hear a crack, so I think Tesla broke it when they replaced the MCU for me under warranty (yellow screen border). Regardless, super glue and fiber board scrap to the rescue again.
This little guy fell out while I was pulling on the right air vent. Great! Every car job needs a left-over part after reassembly, right? Fortunately, Chad mentioned this mystery washer in his video, so I put it back under the dash bracket air vent's T15 (between the dash bracket and vent, not right under the screw). Looks like it belonged there! Thanks, Chad.
Reassembly literally took 15 minutes. Replacing the screen in the IC assembly also took about 15 minutes, since I was being careful to save the screws and put them back in the same holes they came out of (a magnet parts pad is great to avoid loosing bits and remembering where they go). The ribbon cables and connectors will look very familiar to anyone who has replaced the screen of a Nintendo DS Lite.
I found an air wedge to be very helpful in lifting the dash and keeping it there while I removed/replaced the screws. A collection of 3 different size wedges is about $15 on the Big River retail site - money well spent on convenience factor.
The most annoying thing? My eyesight, goshdarnit! I haven't done a stereo upgrade since the factories started putting in decent sound systems about 20 years ago. Back then, when I stuck my head under the dash, I could focus on screws 6 inches from my nose. I started wearing gradient lenses about 10 years ago (the Big Five-Oh), but the gradient is at the BOTTOM, not where I needed it up at the top. As a sop to my aging eyes, I have a cheap magnifying visor for working on tiny parts inside game consoles and controllers, laptops, and the occasional minor surgical procedure. They were helpful for this job, too.
Thanks to Chad and the forum. We'll see how long this screen lasts - another 4 1/2 years, perhaps?
Next: Just waiting for the MCU flash to fail. I hear the US is starting an investigation into this one. Maybe all of us with pre-2016 Model S's will get free MCU updates? Hopefully without the pretty yellow border.
U.S. opens probe into Tesla Model S after touchscreen failure reports