Welcome to Tesla Motors Club
Discuss Tesla's Model S, Model 3, Model X, Model Y, Cybertruck, Roadster and More.
Register

Solved: Road Noise & Front Wind Noise

This site may earn commission on affiliate links.
Through the last few months, I have been watching and reading up the various posts regarding the many ways many of you all have attempted, as well as the various kits available online, to reduce if not eliminate road noise and wind noise from the Model3. After reviewing all those posts and review of the kits, I figured that since none of you have been able to achieve that elusive goal, let alone even come close to reducing the noise, made me ask the question: What are we missing?

So as I kept driving my M3, I attempted to focus on finding those missing sources ie where is the noise emanating into the cabin from. Turns out they are the 4 corners of the cabin ie the A-Pillars and C-pillars. More specifically, the A-Pillars for wind noise and C-Pillars for road noise.

#1 - The solution for wind noise is the following - Z Weatherstrip down inside the leading edge of the front door, and foam block at the top triangle where the front fender, windshield and door meet.

Z-Weatherstrip

FE752F27-DD36-4C76-975B-39D41FA43CDA.png


Foam at the junction
30509DB7-3101-4B73-A504-E35E4989A336.jpeg


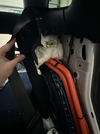
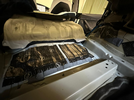
#2 - The solution for road noise is the following - 2" Fiber insulation behind the rear seat side panels that cover the rear wheel wells.
6675D311-F79A-42AD-9928-77D6FA910EAA copy.jpg


F76F1B1B-0F3F-481F-B6A4-185039144B06 copy.jpg


I hope this helps everyone who have been pursuing this goal. Thanks for all the contributions and many thanks to @XPsionic for his constant engagement and interest.
 
Funny you mention this. I just did my "stage 2" noise reduction today

1) I lined all parts of the trunk that I could readily access with Killmat. The Killmat made a really big difference on tapping on the quarter panel noise level--not that that's a realistic metric for actual road noise, but it makes the car feel less crappy to me.
2) I removed 1 layer of white ceramic insulation I had previously installed as recommended by the OP in the rear side bolster area, and instead lined the front portion of the wheel arch behind the side bolsters with a little Killmat and then 2 layers of Siless closed cell foam.
3) I lined everywhere I could in the trunk with Siless---it was pretty much impossible to get good coverage in that crevice you point out in the photo. You can reach your arm back there if you kneel in the sub-trunk and wedge yourself back there, but you have to turn your head the other way to get your arm down the tunnel, good luck getting complete coverage! I just did the best I could.
4) I used the ceramic insulation removed from the side bolsters and shoved it down that crevice, and damn if it didn't fill in all the nooks and crannies nicely! I also felt better about having it someplace where it wont shed dust.
5) Bought a couple 72x80 moving blankets from Harbor Freight and wadded them up to fill the remaining crevice space. I really stuffed it in there. A full blanket fits on the passenger side easy (more than one blanket really). I don't have a subwoofer back there. And I cut about 1/3 off a blanket to shove in the drivers side. The drivers side is smaller due to the charging components. The extra 1/3 of a blanket went in the passenger side.

I ran out of Siless, so I have 2 layers on the forward part of the rear wheel arches, one layer (not complete coverage) here and there throughout the rest of the trunk and various brackets and panels and whanot. I stuffed extra into any gaps where the metalwork of the trunk is welded together with an opening/gap. The sub-trunk is lined fully with Killmat, but just one sheet of Siless on the bottom panel. Sub-trunk is easy to remove if I feel like adding more.

End result is a big improvement over the white side bolster ceramic stuff outlined in the OP (which to my ears, didn't really do anything). The ker-THUNK from the rear suspension is a little more muted and I can definitely notice more road noise coming from the front of the vehicle, which is probably the best indication that the rear work was at least semi-effective. Worth the hours stuffing myself into a trunk and bending my stiff old body into a pretzel? Probably not. But the noise has really been driving me nuts so I felt I had no choice :eek:


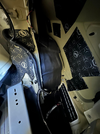
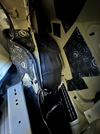
This is the black hole in question.

View attachment 927395

View attachment 927396


View attachment 927399View attachment 927398
Hahaha that is something i have generally recommended- use pillows where you can. Would be better than the blankets
 
Start the installation today but I have grossly underestimated the time needed. Could not finished, still will need 2 or 3 more hours. But I will do a summary now of what I learned about this sound proofing methods and the material I am using.

I am using four different materials.

Material Layer 1 - STP Black Silver: This is a vibration damper that adds mass to metallic panels, changing their resonance frequency and reducing vibration-induced noise. It doesn't block sound significantly but is effective at dampening vibrations. Applied directly to the metal surface, it requires a roller for proper installation. The process is time-consuming and it's recommended to use gloves to avoid cuts from the aluminum layer. It's fairly easy to apply if there's enough space for the roller, but can be challenging in tight areas. Full surface coverage isn't necessary; applying it to less stiff areas and covering 30% of the surface will yield over 90% of the desired effect. [Product link: https://standartplast.com/upload/iblock/c41/stp-black-silver.pdf]

Material Layer 2 - STP Accent: This light closed-cell foam, mentioned in this thread, helps prevent vibrations from transferring to the air inside the cabin. It may also absorb some high frequencies but is less effective at blocking low frequencies. In addition to being easy to cut and install, it provides heat insulation. It's best to apply it generously, covering as much surface as possible. [Product link: https://standartplast.com/upload/iblock/e14/stp-accent.pdf]

Material Layer 3 - STP SoundBlock: This heavy layer effectively blocks sound due to its mass. To prevent vibrations from the panels, it should be applied over Layer 2. However, since it's heavy, it isn't suitable for vertical surfaces, as it may not last long in such positions. It's best applied only to horizontal surfaces. While this particular product is flexible and easy to apply, some reviews suggest that other brands offering similar materials may be harder to install.
[Product link: https://standartplast.com/upload/iblock/5d0/stp-noiseblock.pdf]

I put here this STP becous it is what I found in Europe. But many brands have similar stuff.

Material 4 - Ceramic Fiber: As OP began using in this thread, this material is easy to manipulate and fill gaps with. I believe that it have enough mass to do some sound insulation, so it's worth continuing its use. Better to use gloves when handling it, as it can be uncomfortable if touched with bare hands.

Today I rushed to finalise the wheel arch area on the sides of the back seats because it is the part that need removing all the liners to have good access. Kind of proud of the installation because nothing more can be done here haha. I applied there all the 4 layers. Layer 1, 2 and 3 on the metal behind the wires and the ceramic fibre above the wires.


Left wheel arch with layer 1 applied behind the wires.
1681322365347.png


Right side with layer 1, 2 and 3 applied behind the wires. This is not a horizontal area where the manual recommend to add this layer 3 use but I decided to take the risk, I think in this case it is stable enough and it won't go anywhere.
1681322444541.png


Right side with some ceramic fibre filling the upper gap.
1681322520971.png


Right side with ceramic fiber covering the HV wires.
1681322579127.png


I won't comment results just yet because it is unfinished. Didn't even put the subwoofer back yet.
 

Attachments

  • 1681322561597.png
    1681322561597.png
    575.9 KB · Views: 84
Love the work you guys are doing. NVH seems like part science, part black magic.

Suggestion: look into thick quilted exterior wheel well liners (e.g. current Audi Q5) and air suspension for further reduction of road noise. Air suspension can add another level of isolation.
 
  • Like
Reactions: enemji
On smooth highways I now hear wind rushing over the car and windows that I never did before. 🤷🏽‍♂️

Yea. H of the NVH is definitely an art. You can’t eliminate all noise but you can fine tune it to attenuate the frequencies that annoy you.
 
On smooth highways I now hear wind rushing over the car and windows that I never did before. 🤷🏽‍♂️

Yea. H of the NVH is definitely an art. You can’t eliminate all noise but you can fine tune it to attenuate the frequencies that annoy you.
I have an article link somewhere that supports this, but in addition to sound masking in the same frequency range, lower frequency sounds can mask higher frequency sounds.

To your second point, I notice that when comparing the top Mercedes Benz and Lexus cars, Lexus has less wind noise, but MB has less road noise. Both will measure about the same dBA*. So it depends on personal preference to a degree.
 
  • Like
Reactions: enemji
I have an article link somewhere that supports this, but in addition to sound masking in the same frequency range, lower frequency sounds can mask higher frequency sounds.

To your second point, I notice that when comparing the top Mercedes Benz and Lexus cars, Lexus has less wind noise, but MB has less road noise. Both will measure about the same dBA*. So it depends on personal preference to a degree.
I had a Lexus IS250 which produced the same road noise regardless of which tires I had on it. I had Michelin, Bridgestones, Continental, Kumhos and it made no difference. Lexus had the road noise so well damped and absorbed that only one range of frequencies was able to get through.
 
Start the installation today but I have grossly underestimated the time needed. Could not finished, still will need 2 or 3 more hours. But I will do a summary now of what I learned about this sound proofing methods and the material I am using.
... Continuation. Today I finished the trunk. For the description I will use the same layer number I used on previews post.

Subwoofer compartment with Layer 1
1681509794297.png


Subwoofer compartment with layer 1+2
1681509905817.png


Subwoofer compartment with layer 1+2+4. In the end I had to remove a bit of the ceramic fiber. The subwoofer has a protusion that goes in that space and won't fit if you stuff to much material there.
1681511004556.png


Charger compartment with Layers 1+2
1681511143036.png


Trunk bed with layer 1
1681510176745.png


Trunk bed layers 1+2+3
1681511182870.png


There was some traffic on the road so I couldn't measure the noise. For my disappointment of the 6h of this DIY I cannot hear a clear total noise reduction. But from the drivers seat I can barely hear road noise coming from the back, my impression is that it is all or almost all coming from the front. My guess is that we come to the situation that the sound proof is as strong as the weakest link and that now is in the front.

As a side benefit I think the subwoofer is doing better now. I did some noise hunting with a music with deep bass and could isolate everything that was vibrating on the subwoofer compartment, this plus the panel with a layer 1 I got the impression that the sound is overall even better.

I order some material to do similar to what this guy did on his Kona, but I will add more then what he did. He did very little.
 

Attachments

  • 1681511332816.png
    1681511332816.png
    304.1 KB · Views: 56
  • 1681510268771.png
    1681510268771.png
    1.8 MB · Views: 55
  • 1681510044333.png
    1681510044333.png
    1.9 MB · Views: 54
  • 1681509943216.png
    1681509943216.png
    1.9 MB · Views: 96
  • Like
Reactions: enemji and XPsionic
I can see this turning into a VERY NICE cottage industry… come to your home or workplace, spend 2-3 hours and charge 600-1000$ and turn your Model 3/Y into a European luxury sedan (well, actually the Japanese luxury segments of the three large OEM are technically quieter and more serine than most European ((we really just mean JERRRMAN!)) sedans. I’d probably pay that, but would ask for a discount for coming up with the idea!
 
I cannot hear a clear total noise reduction. But from the drivers seat I can barely hear road noise coming from the back, my impression is that it is all or almost all coming from the front
Great job @ICE5891 , and great photos.

I did way less than you did and came to very similar conclusions. IMO in the rear, the majority of the road noise that makes it into the cabin is right underneath where the seat belts come out of.

@ICE5891 I'm looking forward to you taking apart some of the front of the front carpet and wheel lining and see if you could eliminate more noise ;)
 
  • Like
Reactions: ICE5891 and enemji
With this thread fresh in mind, I couldn't help but to notice the big patch of raw firewall under the front of the center console when I was changing my air filter. The little "transmission tunnel" side panels are just thin plastic with some of that fluffy sound matting on them and are the only thing separating the cabin from that big empty steel cavity, the front portion of which might extend beyond the battery.

Anyway it was trivially simple to slap a notebook paper sized sheet of foam in there while changing the filter so I did. Obviously, I can't claim that one little square of foam makes a detectable difference, but it might help, might be more effective than getting under the floor mats, and it's certainly easy enough to do while you're in there.
 
  • Like
Reactions: enemji
With this thread fresh in mind, I couldn't help but to notice the big patch of raw firewall under the front of the center console when I was changing my air filter. The little "transmission tunnel" side panels are just thin plastic with some of that fluffy sound matting on them and are the only thing separating the cabin from that big empty steel cavity, the front portion of which might extend beyond the battery.

Anyway it was trivially simple to slap a notebook paper sized sheet of foam in there while changing the filter so I did. Obviously, I can't claim that one little square of foam makes a detectable difference, but it might help, might be more effective than getting under the floor mats, and it's certainly easy enough to do while you're in there.
:) skip to 1:55

 
for me, there are gaps in the seal at the top of the window toward the side panel side and then again toward the hood of the car. I tried using a hammer to make sure all the trim was in place but there still seems to be gaps. I compared it to my model Y and I don't see or feel those gaps. Any other ideas on what I can try or do?
 
for me, there are gaps in the seal at the top of the window toward the side panel side and then again toward the hood of the car. I tried using a hammer to make sure all the trim was in place but there still seems to be gaps. I compared it to my model Y and I don't see or feel those gaps. Any other ideas on what I can try or do?
Hammer?

Post some pictures please.
 
  • Like
Reactions: DrGriz
Through the last few months, I have been watching and reading up the various posts regarding the many ways many of you all have attempted, as well as the various kits available online, to reduce if not eliminate road noise and wind noise from the Model3. After reviewing all those posts and review of the kits, I figured that since none of you have been able to achieve that elusive goal, let alone even come close to reducing the noise, made me ask the question: What are we missing?

So as I kept driving my M3, I attempted to focus on finding those missing sources ie where is the noise emanating into the cabin from. Turns out they are the 4 corners of the cabin ie the A-Pillars and C-pillars. More specifically, the A-Pillars for wind noise and C-Pillars for road noise.

#1 - The solution for wind noise is the following - Z Weatherstrip down inside the leading edge of the front door, and foam block at the top triangle where the front fender, windshield and door meet.

Z-Weatherstrip

View attachment 917275

Foam at the junction
View attachment 917276


#2 - The solution for road noise is the following - 2" Fiber insulation behind the rear seat side panels that cover the rear wheel wells.
View attachment 917277

View attachment 917284

I hope this helps everyone who have been pursuing this goal. Thanks for all the contributions and many thanks to @XPsionic for his constant engagement and interest.
Can you provide a list of what materials to buy for this rookie?
 
Can you provide a list of what materials to buy for this rookie?
In the second post of the thread

 
  • Helpful
Reactions: Dave EV
I got delivery of my model 3 during winter and left tesla SC already with winter tires.

Now temperature is rising and I put summer tires on. I am speechless, I was driving on wonderland and didn't known.

Now the sound is so much louder and harsh. Even on very low speeds I hear the tire noise while on winter tires it was completely silent when for exemple going through my parking hall with very smooth surface, now even there I hear the tire.

All this work is less relevant the the tire diference.
 
  • Like
Reactions: enemji
I got delivery of my model 3 during winter and left tesla SC already with winter tires.

Now temperature is rising and I put summer tires on. I am speechless, I was driving on wonderland and didn't known.

Now the sound is so much louder and harsh. Even on very low speeds I hear the tire noise while on winter tires it was completely silent when for exemple going through my parking hall with very smooth surface, now even there I hear the tire.

All this work is less relevant the the tire diference.
What model tires are they?