Great review (and great pics) of your install and experience with our adjustable sway bars! Thank you so much for your support and for sharing this awesomeness here!
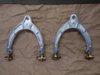
As far as the adjustability of the sway bars, Randy Pobst when development driving our sway bars for us preferred the rear bar at full stiff and the front bar on the first setting. In general we suggest the exact setting you have (front on level 1 and rear at level 2) and then adjusting the rear bar up or down depending on the desired balance of your driving style and car setup.
@UnpluggedP,
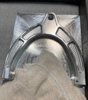
I’m assuming it’s less stiff Level 1 and more stiff to full stiff as you go ‘backwards’ in holes or ‘settings’ (i.e. Level 2, Level 3)?
Ski