Just completed this DIY fix for a handle (passenger front) that would not present on my MS 85D (late 2014). I’m out of warranty (73k miles) and verified with my local SC that the replacement would be ~$750, labor included. Based on this thread, I was able to troubleshoot and figured it was a broken paddle gear, because I could hear my motor running continually behind the handle. I convinced my SC to sell me just the part (about a dollar), which took a few days for them to source. They recommended a full replacement of the door handle mechanism, but for $1 I’m going to try this myself.
I encountered a few surprises (minor hurdles) and thought it would be best to share. I’m no mechanic, but if you’re decent with tools and are okay with a bit of effort then this is an easy fix. Here are the highlights followed by the details:
* T30, T25, T20 (Torx bits), 10mm socket with extension, and 10mm wrench required. Get a few small zip ties and something to snip with. Plastic trim tool to pry is optional but useful. Recommend you have a new ring/retainer clip ready in case there is rust (see below). These are common…Home Depot will probably have on-hand. I don’t know the size so just get a variety. An LED headlamp is handy to have in dimly lit garages. Helped me easily see things.
* Window removal was necessary. The 4th (upper-rear) bolt was not reachable even with the window all the way up. It was blocked by several inches of glass and there was insufficient room to use any sort of socket or wrench to remove it.
* Window is removed by two points. The front release is small circular latch that needs to be pressed in while pulling upwards. The rear release is a nut that needs to be loosened sufficiently to pull up freely. Details on how to access these two points follow.
* Interior door access port covers (wind barriers that are adhesive) can be replaced after careful removal, but not recommended as I believe they will just fall out of place over time. One fell out already and now I can hear wind noise in the door. Working to see if I can purchase a few from Tesla or from the auto shop to fix. I removed all of them when I was trying to figure out glass removal. I recommend you only remove two wind barrier covers: one for the forward window latch and one to access the upper-forward door handle bolt. The rest of the work can be accessed through the large opening in the center of the door (under the door controller).
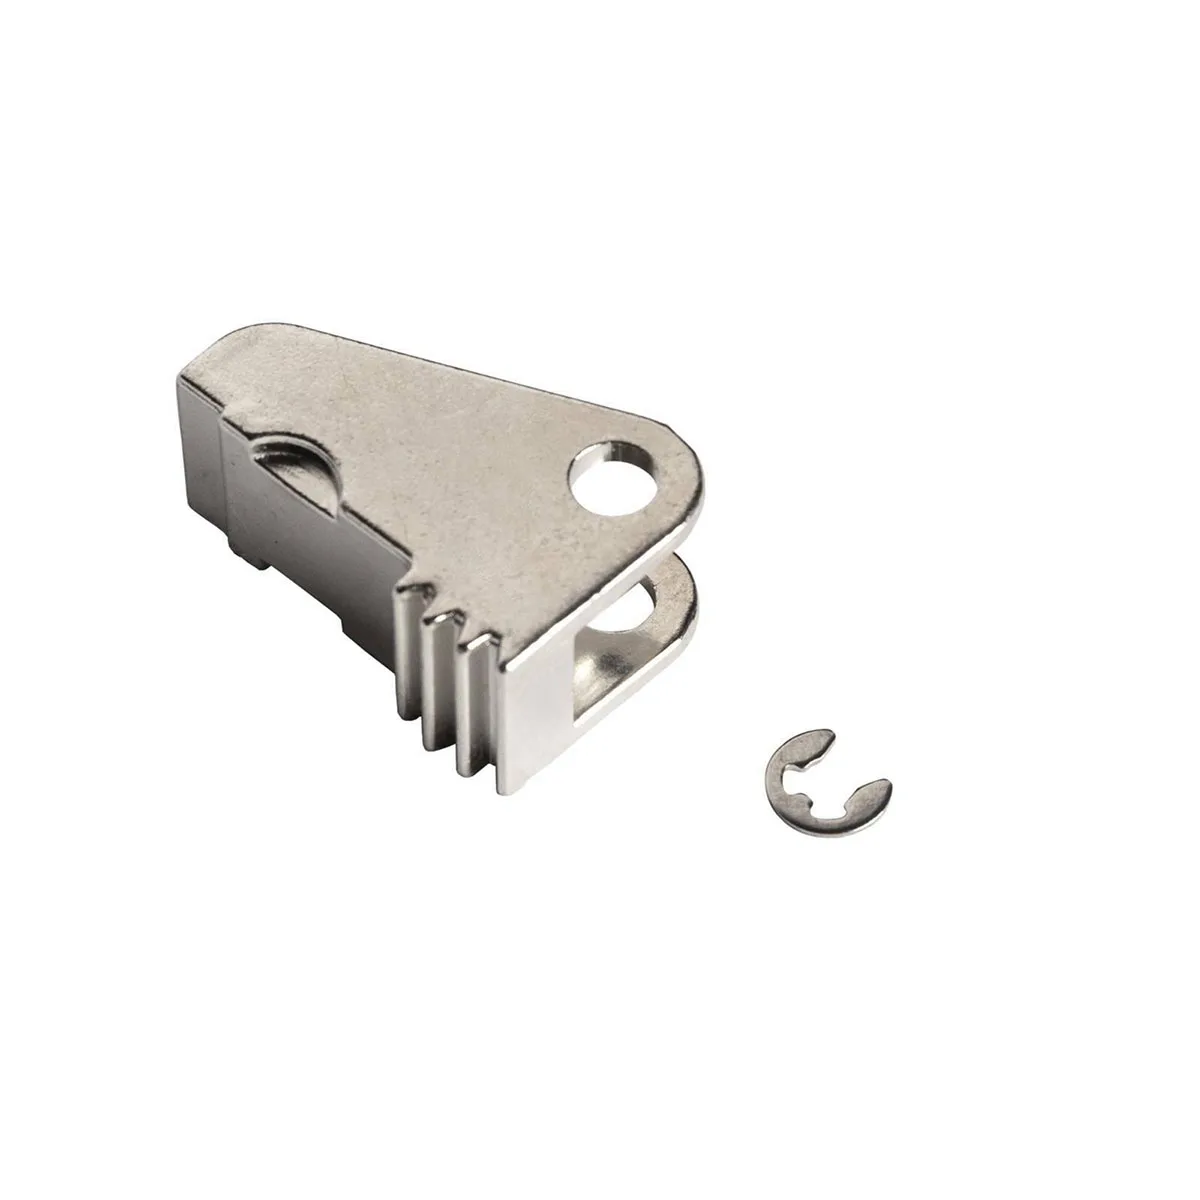
* Inside the handle assembly, the retaining ring clip (that is central on the shaft under the motor) was starting to rust badly. Looks like water gets in. You have to remove this to move the shaft out of place to replace the paddle gear. If I had known there was a possibility of rust I would have replaced with a new clip, but I did not have one on hand, so I re-installed the same one. Hopefully it holds up over time.
1. To start, I used several layers of masking tape over the handle exterior and then used an razor (very carefully) to isolate the tape layers to the handle and remove the border tape from the door exterior. This is critical, as the handle could get scratched when removing the assembly.
2. Removal of the interior door trim went as expected. The rubber covering above the 10mm bolt was easily removed with my plastic trim tool. I pried from the side and it came up easily. Used a 10mm socket with an extension to remove the bolt. The plastic covering under the interior door handle came off easily with the same trim tool, revealing two T30 screws. I then carefully used the plastic trim tool to pop the trim off of the door as the video(s) show and used both hands to pull from the top of the door towards me (to avoid torquing the plastic pegs and breaking). Cables were easily separated at their respective connectors. I used my knee to rest the door trim in place as I worked on getting the cables removed.
3. Access to the interior of the door is through a covering with the door controller on it. You need a T20 to remove the perimeter screws and then let it hang below the opening once removed.
4. Removal of the 4 door handle assembly nuts did not go as expected. I easily removed the top-forward nut via a circular access port (after removing the wind barrier) with a 10mm socket and extension. The lower-forward nut was easily accessed through the large central opening. The lower-rear nut was removed by feel through the central opening. I couldn’t easily locate the upper-rear bolt. I removed a rubber trim piece at the top-rear of the door at the backside of the window glass and with my headlamp I could see the 4th nut behind the window glass. I did have the window all the way up, as the notes recommend. But this one was impossible to get to without removal of the window. Once removed, it is accessible through this top-rear opening (where the rubber trim piece was at the base of the window).
5. This is where I got stuck for a while. I couldn’t figure out how to remove the window glass. Google and forum searches weren’t helpful and the SC was closed so I couldn’t call and ask. Took me an hour to figure out how to do it. So here goes…you need to lower the window half way down. Also, I removed the interior window door trim held down my window clips, but in retrospect I do not think this was necessary.
- REAR: Start at the rear of the door, through the main central opening. To the rear of the black window track you’ll see a silver clamp with a 10mm nut. You need to loosen this with a 10mm wrench to allow the back portion of the window glass to release. The bolt thread was too long for my socket so I had to use a wrench here. If you have a 10mm socket with a long cavity then this part is much easier. For me, I used a wrench a little bit at a time to loosen up the 10mm nut. The rear of the window, when sufficiently loosened, should easily move up when gently pulled.
- FORWARD: At this height, there’s a latch that becomes visible through a long oval access port towards the front part of the door. The oval port is underneath two connectors (purple and tan). Disconnect these connectors and remove a vertically oriented rectangle wind barrier to reveal the oval access port and the window latch within. You might need to move the window a bit up and down until you can see the black plastic assembly that holds the forward portion of the glass window. With your headlamp, locate a small circle near the lower part of the housing. This small circle needs to be pressed (with a screwdriver or anything smaller than the hole that can depress it) while gently pulling upwards at the front of the window glass. If successful, the front part of the window should move up and down fairly easily.
- Once both the rear and forward clamps are free, pull the glass out gently and evenly. I had to rotate the glass clockwise away from the front of the car in order to free the rear metallic section of the window from the window slot. I don’t think you need to remove the window trim here, but it might make the following step a bit easier.
6. After the window was out, the 4th handle assembly nut was removed with a 10mm wrench. I accessed it through the upper-rear part of the door where the window used to be.
7. Strangely, the cover/gasket that should be on the back of the door handle assembly was completely off and hanging below. Somebody had punched a hole in the bottom of the covering and put a zip tie on it and through a hole on the plastic handle housing. Either they (Tesla) knew it was prone to falling off or someone worked on this door previously and was too lazy to replace the seal. That was a bit frustrating.
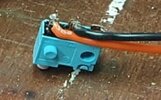
8. Raise the window (invisible) back up all the way so the rear clamp gets out of the way! The door handle assembly came out pretty easily once this was done. My motor was still running and I observed the broken paddle gear. Glad it was not the micro switches. Snip the two zip ties holding the main power/communication cable in place at the bottom of the handle assembly and then disconnect the cable at the connector. The assembly is now free for you to work on.
9. The YouTube video by Boost Brothers (“Why Tesla Door Handles Break and How To Fix Them”) is excellent. This should be used for the paddle gear replacement. I followed it with zero issues. The only thing of note, is that my paddle gear had two spacers on either side that centered it perfectly on the shaft. They fall out when you displace the shaft and remove the old paddle gear. I could not re-center them and get the shaft back through both spacers and the new paddle gear. So I left them out. I don’t think they are very necessary. So I’m hoping it doesn’t prove to be an issue. So far it’s not. T25 bit needed to remove the motor from its mount. As mentioned above, the little 3/4 circle clamp beneath the motor and central on the shaft was very rusted. I wish I had a spare to replace it, but I didn’t. I sanded a bit to remove rust then replaced.
10. Once I replaced the paddle gear I re-applied the rear cover just by pressing around the perimeter. The ‘goop’ that was on there seemed to hold well enough. I then re-connected the power/communications cable between the door handle assembly and the door and zip tied the cable down with two zip ties at the same locations that were secured previously. Before installing, I unlocked the car and verified that my new handle presents…et voila! It did. I re-locked the car and put the keys in the cup holder so it wouldn’t extend during installation.
11. Installation of the fixed door handle assembly went as expected. Gently tighten all 4 nuts. BEFORE tightening place two credit cards between the handle and the door frame to get even spacing. Then tighten all 4 nuts on the assembly. At this point I re-verified unlock and re-lock to make sure the door handle was good to go. All okay here.
12. Mistake #2…I didn’t secure the window all the way down after installation. Get your headlamp on, put the window halfway down again and make sure the front circle latch is re-engaged fully and the rear of the window is sitting fully in its clamp. I had an inch of rear window that needed to get seater farther down and as a result, the window did not operate properly (when I gave it the full up command, it would go to the top and then travel all the way down. If I had shut my door with the window all the way up it could have shattered due to the excess extension.) Point being, seat the glass all the way down then verify operation, THEN tighten the rear clamp. I found this out after I finished the whole project and had to re-open the door to fix. Once verified, tighten up the rear clamp with the wrench and make sure it won’t move out of place. Do the same with the front of the window once latched in its housing.
13. Re-attach the central door controller with the T20 screws. Make sure the door handle control cable sits within its place. Then re-apply your wind barriers. Ideally you have two new once. Mine sort of stuck again. I fear they will fall off.
14. Re-attach all of the cables from the door trim to the door and carefully align the plastic pegs. I used my shoulder to gently apply pressure to get a few of them to secure. Then I used my fist to tap around the perimeter. Close the door and watch the trim to make sure it doesn’t ‘jostle’ out of place. I had to do this a few times to make sure the trim was all the way secure. Just keep pressing and banging around the perimeter gently. Then re-attach the 10mm screw at the top handle and replace the T30 screws under the interior door latch handle. Cover them up, remove the masking tape, and you’re done!
Sounds like a lot, but if you’re prepared and watch the videos ahead of time then you should have no problems. It really wasn’t that hard and in the end I saved $750 and didn’t need to burden my service center with a fix when they could be resolving other people’s problems. In the end it’s a win-win. I just hope they continue to sell me door parts when the other handles fail (they likely will based on what I have read). Have patience, work slow and carefully, prepare and work through it methodically. And you’ll be fine. I’ll try and get some photos up as well.