First off a big thanks to PLUR and fstr on the TOO forum for getting a lot of this info out there, I couldn't do it without their hard work.
One of the worst parts about the SR and SR+ models is their lack of true immersive sound. As stock, the sound system is incredibly front-forward, requiring me to set the balance far to the rear. Fortunately the solution to this issue is rather simple, and relatively inexpensive. If you have a mild understanding of wiring, and feel comfortable removing trim pieces, you can finish this job over a weekend.
Now what all is being changed? In an attempt to simplify production, the interior of all Tesla Model 3 cars are identical, even going so far as to include unused speakers. Strangely, however, the wiring harness is different, meaning these extra speakers could never be activated through software. To solve this problem, I had to add new wires, and an amplifier to power them. Here is what I did, and what parts I used:
This is enough to power the front tweeters, the rear shelf speakers, and the OEM amplifier. If you want to skip the subwoofer, you can choose from smaller amplifiers that are easier to install and hide away. Also all of these parts can be purchased on Amazon unless otherwise noted.
Parts Required:
$189.50 - OEM Model 3 Subwoofer and housing (eBay)
$138.45 - Soundstream PN5.640D 640W 5-Channel Amp
$15.99 - InstallGear 8-Gauge Amp Kit
$11.99 - 100ft 16-gauge wire
$11.99 - Crimp connector kit
$8.99 - T-Tap connector kit
Total cost: $376.91
FYI this how-to skips the A-Pillar tweeters for now, I will add those at a later time!
STEP 1:
Remove the rear seat, then remove the plastic trim along the entryways, there is one long piece up front, and a smaller one at the rear. The B-pillar plastics must also be pulled open, but just enough to gain access to some wires.
STEP 2:
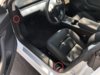
Decide where you would like to mount your amplifier. Some choose in the trunk, the lower trunk cubby, or under the seats. I chose to mount mine near the seat backs, and will cover it with a trunk liner. Also take this time to install your subwoofer. If OEM, it simply bolts in place.
STEP 3:
Begin running speaker wire from your amp to the front of the vehicle, along both sides. You will need two pairs of wires for the left and right, and an additional single wire along the left side for 12v power.
STEP 4:
Run wires from the amp the front of the B-pillars. You will need a pair of wires for each side, this will be your speaker-level input. Also route a single pair of wires from your subwoofer to the amp.
STEP 5:
Run two pairs of wires from the amplifier output to the top of the right rear seat. You will have to remove the seat panel to access this area, simply pull straight up and it should release. There will be a thicker plastic connector with 2-wires going in, and 6 wires going out. Using your taps, connect the speaker wires to the right channel (Yellow -, Grey +) and the left channel (White -, Purple +).
STEP 6:
Using T-taps or Posi-Tap connectors, splice into the subwoofer inputs on the front left and right sides. These wires will be looped together on each side. Driver side is (Blue -, White +). Passenger side is (Black -, Orange +).
STEP 7:
Tap into the 12v switched power. This will be a thicker red wire wrapped in tape, along the driver's side wiring loom. Use a multimeter to test before connecting to the amp.
STEP 8:
Tap into the speaker-level inputs on the left and right B-pillars. These are thin-gauge wires, to take care when tapping. These will also be wrapped together. Driver side is (Black -, Red +). Passenger side is (Green -, Blue +)
STEP 9:
Take all of your wire ends on the amp side and connect them accordingly. There should be two leftover pairs of wires for the tweeter outputs, for a future install.
STEP 10:
Use the amp-installation kit to access constant 12v power. Before doing this, enter the Safety & Security menu and select Power Off. This will shut down the 12v Penthouse power to make for a safer install. Under the rear seat along the passenger side is a foam block, remove it to expose the positive and negative battery connections. Attach the corresponding wires to each, install the fuse along the positive wire, and connect them to your amp.
STEP 11:
Step in the driver seat and turn on the vehicle. Ensure that the amp powers on without issue, and begin to increase the volume. You should now hear your rear shelf speakers and subwoofer working (if equipped). If you have sound issues, first check that you have tapped the wires properly.
Step 12:
ENJOY!
Tips and tricks:
#1 INVEST IN HIGH QUALITY T-TAPS OR POSI-TAP CONNECTORS! I cannot stress this enough, the T-Taps I ordered from Amazon were absolute garbage and took up most of my time. In one case I had to resort to using butt connectors for the driver's side speaker input. I managed to get the passenger side to work (with much swearing).
#2 The factory subwoofer is a dual-coil with four wires. I was able to convert this to a two-wire setup by just connecting the negative wires and positive wires together respectively. Red and Green (+), Blue and Black (-).
I will be adding photos but in the meantime I hope this information helps. It is entirely possible to get the full premium interior for under $500 and a few hours of work. If I were to do this all over again I would buy a smaller amplifier and just power the rear shelf speakers, as they make the biggest difference of all!
One of the worst parts about the SR and SR+ models is their lack of true immersive sound. As stock, the sound system is incredibly front-forward, requiring me to set the balance far to the rear. Fortunately the solution to this issue is rather simple, and relatively inexpensive. If you have a mild understanding of wiring, and feel comfortable removing trim pieces, you can finish this job over a weekend.
Now what all is being changed? In an attempt to simplify production, the interior of all Tesla Model 3 cars are identical, even going so far as to include unused speakers. Strangely, however, the wiring harness is different, meaning these extra speakers could never be activated through software. To solve this problem, I had to add new wires, and an amplifier to power them. Here is what I did, and what parts I used:
This is enough to power the front tweeters, the rear shelf speakers, and the OEM amplifier. If you want to skip the subwoofer, you can choose from smaller amplifiers that are easier to install and hide away. Also all of these parts can be purchased on Amazon unless otherwise noted.
Parts Required:
$189.50 - OEM Model 3 Subwoofer and housing (eBay)
$138.45 - Soundstream PN5.640D 640W 5-Channel Amp
$15.99 - InstallGear 8-Gauge Amp Kit
$11.99 - 100ft 16-gauge wire
$11.99 - Crimp connector kit
$8.99 - T-Tap connector kit
Total cost: $376.91
FYI this how-to skips the A-Pillar tweeters for now, I will add those at a later time!
STEP 1:
Remove the rear seat, then remove the plastic trim along the entryways, there is one long piece up front, and a smaller one at the rear. The B-pillar plastics must also be pulled open, but just enough to gain access to some wires.
STEP 2:
Decide where you would like to mount your amplifier. Some choose in the trunk, the lower trunk cubby, or under the seats. I chose to mount mine near the seat backs, and will cover it with a trunk liner. Also take this time to install your subwoofer. If OEM, it simply bolts in place.
STEP 3:
Begin running speaker wire from your amp to the front of the vehicle, along both sides. You will need two pairs of wires for the left and right, and an additional single wire along the left side for 12v power.
STEP 4:
Run wires from the amp the front of the B-pillars. You will need a pair of wires for each side, this will be your speaker-level input. Also route a single pair of wires from your subwoofer to the amp.
STEP 5:
Run two pairs of wires from the amplifier output to the top of the right rear seat. You will have to remove the seat panel to access this area, simply pull straight up and it should release. There will be a thicker plastic connector with 2-wires going in, and 6 wires going out. Using your taps, connect the speaker wires to the right channel (Yellow -, Grey +) and the left channel (White -, Purple +).
STEP 6:
Using T-taps or Posi-Tap connectors, splice into the subwoofer inputs on the front left and right sides. These wires will be looped together on each side. Driver side is (Blue -, White +). Passenger side is (Black -, Orange +).
STEP 7:
Tap into the 12v switched power. This will be a thicker red wire wrapped in tape, along the driver's side wiring loom. Use a multimeter to test before connecting to the amp.
STEP 8:
Tap into the speaker-level inputs on the left and right B-pillars. These are thin-gauge wires, to take care when tapping. These will also be wrapped together. Driver side is (Black -, Red +). Passenger side is (Green -, Blue +)
STEP 9:
Take all of your wire ends on the amp side and connect them accordingly. There should be two leftover pairs of wires for the tweeter outputs, for a future install.
STEP 10:
Use the amp-installation kit to access constant 12v power. Before doing this, enter the Safety & Security menu and select Power Off. This will shut down the 12v Penthouse power to make for a safer install. Under the rear seat along the passenger side is a foam block, remove it to expose the positive and negative battery connections. Attach the corresponding wires to each, install the fuse along the positive wire, and connect them to your amp.
STEP 11:
Step in the driver seat and turn on the vehicle. Ensure that the amp powers on without issue, and begin to increase the volume. You should now hear your rear shelf speakers and subwoofer working (if equipped). If you have sound issues, first check that you have tapped the wires properly.
Step 12:
ENJOY!
Tips and tricks:
#1 INVEST IN HIGH QUALITY T-TAPS OR POSI-TAP CONNECTORS! I cannot stress this enough, the T-Taps I ordered from Amazon were absolute garbage and took up most of my time. In one case I had to resort to using butt connectors for the driver's side speaker input. I managed to get the passenger side to work (with much swearing).
#2 The factory subwoofer is a dual-coil with four wires. I was able to convert this to a two-wire setup by just connecting the negative wires and positive wires together respectively. Red and Green (+), Blue and Black (-).
I will be adding photos but in the meantime I hope this information helps. It is entirely possible to get the full premium interior for under $500 and a few hours of work. If I were to do this all over again I would buy a smaller amplifier and just power the rear shelf speakers, as they make the biggest difference of all!