Welcome to Tesla Motors Club
Discuss Tesla's Model S, Model 3, Model X, Model Y, Cybertruck, Roadster and More.
Register

Using TM-Spy to see Model S data.

This site may earn commission on affiliate links.
Hey guys, bought a cheap ELM dongle on Amazon and finally made a small harness to test it all. I do have a CANtact but I wanted to test something else. This is the model I bought, a KMoon ODB2 2.1 Mini.

It does not seem to work. I can see he bottom right corner cycling "retrying ELM 10...11...12"... "tesla 10...11".

I enabled trace and checked the log. Here what it looks like :


Code:
06/16/2016 11:22:31 40 000 NaN No Backup Setup.txt file found!
06/16/2016 11:22:31 40 000 NaN No Backup Data.txt file found!
06/24/2016 15:17:57 40 000 NaN No Backup Data.txt file found!
06/24/2016 15:30:05 40 000 NaN No Backup Data.txt file found!
06/24/2016 15:31:49 00 000 NaN No Backup Data.txt file found!
06/24/2016 15:33:57 00 000 NaN No Backup Data.txt file found!
06/24/2016 15:33:58 00 000 NaN Step 0 - BtAdmin already Initialized  MacAdr = 00:1D:A5:68:98:8A
06/24/2016 15:33:58 00 000 NaN Step 1 - Using_WiFi=false  Bluetooth=true  WiFi=true
06/24/2016 15:33:58 13 000 NaN Step 3 - BtConnect: Trying to connect to BT device 00:1D:A5:68:98:8A 1 (Wait for interrupt)
06/24/2016 15:33:58 09 000 NaN [BtS] read failed, socket might closed or timeout, read ret: -1
06/24/2016 15:33:58 09 000 NaN Step 4 - 0.2 sec. Failed to connect to Serial Port 1 00:1D:A5:68:98:8A
06/24/2016 15:34:09 13 000 NaN Step 3a - 11.8 sec. BtConnect: Trying to connect to BT device 00:1D:A5:68:98:8A 1 (Wait for interrupt)
06/24/2016 15:34:11 03 000 NaN Step 4 - 1.5 sec. Serial Port Opened Successfully & Service Started
06/24/2016 15:34:11 03 000  0 Step 5 - AStreamT Initialize to BTSerial
06/24/2016 15:34:16 05 013  0 Bad ATAR response: 00 00 00 00 29 0F FF 23 00 4E 05 00
06/24/2016 15:34:16 08 012  0 Bad ATAR response: 00 00 00 00 8C 0D 2B 01 50 00 00 81
06/24/2016 15:34:16 08 011  0 Bad ATAR response: 00 00 00 00 00 0D 2B 01 50 00 00 81
06/24/2016 15:34:18 08 010  0 Bad ATCM7FF response: 00 00 00 00 00 0000000000000000 000000000 00 00 000000 000 00 00 00 00 00000 000 0000 000000000000000000 00 00 000000 00 00000 00000000 00 000 00 00 0000 0000 0000 00000000000000 00 000 00000000 00 000 0000000000 00 00 00 00 000000000 00 00 0000000000000 00 000 0000000000 000000 0000OOK
06/24/2016 15:34:18 05 013  0 Bad ATAR response: 00 00 00 00 00 C8 00 D8 00 00 05 47
06/24/2016 15:34:19 08 012  0 Bad ATAR response: 00 00 00 00 EF 1D B2 8B FF FF F0 00
06/24/2016 15:34:19 08 011  0 Bad ATAR response: 00 00 00 00 10 00 00 00 00 00 00 00
06/24/2016 15:34:21 08 010  0 Bad ATCM7FF response: 00 00 00 00 0000000 00 00 00 000000000000 0000000000 00 00000000 0000000000 0000 00000000000000000000 0000000000 00000 00000000 00000000000 0000000000 000OOK
06/24/2016 15:34:21 05 013  0 Bad ATAR response: 00 00 00 00 92 31 10 00 80 A8 00 00
06/24/2016 15:34:24 08 010  0 Bad ATCM7FF response: 00 00 00 00 00 31 10 00 80 00 000000 00 00 00000 0000000000 00 00 000000000000000000000 0000000000 000 000000000 0000000000 00 0000000 000000000000000000000 000000000000000000 00 0000000000 0000 00 00 0000000000 00 00 000000000000OOK
06/24/2016 15:34:28 05 010  0 Bad ATCM7FF response: 0 0000 0000000000 00 000 000000000000 00 0000 0000 00000 00 00 0000000 00 00 00 00 C00000000000000 00 0000000000 00 00 00 000000000000 0000000000 00 00 000000 00000000000 00 000 000000000000000000 00000000000 00 000000000000000000 00 00 0000000000 00000000000000000 00000000 0000000000 00000000000 0000 00 00 00 000000 000 00 000 00000000000000 00 00 000000000 00 0000000000 000 00 00 00 0000000000 00 000 000000000000 00 00 000000 000000 00 00 000000000 00 00 00 000000000000 000000000000000000 00 00 00000 0000000 0000000000 00 00 000000 0000000000OK

Is the cheap ELM at fault here?
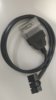
Take an ELM trace (see bottom of help file for how to do it) and then send me the TRC_xxxxxx.txt file that is created.
 
ll...ll...
The better picture is a great help. Thanks for the run down and up again.

As when I looked at mine, it appears that there is not much usable room in there.
Perhaps, plugging onto the TDC with the 3-foot adapter would fit, then running
the cord just inside the top edge of the trim (down the "ski jump") and all the way
to the back end of the trim, the cable could come out there, with the adapter's
OBD connector, and the dongle back there, or even under the passenger seat if
the adapter cable was a bit longer yet. I measure 24 to 26 inches needed to come
out the botton edge of the trim piece, somewhere near the rear end of the trim.
On mine, it looks like exiting at the rear end itself will not work, at least without
a notch ... you know nachos, yum, yum?

I will look more the next time I have the trim piece removed.
Cheers, Gary

I know it's a little late to respond, but this might help those who come later. This bus runs at 500 kbits, so is considered high speed. On a high speed can bus, these stub connections off the main buss should have a total length less than 1 foot. As there is already some length of wire used up to the connector, any length to the obd adapter should be kept fairly short. Long lengths of wire can induce significant noise on the main buss possibly resulting errors in the messages between the various modules on the buss.
 
  • Informative
Reactions: davidc18
I see an interesting pattern in the brick voltages from each module while Supercharging. In each module, two bricks (a pair) report low, two report high, and two report in the middle ... like the 3 bears story ... with a very similar pattern reported from each module.

I suspect that the high charging currents somehow affect the measurement of the brick voltages in each module, and that the actual brick voltages are not really that different while supercharging. Perhaps it is due to some N millivolts lost in some longer internal brick interconnections, and those N mv are getting included in the measurement of the middle pair of bricks, and 2 x N mv are getting included in the measurement of the highest pair of bricks, and then being reported as if they were part of the brick voltage.

A smaller M mv lost in perhaps shorter connections between the two bricks in each pair might, in the same way, account for the smaller differences reported between the two bricks of each pair.

It may be that within a module they read two bricks simultaneously, and then read the groups of two in sequence, on after the other. Because the pack is being supercharged, the groups that get read a little latter have a higher voltage.
 
My car is 2014 September Classic and TDC was tucked deep below the center cubby. Tesla Ranger was very kind pointing out how to remove the cubby (just pull strong down with hands on both sides), and finding the TDC. I got @Chris TX 's longer Classic cable and LELink adapter.

With my car the space under the cubby seems so deep that I was able to tuck the whole cable there and place the LELink on the right side of cubby near the L-shaped cover, then close those panels completely. BLE reception seems to be good in the driver's seat.
 

Attachments

  • P_20160804_191108.jpg
    P_20160804_191108.jpg
    123.9 KB · Views: 110
  • Informative
Reactions: davidc18
You need to have a screen-4 "Plot" selected before you can start gathering data, since the plot specifies which data to gather, and how to display the data as it is being gathered. The "active" Plot should show on the top line of graph screen 4, and usually there is at least a default there. Or, maybe you do not have a working connection to the car's CAN bus, so there is no data to gather ... or running the app in off-line mode?
 
  • Informative
Reactions: hiroshiy
You need to have a screen-4 "Plot" selected before you can start gathering data, since the plot specifies which data to gather, and how to display the data as it is being gathered. The "active" Plot should show on the top line of graph screen 4, and usually there is at least a default there. Or, maybe you do not have a working connection to the car's CAN bus, so there is no data to gather ... or running the app in off-line mode?
Thanks again, @garygid , for your help. OK, I need to select "Select Plot" radio button even though it's selected, then choose "Pack Power" to see the pack power... now I think I understand how to use it. My CAN connection is I think fairly good, with Successful rate between 80% and 97%. Will try again tomorrow.
 
Yes!! I was able to view the graph, after choosing "Start Graphing" and wait for like 20 seconds. I wasn't patient before...

A few more stupid questions. (1) How can I read amps numbers from the graph attached? I can zoom in terms of time, but for the vertical scaling, I can choose full scale, fixed or stacked and none of them is giving the amps numbers in full. (2) What does the green line show? It seems the line is pulsing and not steadily flat.
Screenshot_2016-08-15-11-04-33.jpg
 
Good progress. You have the vertical scales LOCKED so the graphs are going beyond the scaled one-third of the screen that each would normally be using. View the same data again after restarting the app. I think tapping the far left axis caption, perhaps just while scaling (Zoom/Scroll) horizontally, is what toggles the Locked/Unlocked attribute.

Yes, this app has lots of features, and you might want to read the Help/About information.
 
Last edited:
Coming from a Nissan LEAF and now with a new (facelift) Model S 60 with software-limited 75 kWh battery, I already have a suitable ODB BT dongle available here, currently still in use with LeafSpy (Android). So the only problem for me now is the required TDC to ODB adapter.
  1. What's the status for the new style TDC plug and instructions for the pin layout to make an adapter myself?
  2. Anyone offering a ready made adapter for the new style TDC plug (I'm here in Central Europe)?
  3. How to open the housing where the TDC is located in the new facelift Model S with the center console?
  4. Can the ODB BT adapter be hidden in the housing where the TDC is located and always be connected and on?
1,2: Mine is classic so different from yours, but @Chris TX made the cable for me. It has old TDC on one end and OBD2 on the other end. It worked flawlessly.

3:Not sure with post facelift MS but in my case just pull down the cubby and then remove the side panel on the driver side. I asked Tesla service staff about the exact location.

4: In my case cable was 1ft but it still went into the space where the TDC connector was originally buried. I can receive BT LE signal (mine is BLE, which doesn't require pairing and low power) fine in the cup holder.
 
  • Informative
Reactions: Tesl@ Bargain
How to open the housing where the TDC is located in the new facelift Model S with the center console?

Put a rag on the console beneath the cubby to protect the console's surface. Pull down hard on the front of the cubby. You might have to get your fingers on the top of the cubby to get it to release. After the front of the cubby releases, pull the cubby straight out toward the rear of the car. The cables are sitting on the top of the cubby so they should drop down onto the console.
There are horizontal tabs on the rear of the cubby that have to be inserted in slots at the back of the recess to reinstall the cubby.