Not sure why someone rated my previous post dislike, but I'd be happy to show you my setup. I'll start by saying I'm pretty horrible at explaining things and I probably should have taken more pictures and included arrows. Let me which parts aren't clear and I'll clarify.
First, the parts I used are as follows.
1. 40" Left angle USB extension cable found here:
USB 3.0 Extension Cable - Left Angle - 877.522.3779 - USBFireWire.com
2. Patriot 256GB USB 3.0 Flash drive
Amazon.com: Patriot 256GB Supersonic Boost Series USB 3.0 Flash Drive with Up to 150MB/Sec - PEF256GSBUSB: Computers & Accessories
I had an idea to route the USB cable down through the routing path that Tesla intends to be used for the supplied phone charger hardware. I happen to have an iPhone 6S (it's big) which means two things. 1. I don't really need to charge it in the car due to big battery, and 2. it doesn't stand up very well with the supplied charging hardware. Thus, I didn't mind using this spot to route a USB cable for a music drive instead of the phone charger.
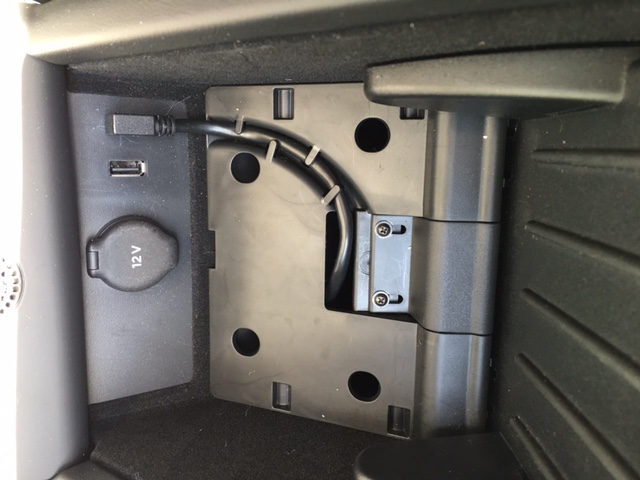
Step 1:
Pull up the rubber in the rear part of the console to expose the cable routing. (see below picture)
Step 2:
Plug in the left angle extension cable and route it around and through as shown.
Note, the thickness of the USB cable I used was almost too much to fit under the little tabs. Be real careful or you'll snap them off. You can probably see how the plastic on one is stressed where I almost snapped one off.
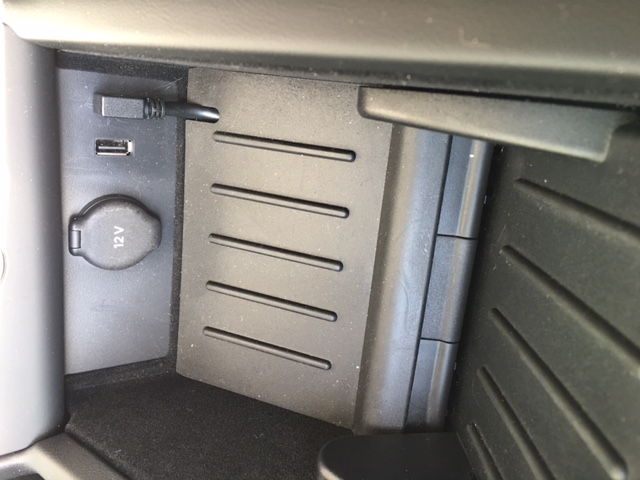
Step 3: Replace the rubber piece you just removed, as shown. Then close the cover over this part. Nice and clean.
Step 4:
Open the front section of the center console and remove all 4 of the cup holder pieces. Pull up the big rubber piece under the cup holder section. Don't worry it's very easy to remove and replace. No glue or anything.
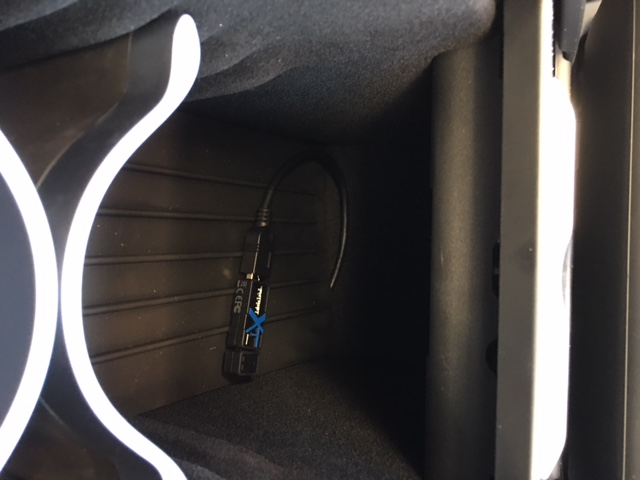
Step 5:
Pull the USB cable from under the rear part of the center console and route it under the big rubber piece in the cup holder section so that the end pops up at the forward most part of the cupholder area (see picture below). This actually worked better than I thought it would, because the under part of the rubber piece is grooved, so the cable is routed quite easily.
Step 6:
Replace the rubber flooring for the cup holder section and the cup holder hardware.
Step 7:
Plug in USB music drive and enjoy.
I probably could have gone with a shorter cable, but I wanted something long enough to allow connection of a bigger (512GB) SSD USB enclosure.
Anyway, this setup has worked flawless, it's totally out of sight. I ordered the Model S when it was yacht flooring and was surprised upon delivery with the new console in March. I wasn't sure I liked the console at first, but having the music setup like this is pretty nice.
Hope this all makes sense enough.