Welcome to Tesla Motors Club
Discuss Tesla's Model S, Model 3, Model X, Model Y, Cybertruck, Roadster and More.
Register

2nd row seatbelts

This site may earn commission on affiliate links.
2017 MX 75d 6 seater 2nd row seatbelts are slow to retract. They are actually very dirty. Did make a big difference with some silicone spray. However they are dirty, so I plan to clean them. I have a hand held steamer and upholstery vacuum.
Does anyone foresee an issue cleaning the seatbelts with a steamer?
 
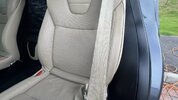
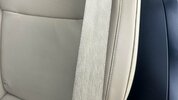
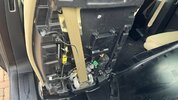
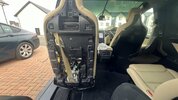
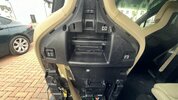
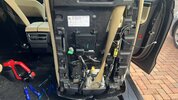
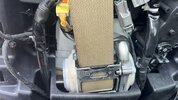
As I had some spare time this morning I decided to strip the back panel off the 2nd row seats, detached the seat control cable, and untwist both seats seatbelts. Clean them, and give them a bit of silicone spray, for good measure.
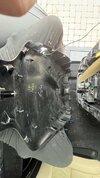
It's actually surprising easy to do, and only one metal clip mount broken.

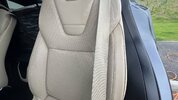
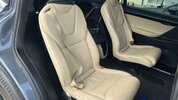
This info is for the six seater.
Move the seat forward.
Do not start at the top, as I had read you were supposed to do.
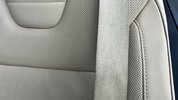
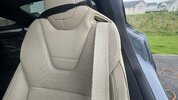
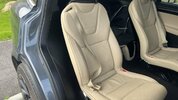
To remove the back panel start at the bottom.
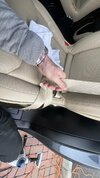
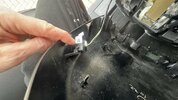
Get on gloves or have a rolled up towel.
There are two hand points at the bottom to get a grip of, but without gloves you'll slice your hands.
Get a grip and pul swiftly and straight back.
That will pop off the base of the panel, the rest will pop off a bit at a time.
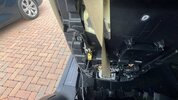
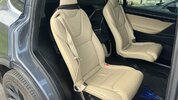
Lift up at the top and pull back gently.
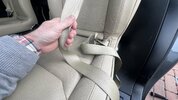
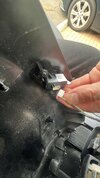
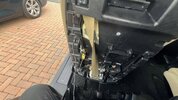
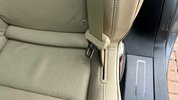
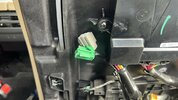
Detached the seat control cable.
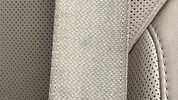
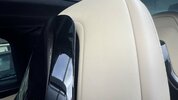
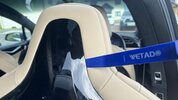
Fix or untwist the seatbelt and clean if you need to.
Bare in mind the ratchet for the seat might be locked on so unfurling the seat belt might not work as the seat is in a forward position.
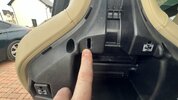
Re attach the seat control and reverse attach the back panel starting at the top and working your way down.
Job done.
Go have. Cup of tea.
 

Attachments

  • IMG_4622.jpeg
    IMG_4622.jpeg
    550.2 KB · Views: 5
  • IMG_4627.jpeg
    IMG_4627.jpeg
    381.1 KB · Views: 5
  • IMG_4626.jpeg
    IMG_4626.jpeg
    462.4 KB · Views: 3
  • IMG_4625.jpeg
    IMG_4625.jpeg
    467.1 KB · Views: 3
  • IMG_4624.jpeg
    IMG_4624.jpeg
    288.4 KB · Views: 3
  • IMG_4621.jpeg
    IMG_4621.jpeg
    569.2 KB · Views: 5
  • IMG_4620.jpeg
    IMG_4620.jpeg
    541.8 KB · Views: 4
  • IMG_4619.jpeg
    IMG_4619.jpeg
    561.6 KB · Views: 3
  • IMG_4618.jpeg
    IMG_4618.jpeg
    554.2 KB · Views: 3
  • IMG_4623.jpeg
    IMG_4623.jpeg
    323.1 KB · Views: 4
It does also appear that my seat are possibly wired for heating and cooling. Must work out how to sort this.
 

Attachments

  • IMG_4637.jpeg
    IMG_4637.jpeg
    374.6 KB · Views: 5
  • IMG_4636.jpeg
    IMG_4636.jpeg
    366.9 KB · Views: 2
  • IMG_4635.jpeg
    IMG_4635.jpeg
    331.1 KB · Views: 3
  • IMG_4634.jpeg
    IMG_4634.jpeg
    469.3 KB · Views: 5
  • IMG_4633.jpeg
    IMG_4633.jpeg
    405.2 KB · Views: 4
  • IMG_4632.jpeg
    IMG_4632.jpeg
    484.2 KB · Views: 4
  • IMG_4631.jpeg
    IMG_4631.jpeg
    494.2 KB · Views: 5
  • IMG_4630.jpeg
    IMG_4630.jpeg
    327.1 KB · Views: 4
  • IMG_4629.jpeg
    IMG_4629.jpeg
    340 KB · Views: 1
  • IMG_4628.jpeg
    IMG_4628.jpeg
    378.1 KB · Views: 3
Final batch of photos.
All told, took me about 20 minutes of labour, and about 10 minutes of faffing.
 

Attachments

  • IMG_4647.jpeg
    IMG_4647.jpeg
    393.6 KB · Views: 6
  • IMG_4646.jpeg
    IMG_4646.jpeg
    221.2 KB · Views: 5
  • IMG_4645.jpeg
    IMG_4645.jpeg
    216.6 KB · Views: 5
  • IMG_4644.jpeg
    IMG_4644.jpeg
    362.5 KB · Views: 3
  • IMG_4643.jpeg
    IMG_4643.jpeg
    419.8 KB · Views: 3
  • IMG_4641.jpeg
    IMG_4641.jpeg
    370.9 KB · Views: 6
  • IMG_4639.jpeg
    IMG_4639.jpeg
    419.1 KB · Views: 4
  • IMG_4638.jpeg
    IMG_4638.jpeg
    429.6 KB · Views: 4
  • IMG_4648.jpeg
    IMG_4648.jpeg
    370.5 KB · Views: 5