


Tesla EVs are decidedly modern in appearance and interior. And in many places, Tesla has made bold innovations compared to traditional gasoline vehicles and equipped it with leading-edge technology, making it the most advanced eclectic car that grabs the attention of people to buy its vehicles. Tesla has a large sales volume in the global market and ranks first among new energy vehicles,especially Model3 and Model Y.


Systemversion:V0.3.Xversion
Systemversion:V0.2.Xversion
Note:The version of theupgraded firm ware must correspond totheversion of the MCU firmware of the installed screen ( 9.0inch ).
There are two major versions:0.2.Xand0.3.X.
2.Preparations before upgrading
On the far right side of the 9.0 inch screen->Slidetoleft->Setting->About the device
When the upgrade operation isrequired,please provide the following version interface to Tesery after-salesteam ,then the aftersale team will provide the corresponding software.
Note: update.img is the UI application upgrade firmware, and XXX.bin is the MCU upgrade firmware
Note: Copy all upgrade files (excluding folders ) to the U disk, and DO NOT change the name of the upgrade firmware file!
3. Upgrade Operation


You can view the installation video below:
Next Blog:Is the Tesla "Yoke" Steering Wheel Optional?
Missing from Tesla Model 3 - Eliminates the Instrument Panel
As it says, nothing in the world is perfect. There is a lot of feedback from the market, Tesla Model 3 & Model Y are eliminate the traditional center dashboard display, leaving only a large display that makes it painful for the driver. Viewing information while driving, and experience of the cental display isn't that perfect, since Tesla vehicles don't support Carplay and Android Auto, they still need a smartphone mount for navigation, but it's still not convenient enough.Tesla's Issue - Turning Off While Driving
Tesla cars are pretty prone to bugs and issues considering that much of Tesla’s features hang off software.After all, the vehicles are constantly updated with new features and random improvements – almost like they’re all a part of a massive beta program.And now, there are several reports saying that the instrument clusters on various Tesla models are dangerously turning off while driving.Aftermarket Accessories Fixes the Issue
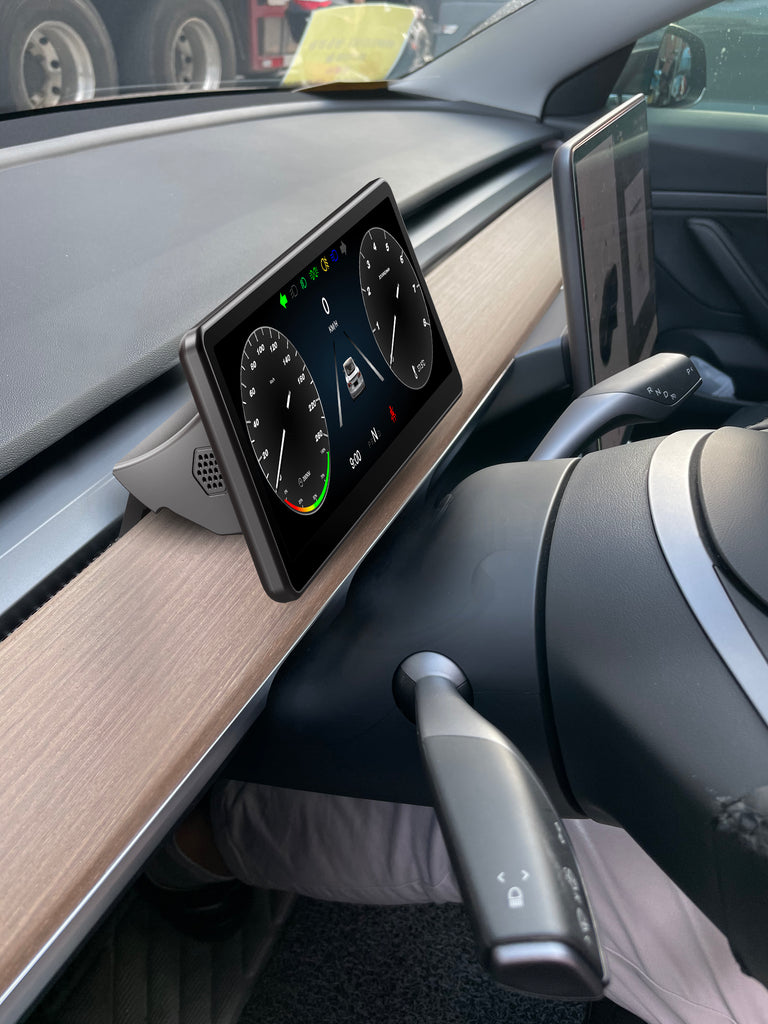
So Tesery has developed a better heads-up display that integrates Carplay and Android Auto to help end-users with these pains and provide them with a safe and fun driving experience. With Carplay and Android Auto, the navigation system can be displayed on the front dashboard. Dual dashboard display look more luxurious and advanced in your cockpit. Even if the central display suddenly crashes during driving, the instrument panel can display the status information of the car normally, that can provide safe driving.Tesery Instrument Panel Overview(Impressive Features)
Perfect as OEM
Provides a better view
Display information
- Driving speed/Overspeed warning
- Turn signal lights
- Headlights
- Time/gear/battery capacity
- Seat belt reminder
- Temperature reminder
- Daytime mood/nighttime mood display
- Brightness is adjusted in sync with the large central screen
- Customizable user interface
- Function display can be customized
Quick Start
Drive Safely
Simple installation
Various operations
- Support touch control, slide up and down on the touch panel to freely switch between different states, fast;
- Check the most important information (light and gear information, safety distance information, door information, tire pressure information);Other states can be customized in OEM.
- The steering wheel is perfectly matched;
- Voice control supports Carplay and third-party apps.
Carpaly & Carlife
- Supports wireless CarPlay connection (IOS), wireless CarLife connection (Android Auto);
- Support for other apps on your iPhone - such as your favorite audio, messaging, and voice apps, as well as apps on your iPhone such as apps for third-party parking, electric vehicle charging, and quick food ordering. Easily connect to your Android smartphone and get your favorite APP in the Android car list;
- Apps developed by car manufacturers are also supported, so you can control more. You can personalize your experience by rearranging exactly how your apps appear in CarPlay through the settings on your phone.
Multiple experiences
- Enjoy all your favorite audio via Spotify, iHeart Radio, Podcasts, and even DAB+ digital radio, offering a wide range of digital radio stations;
- Experience precise navigation. Voice control works seamlessly with this feature, allowing you to dictate your destination and start driving;
- Built-in Bluetooth enables wireless connection of mobile phones for convenient and secure hands-free calling and audio streaming;
- Secure hands-free calling and audio communication. Additionally, you can use voice control through the built-in or wired microphone.
Support upgrade
Support left and right rudder driving
How to Operate the Instrument Panel?
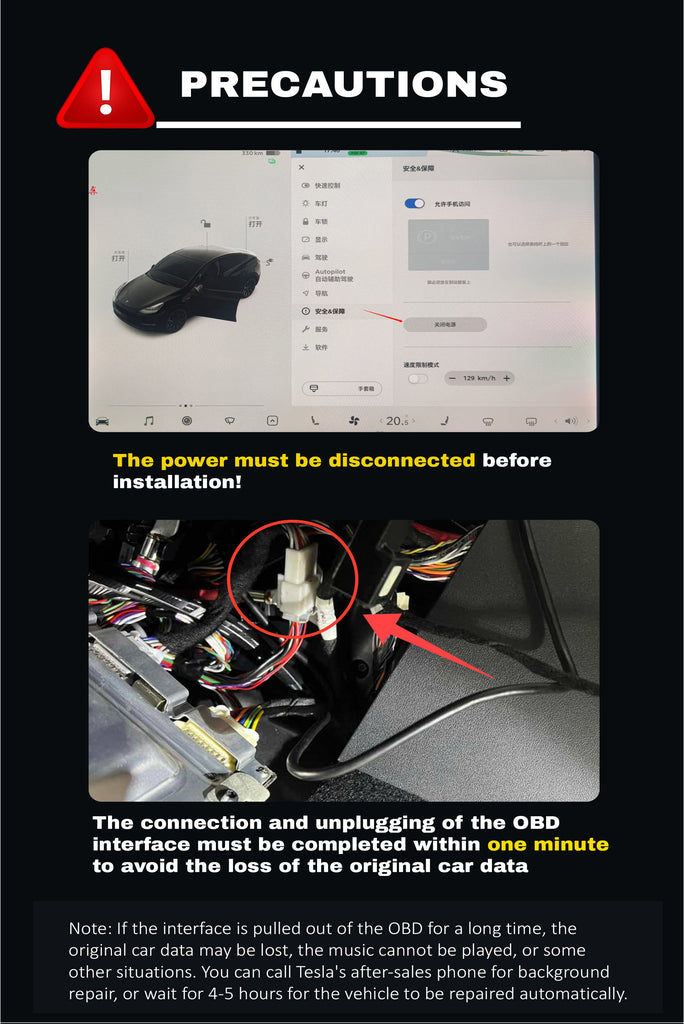
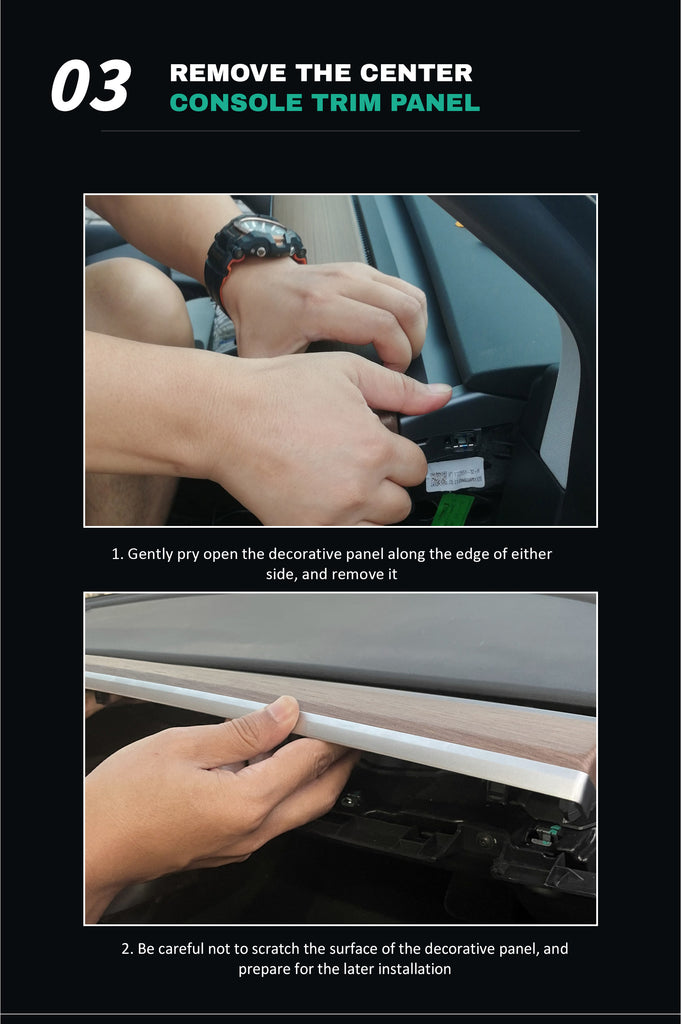
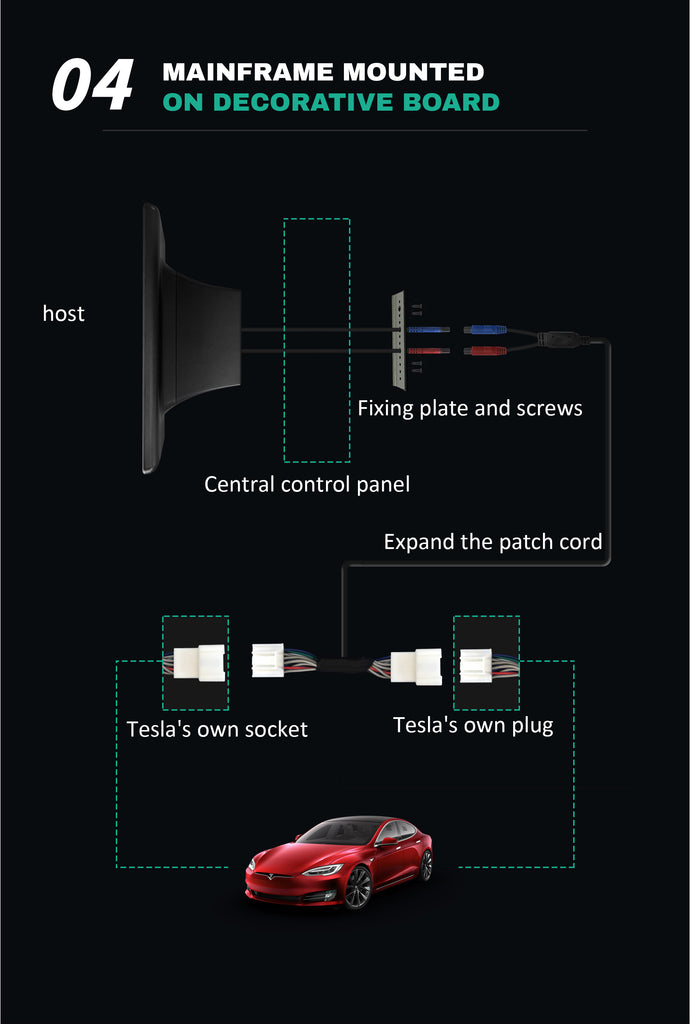
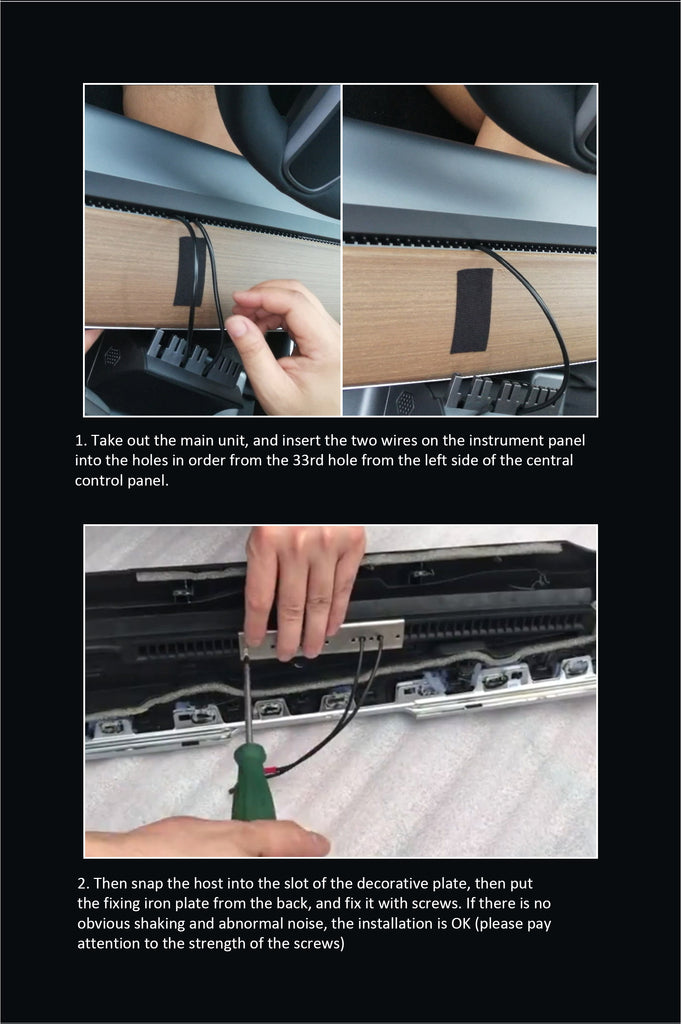
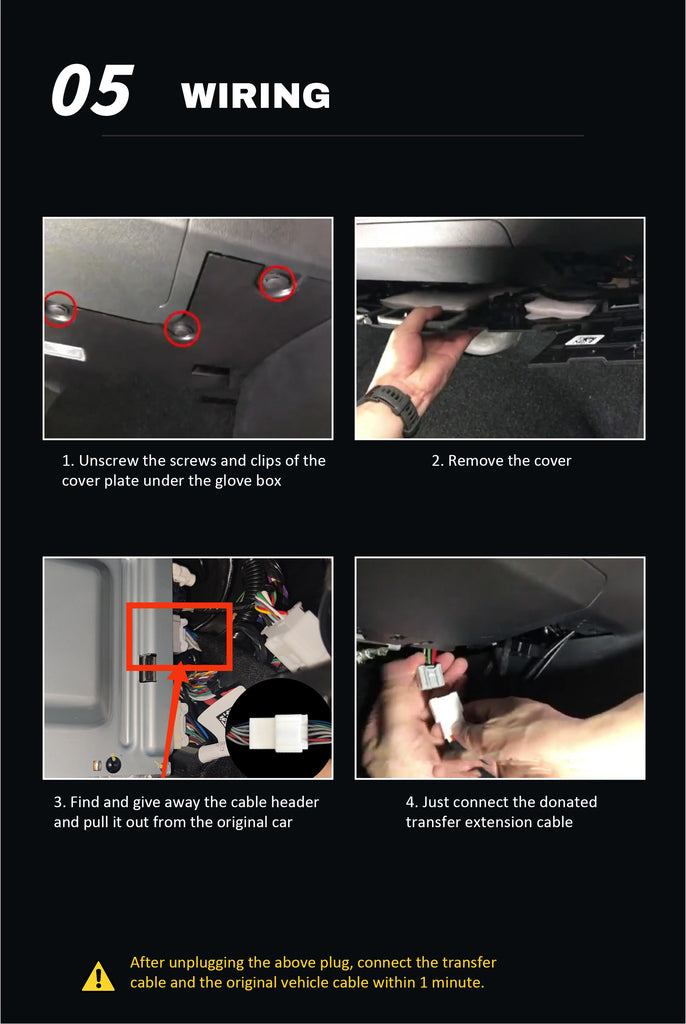
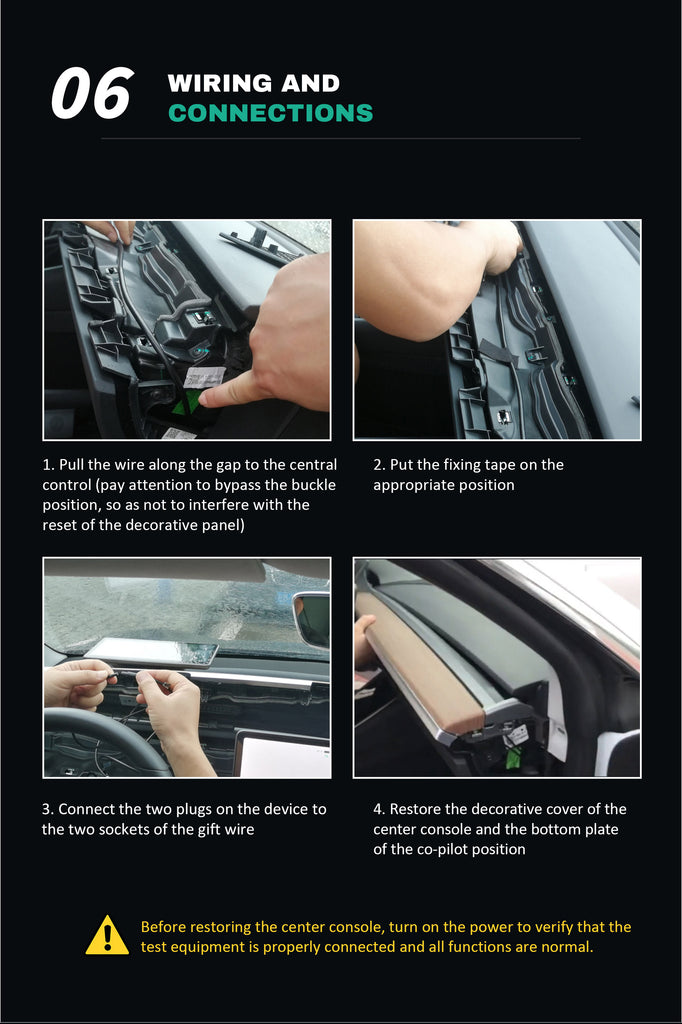
How to Install Instrument Panel?
How to Upgrade the Instrument Panel?
1.Soft ware version descriptionSystemversion:V0.3.Xversion
Systemversion:V0.2.Xversion
Note:The version of theupgraded firm ware must correspond totheversion of the MCU firmware of the installed screen ( 9.0inch ).
There are two major versions:0.2.Xand0.3.X.
2.Preparations before upgrading
- Confirm the System Version
On the far right side of the 9.0 inch screen->Slidetoleft->Setting->About the device
When the upgrade operation isrequired,please provide the following version interface to Tesery after-salesteam ,then the aftersale team will provide the corresponding software.
- Toolpreparation
- Firmware upgrade package file
Note: update.img is the UI application upgrade firmware, and XXX.bin is the MCU upgrade firmware
Note: Copy all upgrade files (excluding folders ) to the U disk, and DO NOT change the name of the upgrade firmware file!
3. Upgrade Operation
- Insert the U disk with the upgrade file copied into the Type-C interface on the right side of the 9.0 inch screen;
- If there is MCU upgrade firmware in the U disk, the 9.0 inch screen will automatically kip to the MCU upgrade interface;
If only upgrade the UI application (HMI) firmware, you can view next step; - Click the Start button on the screen to start upgrading MCU firmware;
- A progress bar will appear after the upgrade is started. After the upgrade is successful, the system will restart. Do not pull out the U disk at this time!
- The application upgrade interface will pop up after the system is restarted; Click "zkgui" or other (there will be other options if the upgrade content isdifferent) tick all the boxes behind; Then click the Upgrade button at thelower right corner of the screen;
- A progress bar will appear after the upgrade starts. When the upgrade iscompleted, the system will restart.When the system re-enters the step 4application upgrade interface,click the upper left corner to return to thescreen interface;
- After completed the upgrade , then remove the U disk;
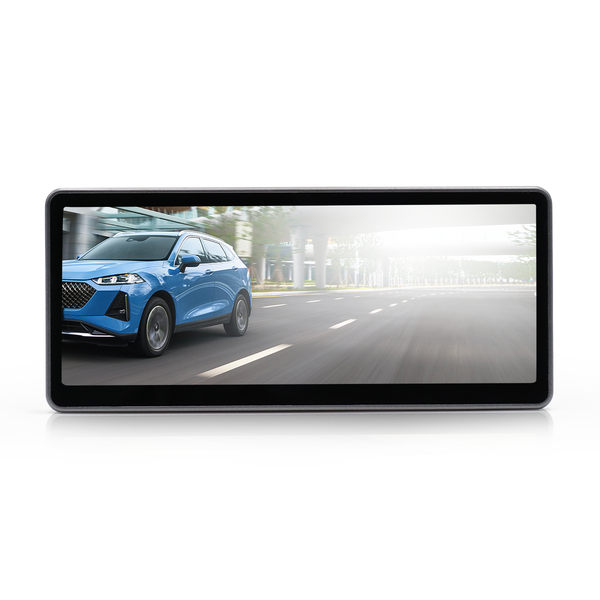
Display Show
You can view the installation video below:
Next Blog:Is the Tesla "Yoke" Steering Wheel Optional?