So,
I wanted to follow up. I don't think I mentioned that our 2017 Model X was affected by this issue as well. Going on the translated fix from Norwegian forums in
post #17 of this thread, my wife and I worked on this project together.
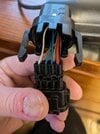
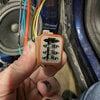
TL;DR, replacing the connector fixes the issue. For us, the connector was too far gone to just need cleaning - one of the blade pins was corroded enough that it bent and mostly broke off. Replaced with an 8-pin waterproof deutsch connector.
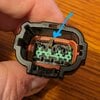
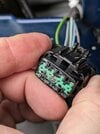
I'll detail what we did:
- Disassembled the door panels (I can't give you advice on this one since my wife did it - she said it wasn't too hard).
- Disconnected a connector from the controller box and removed the controller box (the "Square" mentioned in #17), and a few other things that are fairly obvious.
- Removing the connector will prevent it from actuating, but it still is getting power so:
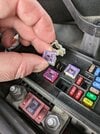
- Remove the fuse for the door drive motor (I will include photo of this). This will remove power from the motor so it's safe to work with the wiring.
See this YouTube video that details the fuses in the first gen Model X - this is where I got it from:
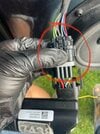
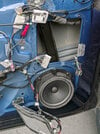
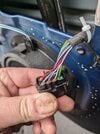
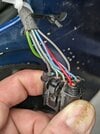
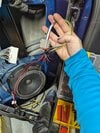
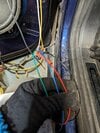
- Inside of the door you will find the connector connecting the drive motor to the wire harness. Both sides of this are pretty short, which made this fix a bit difficult. To make it easier to access, there is a ziptie tying down the wire harness on the right side of the door (towards the car). Snip this. Then you can pull the connector just outside of the door onto the top of the "pocket" that allows you access to the innards of the door (see photo of door).
- The wires on both sides of the connector -- from the wire harness, and to the drive motor, are both pretty short, so I clipped them right up against the connector.
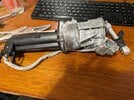
- Here is where my wife took the drive motor out - not sure the process here, but you can get the whole drive motor out without too much fuss apparently.
- Since the wires were quite short, I extended these wires with additional wire, along with additional heatshrink over them to make doubly sure they were water tight. I did this for each wire, on both sides - wire harness side, and drive motor side. I'll detail the colors and wire gauges below. This was probably the most tricky part, as the wires on both sides were corroded (worse on the drive motor side), and it took two different fluxes to find a flux that would actually get the corroded wires to take solder.
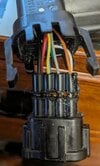
- After that it was just a relatively easy job of crimping the wires with Deutsch connector pins, and sliding them into the connectors. I was able to buy a two pack of 8-pin waterproof deutsch connectors from Amazon for about $16. These connectors are a breeze to work with. The pins just slip right in and lock into place, and are then fully secured with a wedge lock on both sides of the plug. The waterproofing on these connectors I think is superior to that of the original one that Tesla used.
- With all that done, now you put it all back together:
- Put the drive motor in (no details here, sorry).
- Connect the wire harness to the drive motor using the new connector.
- Push it all back into the door
- Screw back on the square controller box
- Reaffix the wire harness door seal on the end of the door if you pulled that out (I did)
- Add some additional waterproofing to those holes.
- Reassemble the door panel.
I think the reason that these connectors corrode is because it was pretty clear that water can get into the door panel when it rains. I think it comes through where the wire harnesses come through, and/or where the drive motor shaft comes through into the door, on the door end. I would recommend adding some additional waterproofing to this to prevent water infiltration here.
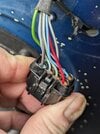
Here are the details on the connector and wires:
8-pin connector
Drive-motor side pin layout, bottom to top, left to right, with power and ground on left:
Row 1 (bottom first, top second): Power - Red, Ground - Black. Both are 16AWG
Row 2: Blue, Yellow - 20AWG
Row 3: Green, Grey - 20AWG
Row 4: White, Orange - 20AWG
Wire harness side - bottom to top, left to right, power and ground on right:
Row 1: Red, Blue - 20AWG
Row 2: Green+White, Purple+White - 20AWG
Row 3: Blue+White, Grey - 20AWG
Row 4: Grey - Ground, Green - Power, Both are 16AWG


