I recently bought a Whispbar rack from Tesla. There is an installation video available on the Tesla website, and there is an instruction manual in the box.
The problem is that neither one is for the current iteration of the roof line. A call to support will result in referral to a service center. I emailed support with photographs and my question about the 3M tape, and was again referred to a service center. The problem is that no one knows anything about the rack unless they have installed one.
Adjustable Bar Length
Don't worry about the bar end settings, the video is way off. Just loosen the screw 10 rotations, as directed, then adjust it on the fly by holding it up over the bolts you inserted in the roof. Make sure you place the washer with the tang, on the bolt first. This will show you the spacing required for the bar ends. Don't try to force anything. If the rack won't seat easily, you have the ends in the wrong slots. These are small bolts and washers on which you are placing a long rack. The fulcrum effect will allow you to bend or break something if you are ham-fisted.
3M Tape
The tape is not the length of the mount which sits on it. This is mysterious knowledge kept in area 51 so, buy some more tape or live with it.
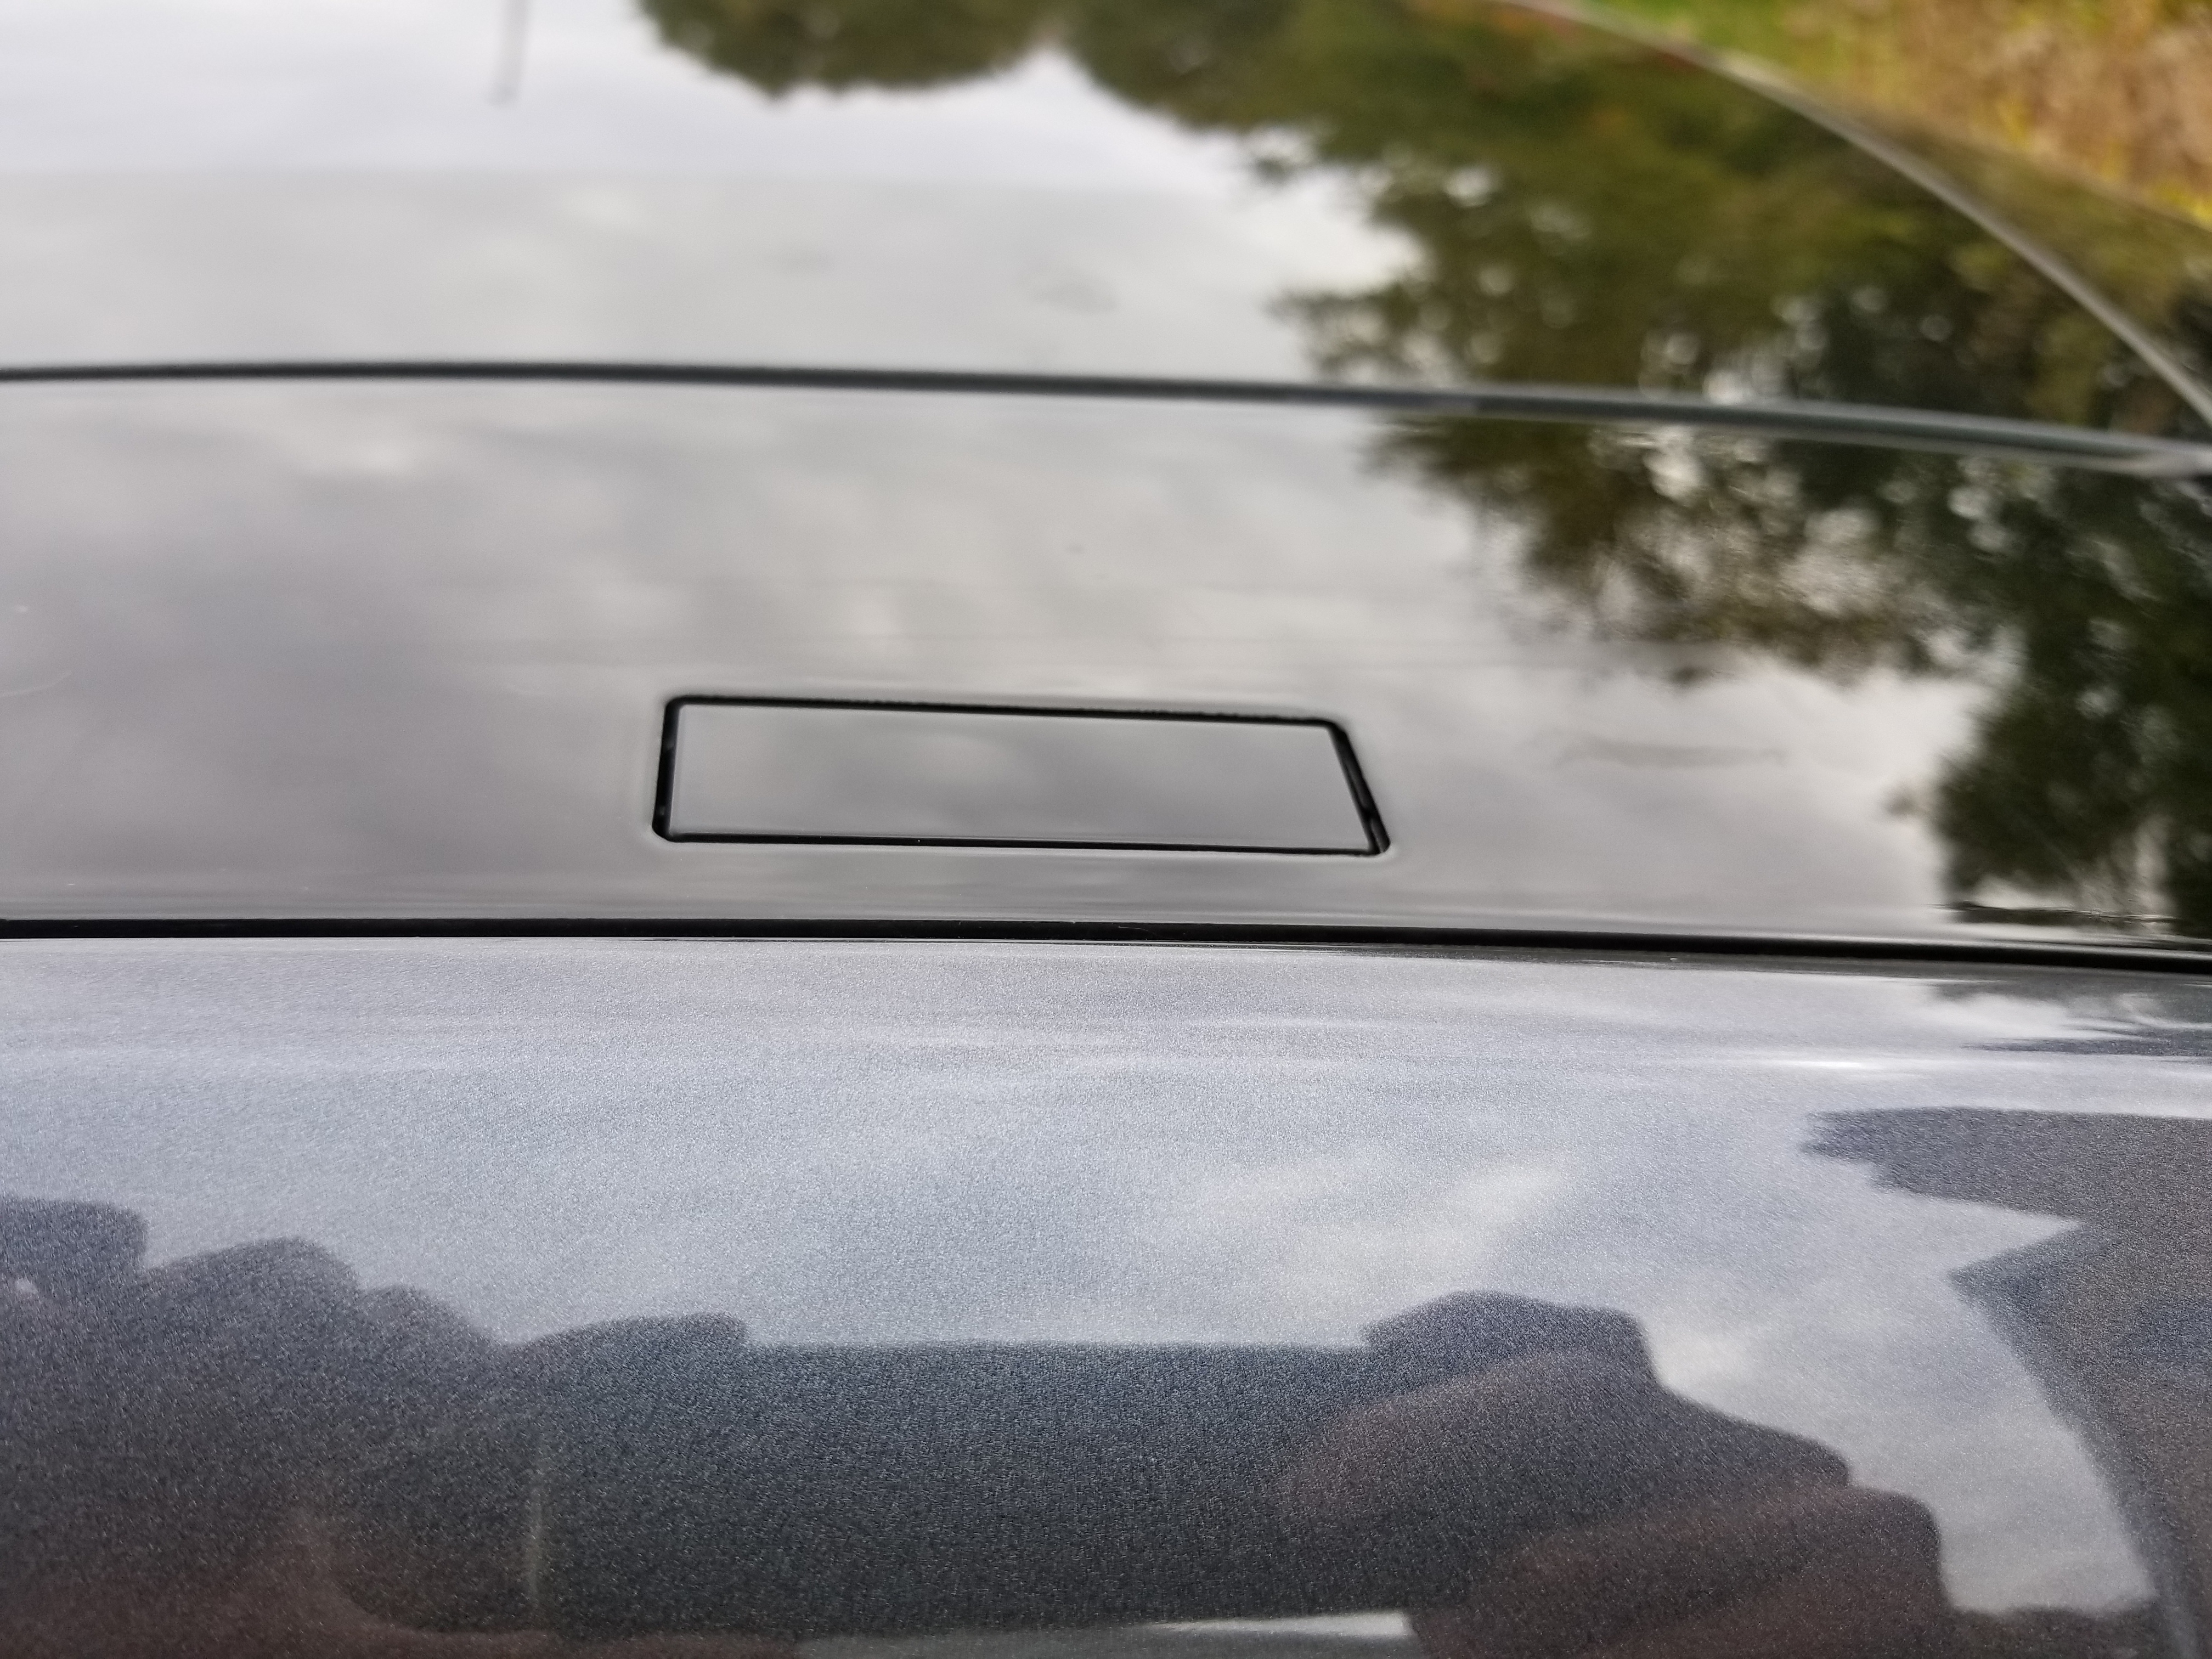
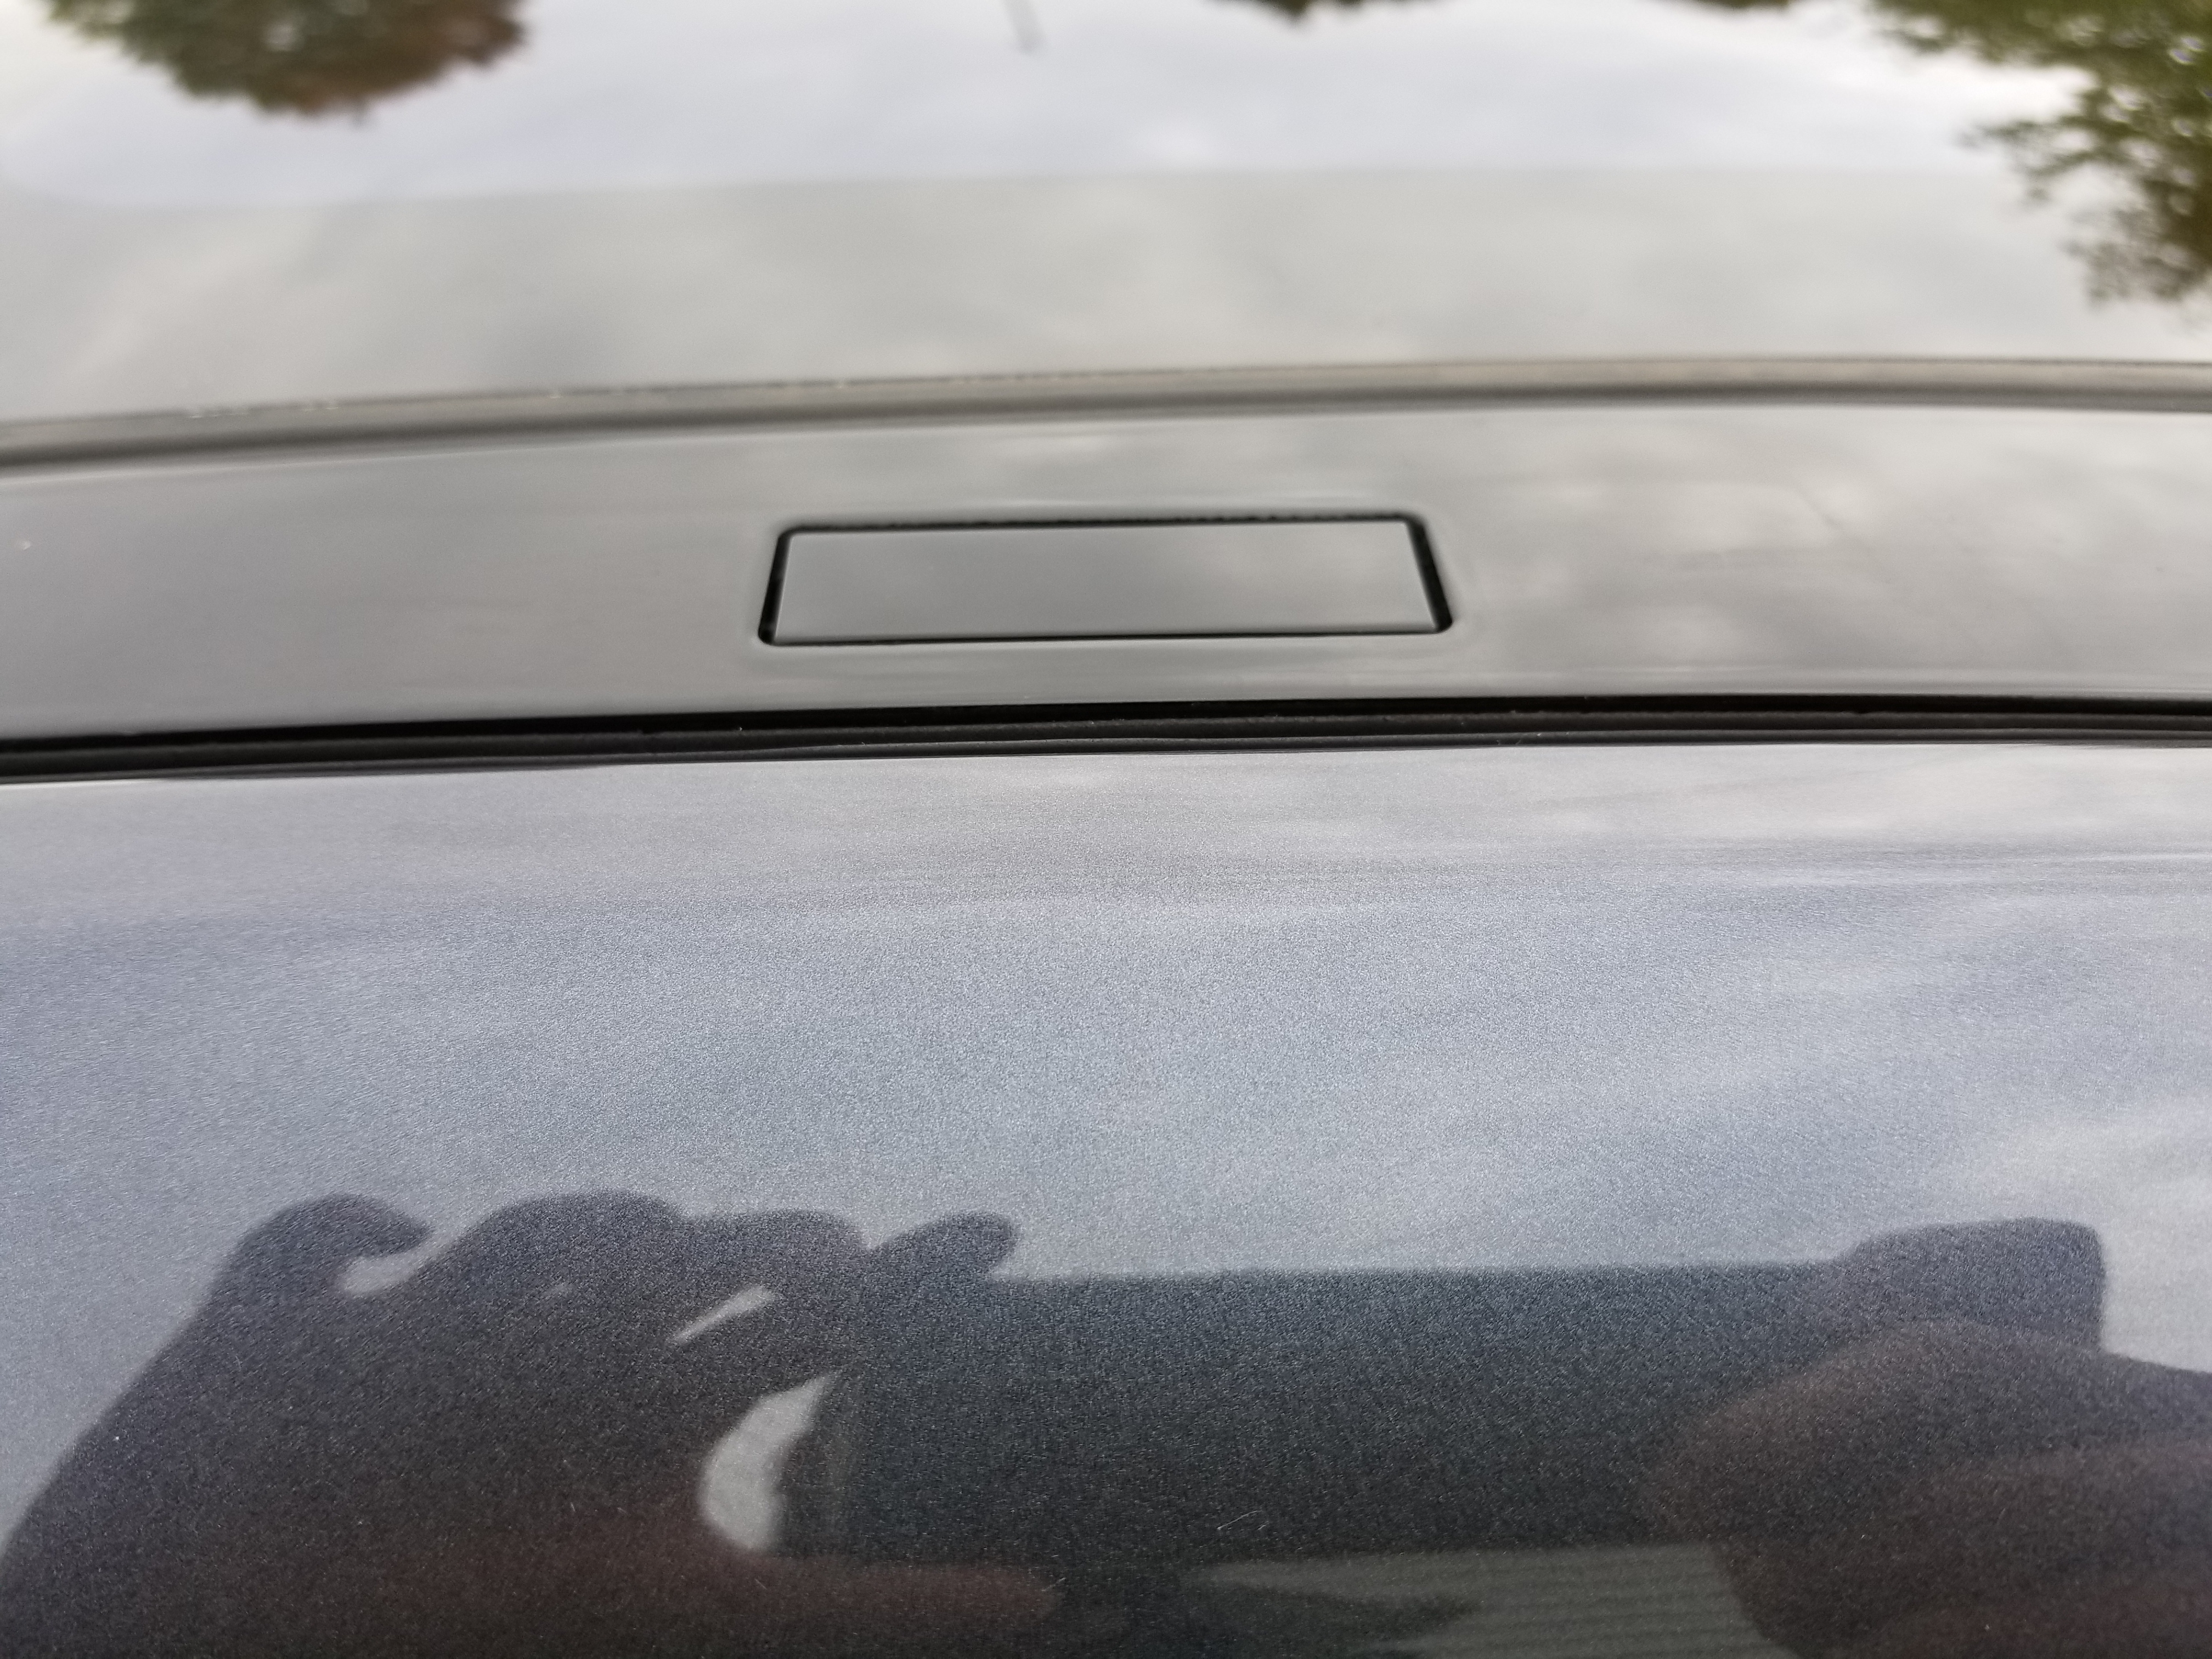
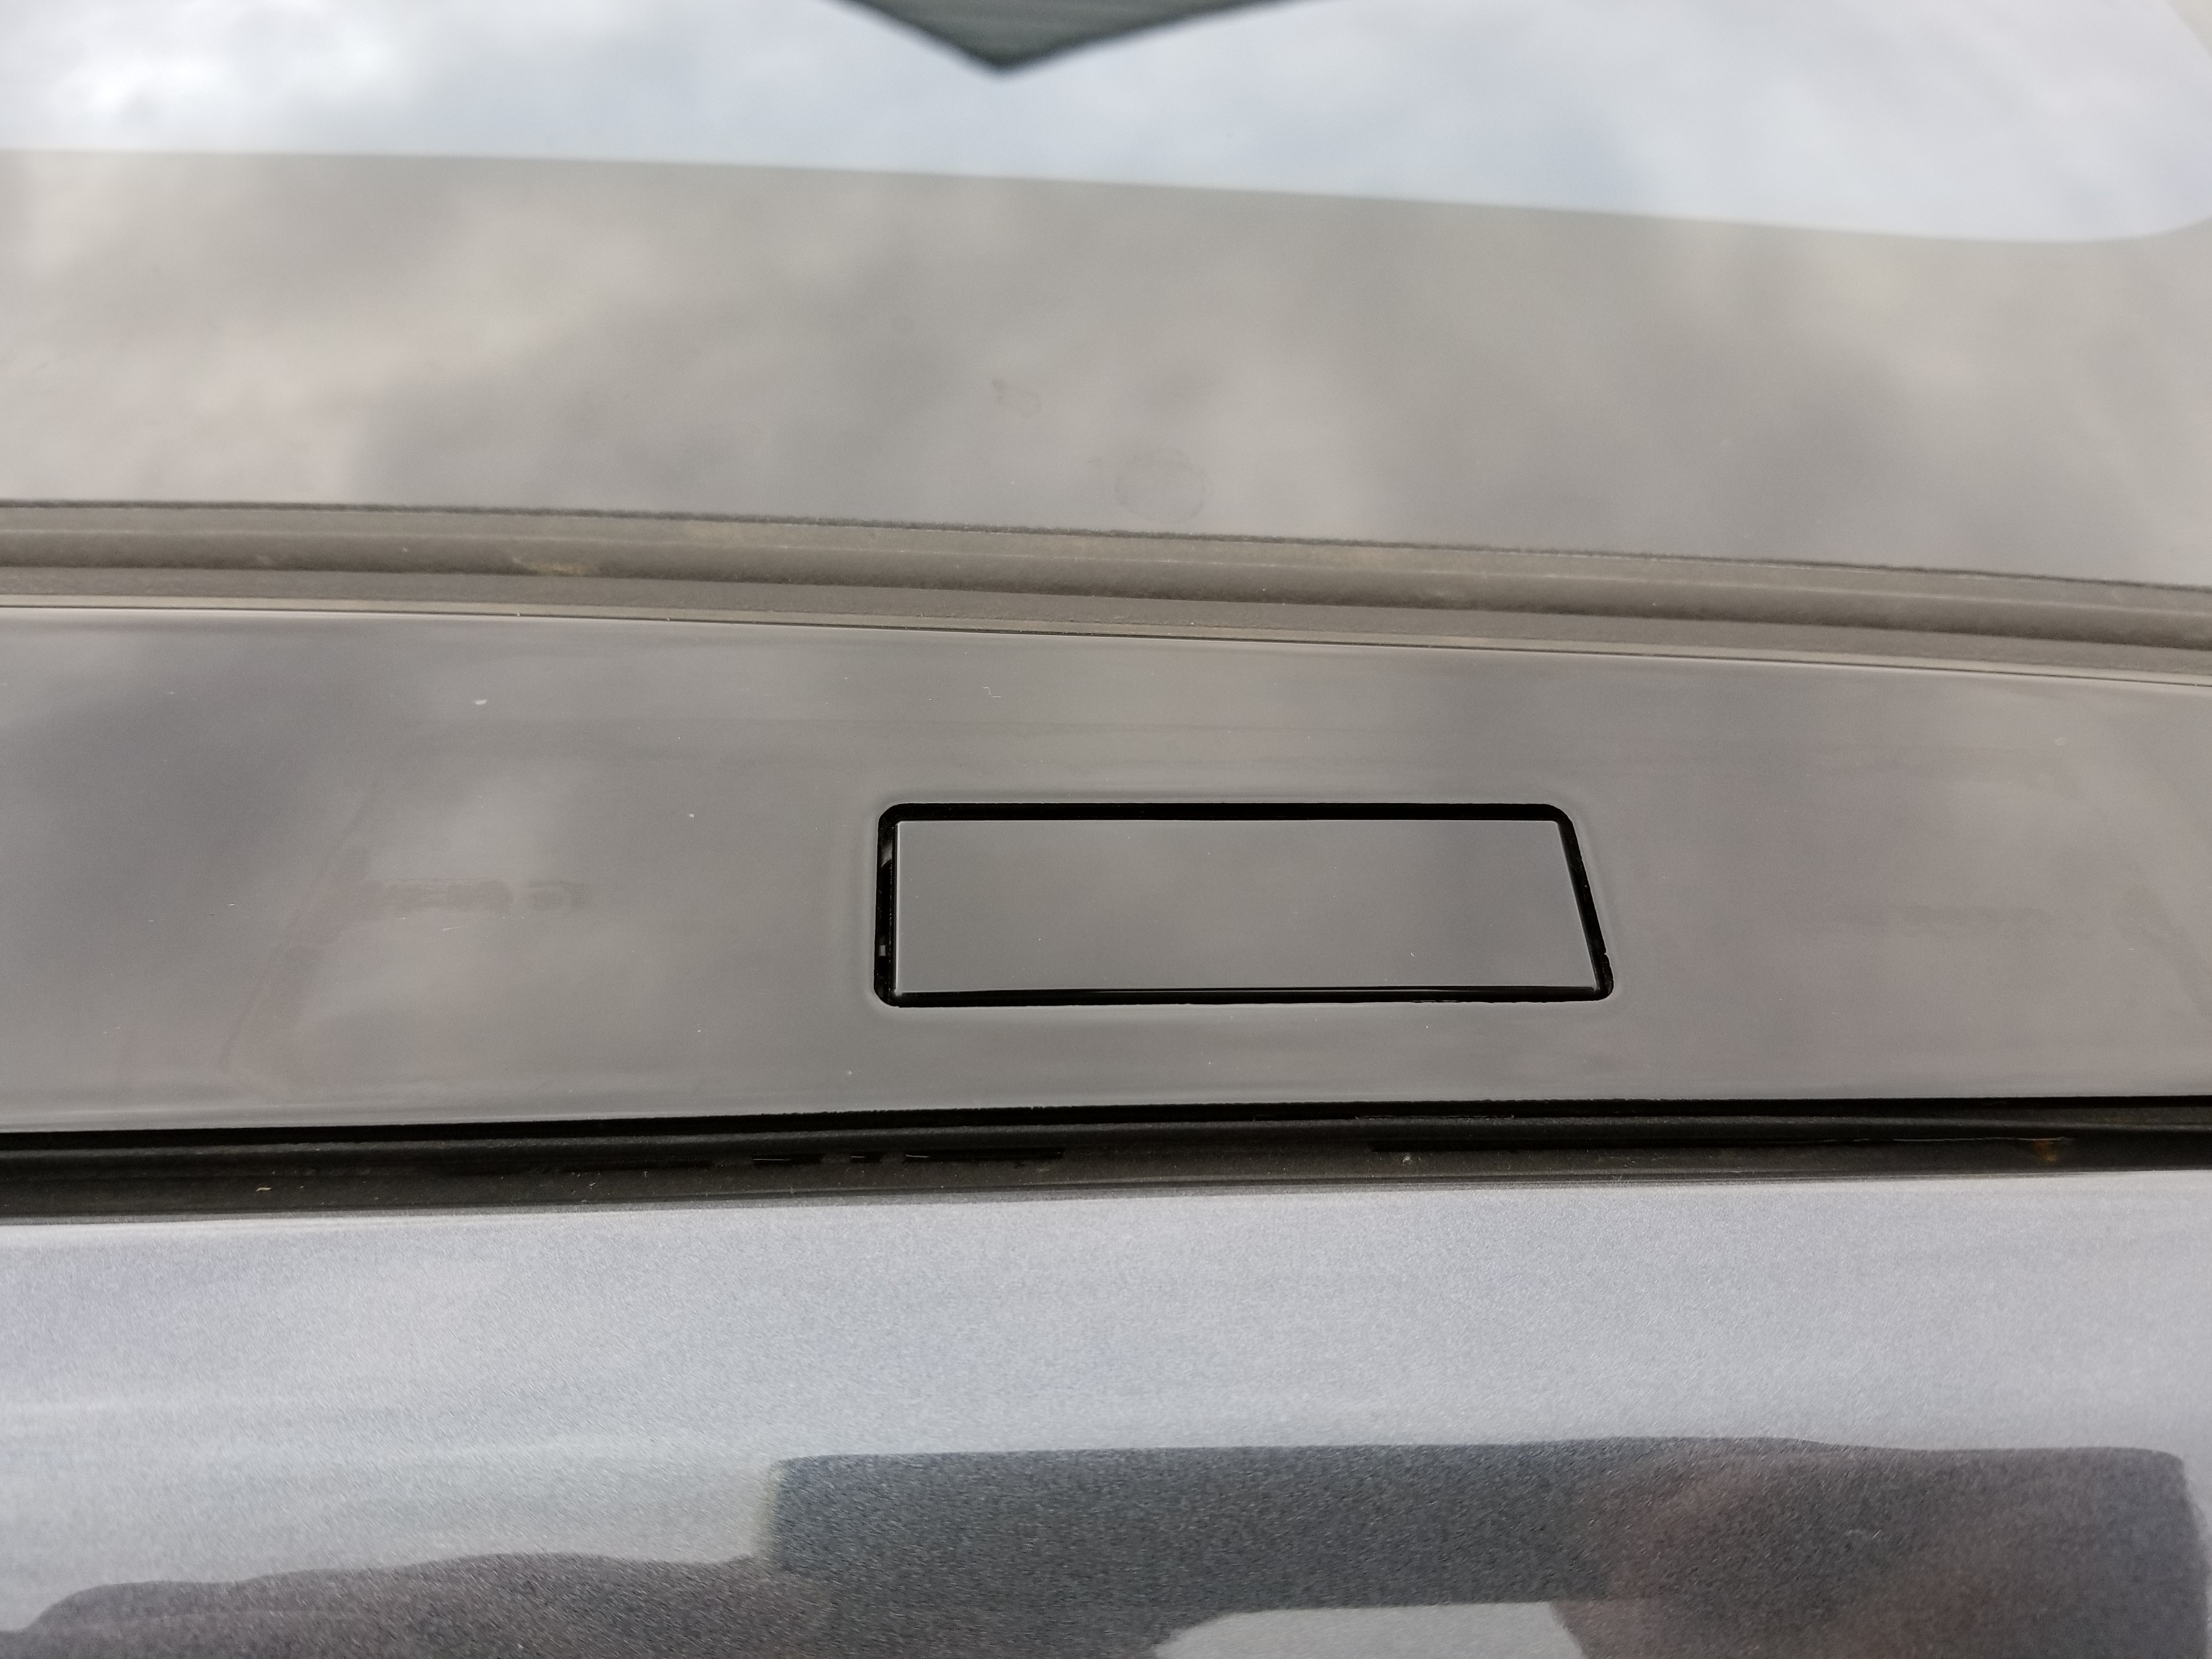
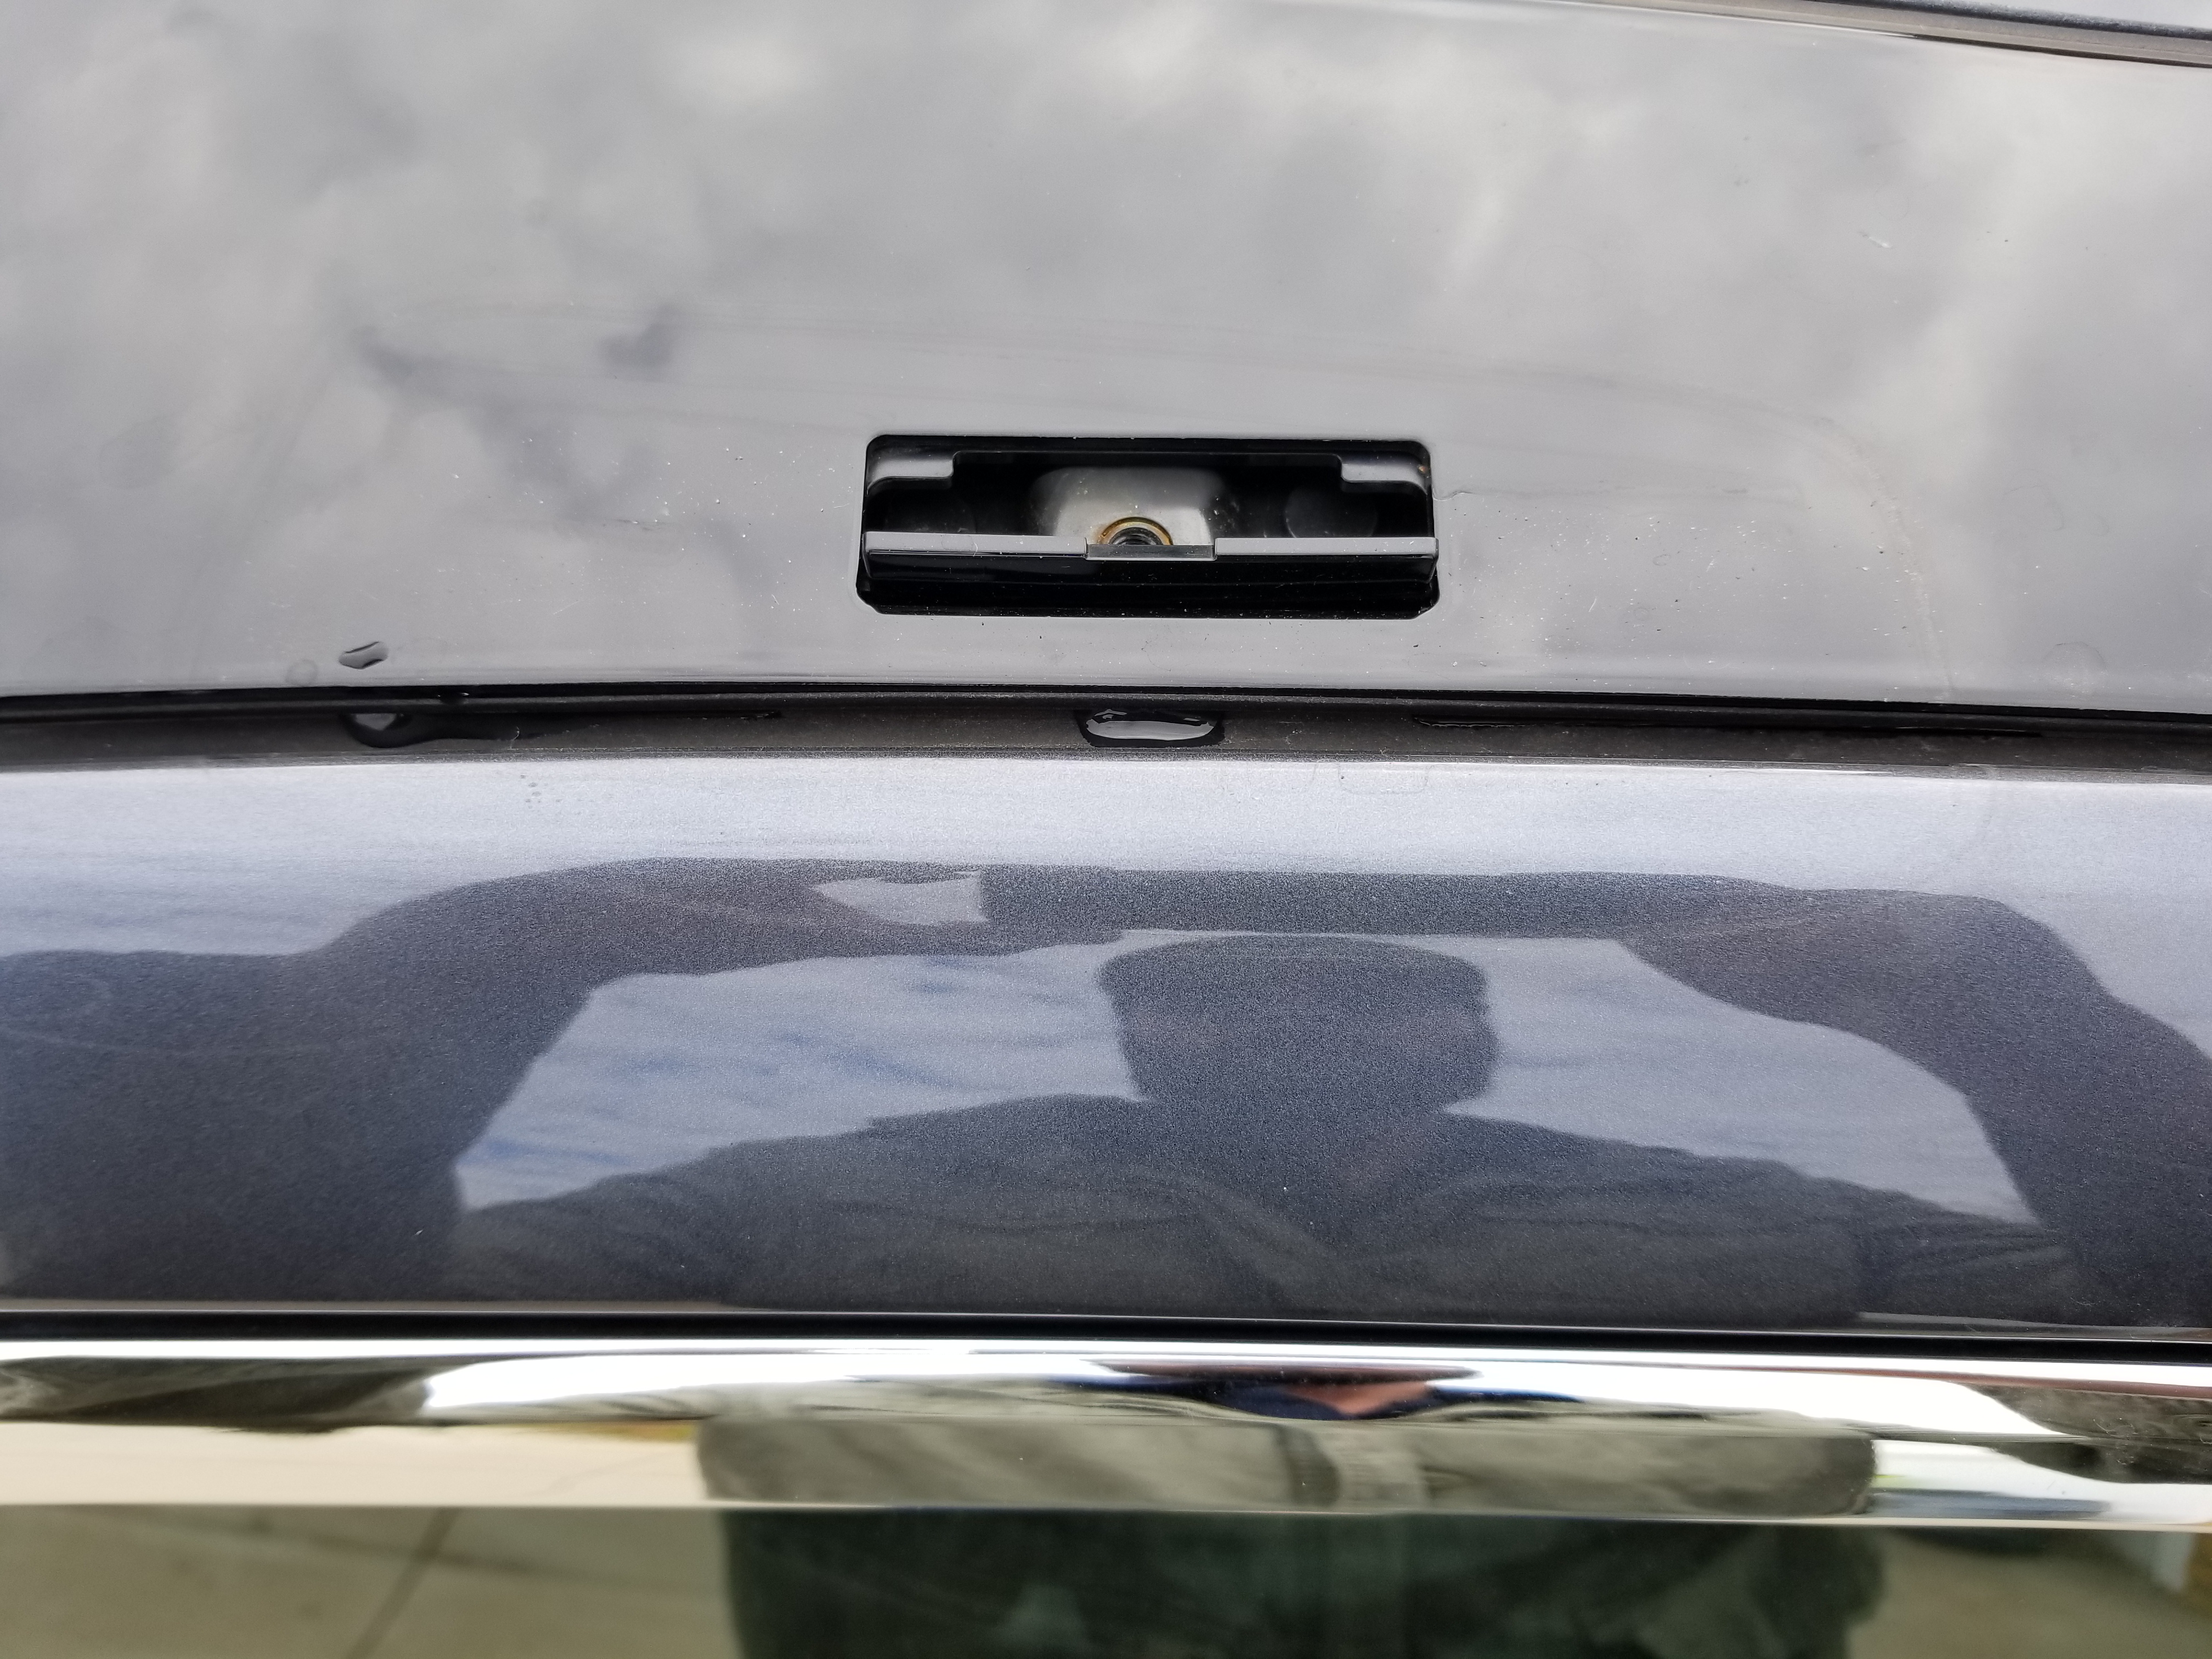
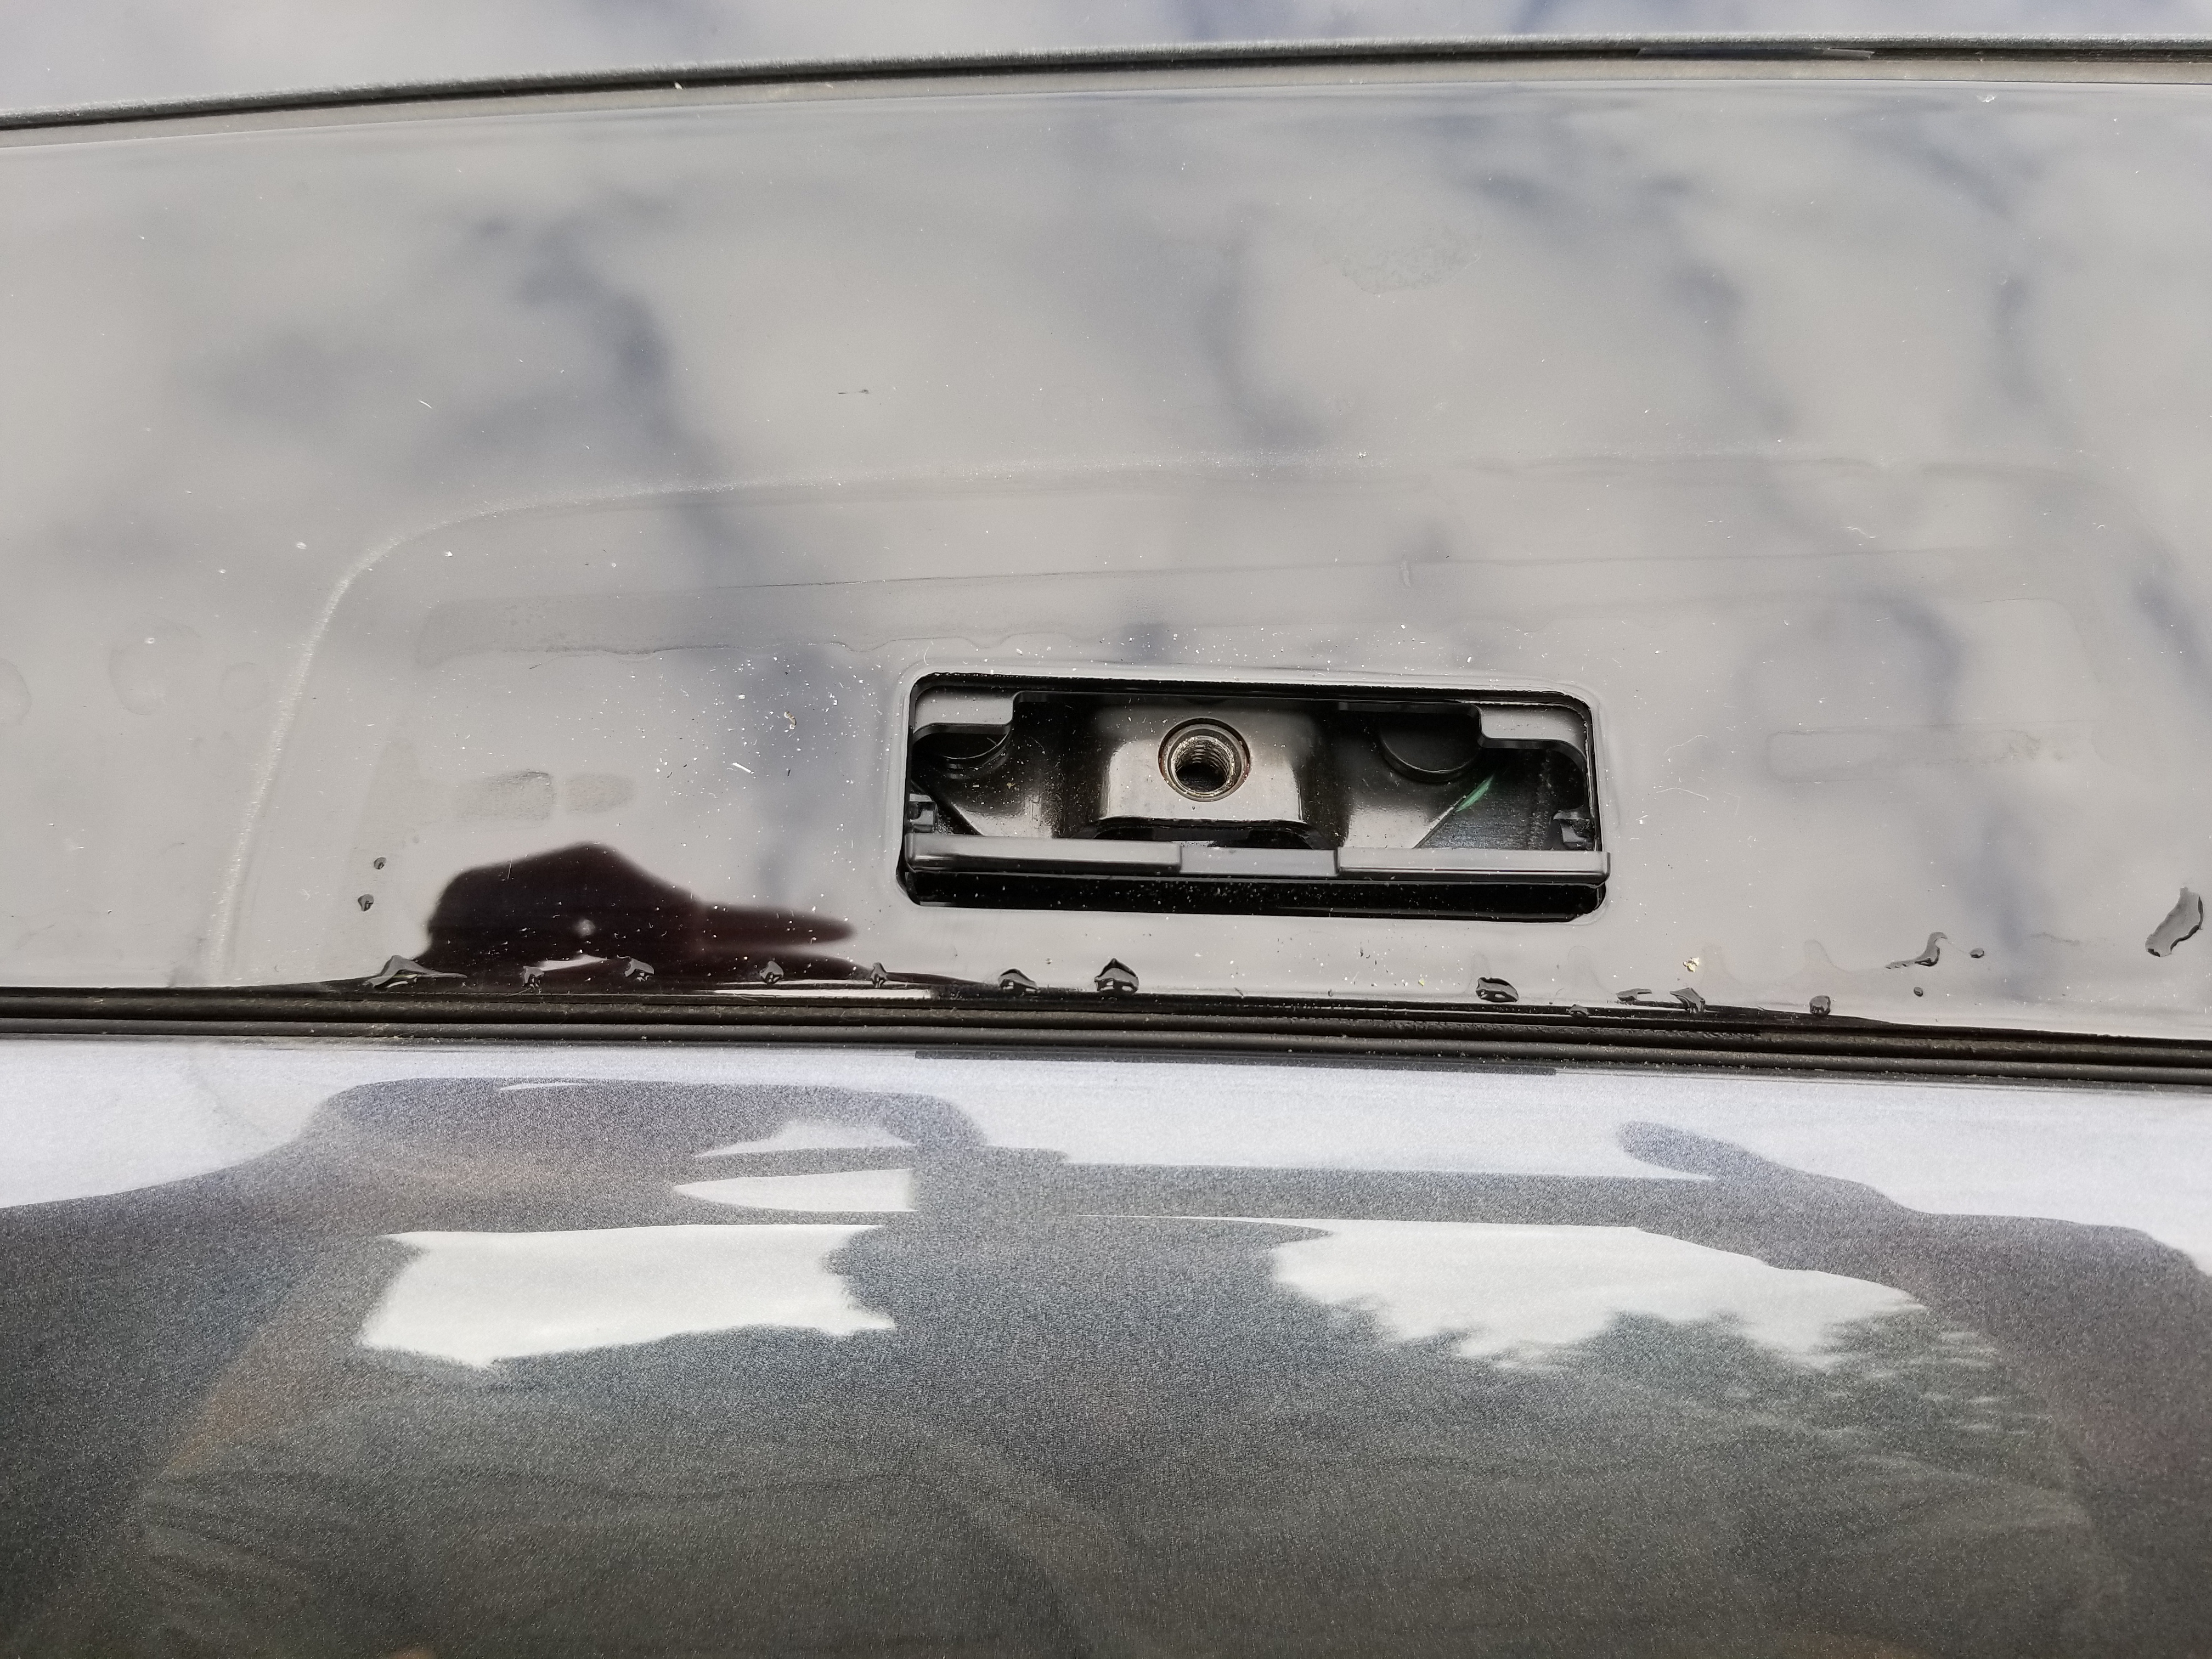
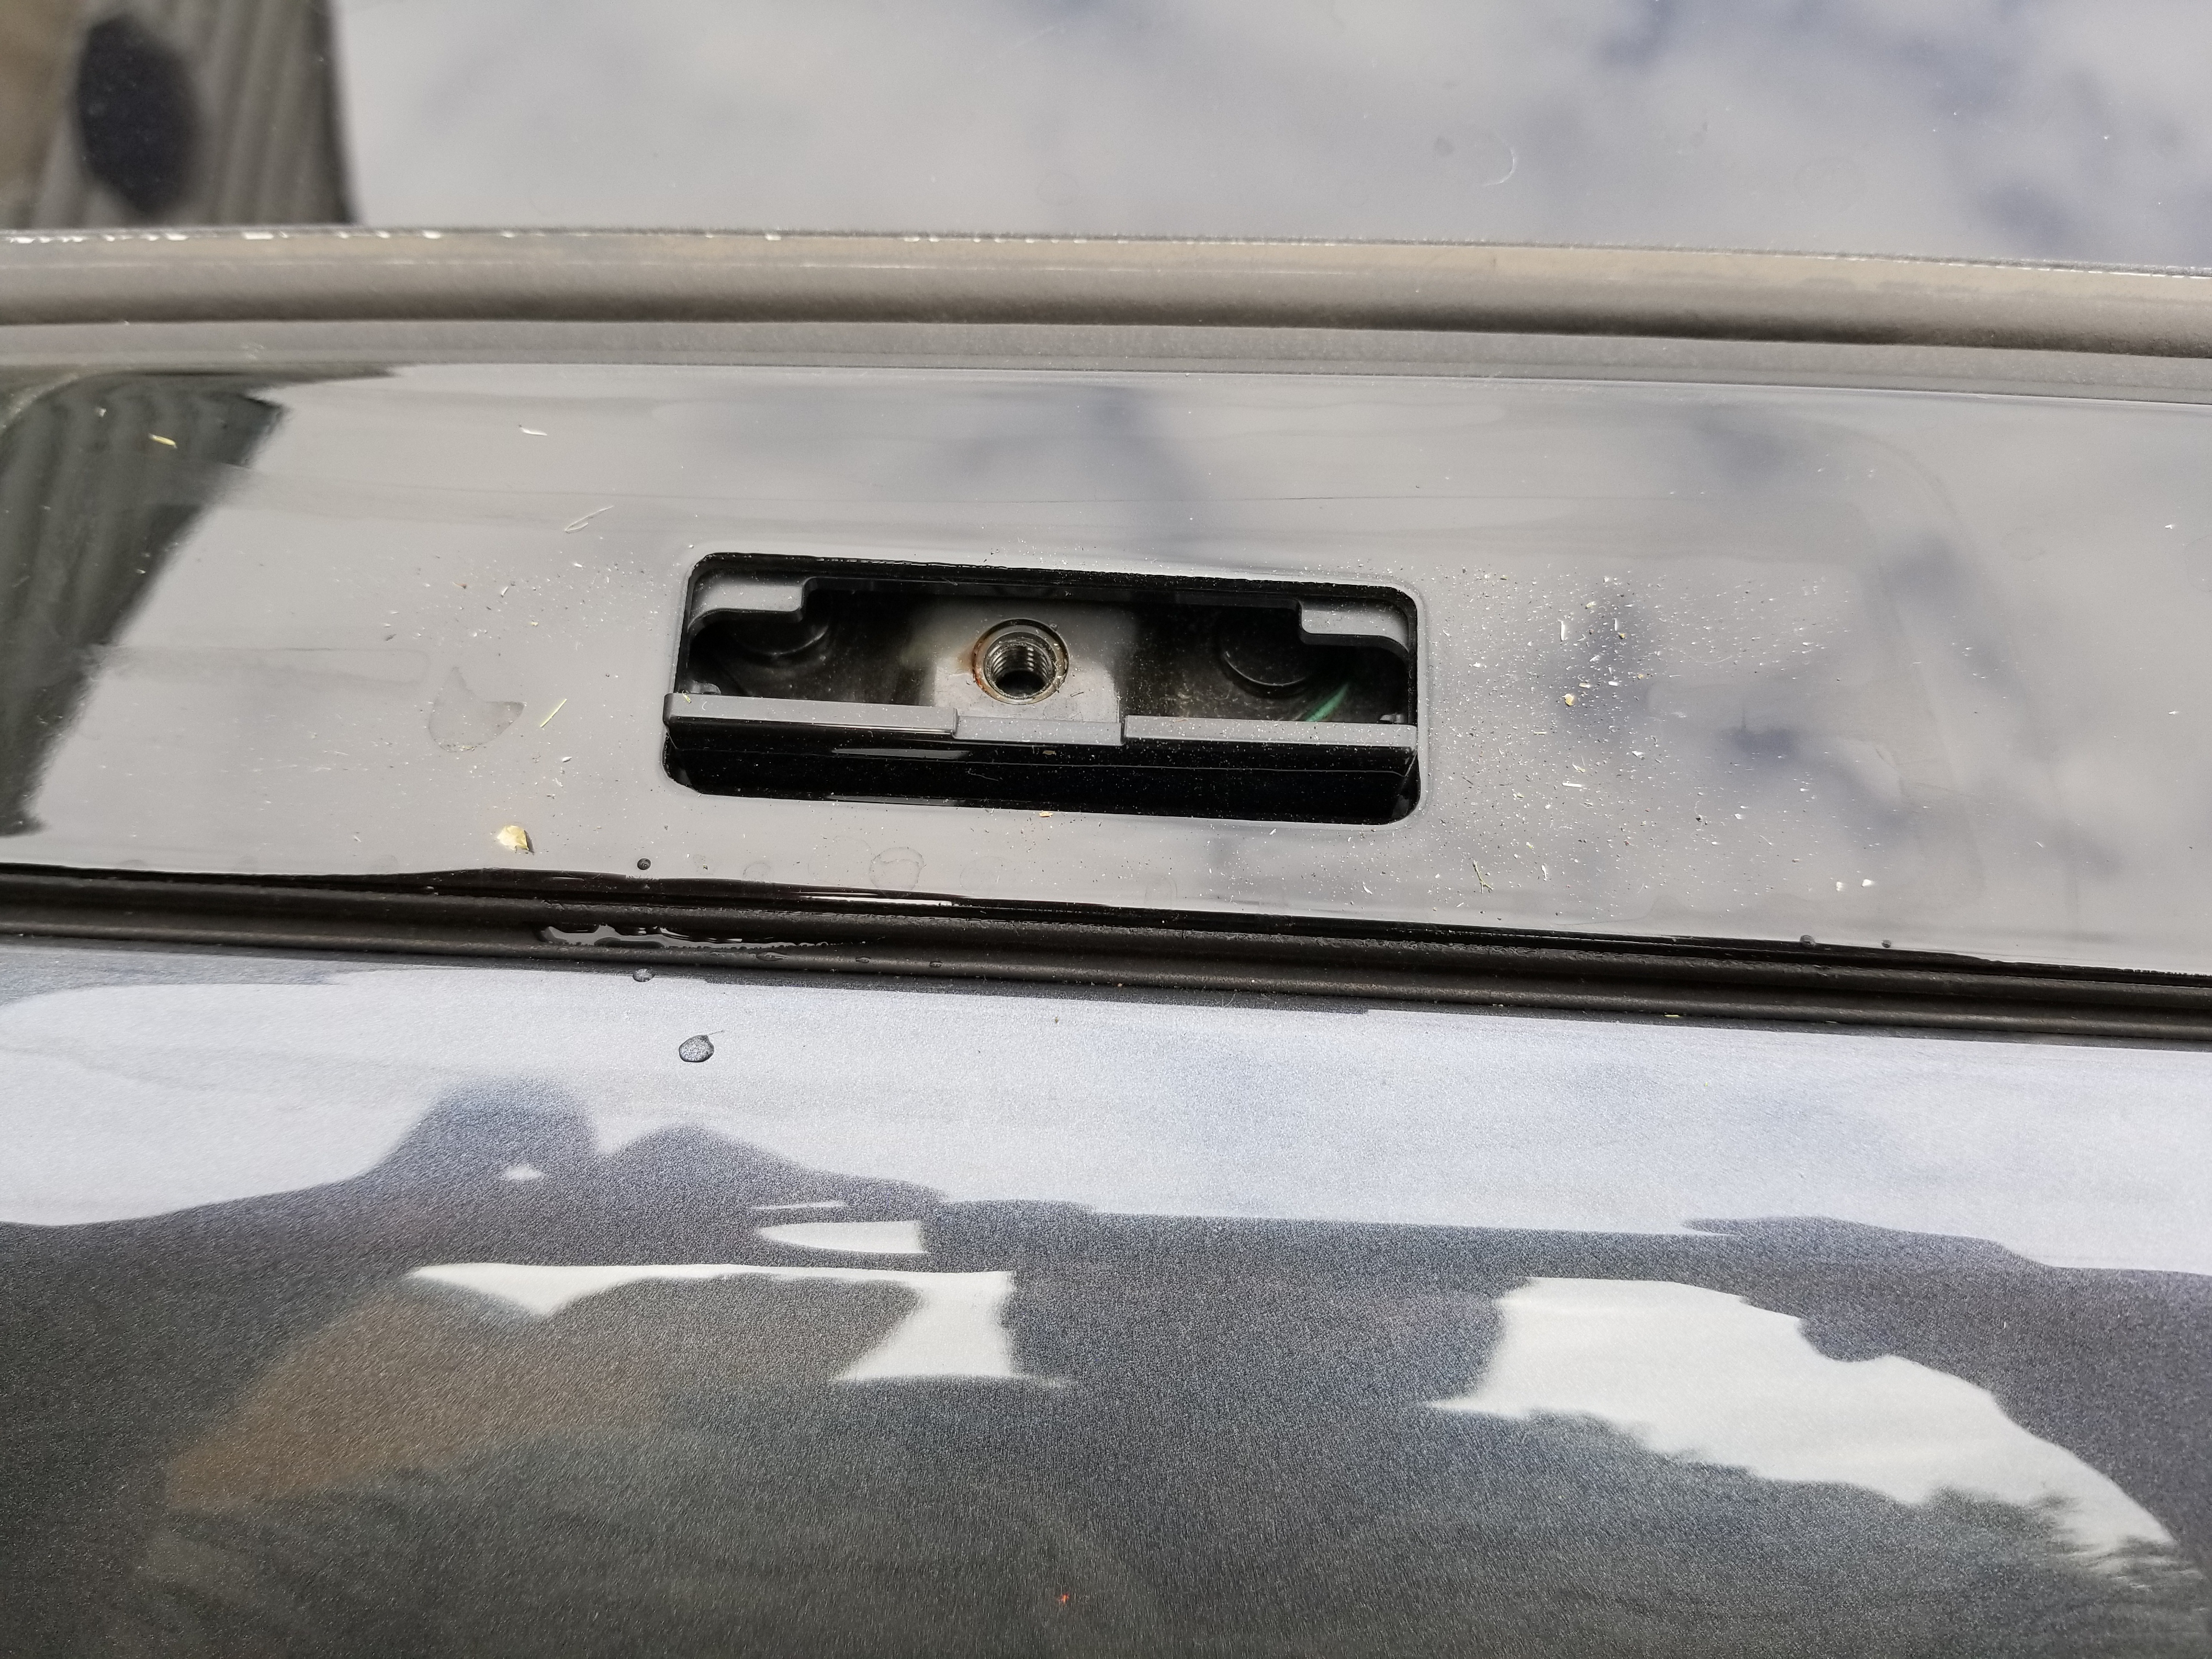
- On the medial (inner) side of the roof, the tape is placed along the edge of the mounting slot.
- On the distal (outer) side, the tape is placed on the painted surface of the roof frame, not the plastic piece. See photo.

This is how the Tesla service center installs the tape. Supposedly, to protect the paint from the boot, not the actual mount. The mount will sit directly on the plastic piece between the slot and the painted surface. The service center in Seattle claims that they have been able to buff this plastic if it gets marred.
I think I will buy some more 3M tape to put on the plastic piece. The service center doesn't know if the rack will scratch this or not because, people just leave the racks on.
I did get a loaner vehicle recently which showed signs of having a roof rack at some point. Nothing was scratched. The 3M tape was there but, someone had been rough with the little doors that cover the mounts.
The problem is that neither one is for the current iteration of the roof line. A call to support will result in referral to a service center. I emailed support with photographs and my question about the 3M tape, and was again referred to a service center. The problem is that no one knows anything about the rack unless they have installed one.
Adjustable Bar Length
Don't worry about the bar end settings, the video is way off. Just loosen the screw 10 rotations, as directed, then adjust it on the fly by holding it up over the bolts you inserted in the roof. Make sure you place the washer with the tang, on the bolt first. This will show you the spacing required for the bar ends. Don't try to force anything. If the rack won't seat easily, you have the ends in the wrong slots. These are small bolts and washers on which you are placing a long rack. The fulcrum effect will allow you to bend or break something if you are ham-fisted.
3M Tape
The tape is not the length of the mount which sits on it. This is mysterious knowledge kept in area 51 so, buy some more tape or live with it.
- On the medial (inner) side of the roof, the tape is placed along the edge of the mounting slot.
- On the distal (outer) side, the tape is placed on the painted surface of the roof frame, not the plastic piece. See photo.
This is how the Tesla service center installs the tape. Supposedly, to protect the paint from the boot, not the actual mount. The mount will sit directly on the plastic piece between the slot and the painted surface. The service center in Seattle claims that they have been able to buff this plastic if it gets marred.
I think I will buy some more 3M tape to put on the plastic piece. The service center doesn't know if the rack will scratch this or not because, people just leave the racks on.
I did get a loaner vehicle recently which showed signs of having a roof rack at some point. Nothing was scratched. The 3M tape was there but, someone had been rough with the little doors that cover the mounts.