Update: I went ahead and performed the mirror detachment (yes, had to dig deep for a moment) as a test run and...
...huge success and sighs of relief! The process of actually detaching (and re-attaching) the mirror from the L-arm was surprisingly smooth and dare I say
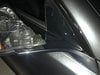
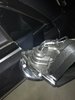
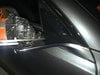
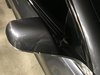
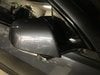
easy thus revealing the flattened top part of the L-arm and way better guestimates for my continued DIY. I’m not sure why people wouldn’t try this method more as long as they have proper trim removal tools. I’ll document this better in another thread, but check out the pics attached. I’m now extremely confident I can get the job done in at least 3 separate pieces of vinyl wrap while the mirror remains on the car. A top L-atm, bottom L-arm and base of the mirror popped off, thus (should now be) providing the cleanest seam lines in mirror chrome deletes.
I’ll complete the actual install this week and in another thread. Ran out of time as the wife called in an errand. I went with gloss black on my MSM.