This is for information only in case others are interested in a project, I'd be happy to answer any questions.
Disclaimer 1: I have a classic MS with a separate parking brake in the rear, the new rear calipers have an integrated parking brake. If this is your case, you can just do the front calipers and paint your rears to match. Skip everything I say about the rear calipers")
Disclaimer 2: This will void your warranty on the brake parts you're replacing, just like installing a big brake kit would. Thankfully the parts below are much cheaper than anything else you can get.
Disclaimer 3: I had help from someone that has done this multiple times already. I had confidence in knowing we were being safe. I am not responsible for any damage or harm you may cause to your car or yourself. Do at your own risk, I am not liable for it!
The summary if you don't feel like reading everything…
Like most of the parts on our car, the calipers are the same design as a different OEM.
The full story…
A friend of mine owns a CTS-V and a Pontiac G8 and noticed that our Tesla calipers looked really similar.
His eye was right, the Tesla calipers are near identical to the 2004-2007 CTS-V calipers. Only difference is they are two pieces, halves are bolted together (GM is one casting) and the rear calipers cross over tube is flipped (easy to unscrew and swap sides to make sure the bleeders are at the top).
So if you need new piston seals or new calipers or even want to custom powder coat stock calipers, you can get these new ones for a direct swap for around $800 (calipers, pads, pins) instead of paying Tesla prices. They are direct bolt on, no modifications of any type needed. Just paint to your desired color. Like these: 2004-07 Cadillac CTS-V 4 Piston Brembo Front & Rear Calipers w Brake pads & pins | eBay
So what does this have to do with a big brake kit for Tesla…
In the 2004 gen CTS-V and 2009 G8 community, changing the front calipers to the 2009-12 6 piston CTS-V is a very popular mod, and since our Tesla’s share the same parts I took on the challenge to do the same as the CTS-V and G8 owners. Google CTS-V 6 piston caliper mod and you will get a ton of results on the GM forums with lots of details for this mod. I will put those details here with additions needed to fit our Tesla.
The hard part…
There is a hard part about this mod It’s the rotors. The 6 piston calipers use a 370mm rotor. Our stock rotors are 355mm. Our rotor height is much different than the GM ones. You can’t use GM rotors (kind of…read on). If you kept our 355mm rotors and just bolted on the 6 piston calipers than there would be a (370-355)/2 = 7.5mm pad stick out. Not the end of the world and you probably could drive on it like this but I didn’t like that solution.
My quest to find Tesla aftermarket 370mm rotors reached a lot of dead ends. There is a lot of big brake kits for Tesla that have 370mm rotors but not sold individually. The closest I have found is Girodisc would make them for me but they wanted a 10 order minimum and wanted $1000 for the pair of rotors.
I ended purchasing the 2 piece Brembo rotors that go with the 6 Piston calipers, removed the OEM hats, made my own hats and bolted them on to the rotor ring. The hats I made have the same mounting as the OEM, only difference was the height and some custom looks!
What you need…
Parts List:
Front 6 piston calipers (required, $757 on ebay): GM Part #20982734 & 20982719 (if you’re going to paint them a different color than yellow, get the silver ones instead, they are cheaper!)
Rear 4 piston calipers (not required, just paint your rear calipers on your car to match, but I wanted everything new. If I was doing it again I would do just the fronts and paint my rear ones to save some money for the same result): GM Part 20982644 20982647
I purchased both sets from ZZperformance ($1257): New Cadillac CTS-V 6 Piston Yellow Brembo Calipers Front & Rear w/pads pins ZL1 | eBay
New front caliper mounting bolts (required, $15 on Ebay): Brembo 6 Piston Front Caliper Brake Mounting Bolts x 4 CTS-V Camaro ZL1 ZR1 Z06 | eBay
Caliper Paint to match the yellow calipers ($20, closest match I could find is Porche Speed Yellow, paint code: L12G)
Get caliper paint if you want a different color, such as red. The G2 paint is awesome. http://a.co/d/gj9SbXt
Caliper clear (VHT gloss $14): http://a.co/d/dlkBppa
Tesla Decals for calipers ($12, I made my own decal size and lettering and sent them to this guy to have printed, my decal template is available upon request): 12pc Tesla Brake Hi Temp Caliper Vinyl Decal Sticker (Any Color) | eBay
Stainless braided brake lines (required, $150 from @EVTuning solutions, the square block on the OEM lines doesn’t fit properly)
MISC:
CRC Disc Brake Quiet ($6, http://a.co/d/3ES6417)
Wet sand paper
9/16” drill bit (for the knuckle, the bolts for the 6 piston calipers are bigger, there is no avoiding this. It’s not as scary as it sounds, it’s very easy to drill these holes and you can’t mess it up, the drill bit centers itself in the hole. If you want to go back to OEM calipers you would just need to put in a sleeve/bushing to make the hole smaller again. This is also required on the G8 and CTS-V mods, hundreds of these mods have been done without any structural integrity issues. Not much of the material is taken off the knuckle) http://a.co/d/iLHwKJP
My Solution for the Rotors:
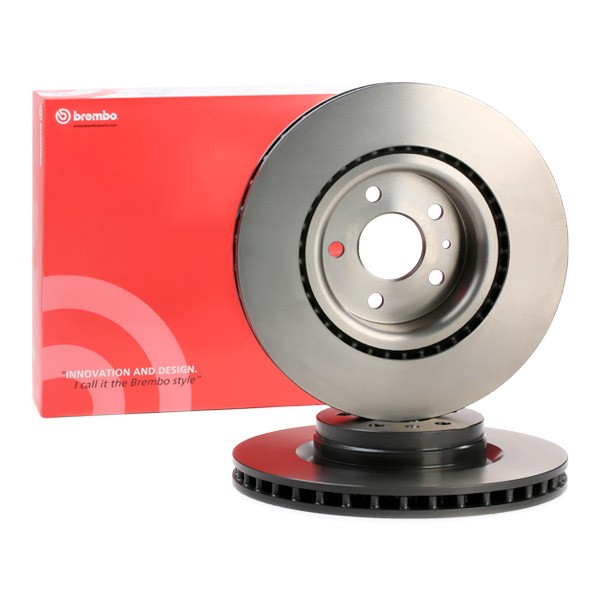
Ac Delco 2 piece brembo rotors part number (I paid $516 for both on Amazon, they occasionally have AC Delco coupons for 20% off, keep an eye on it): 177-1145, 177-1146
Custom made rotor hats, machined from 6061T Aluminum and black anodized like OEM and other aftermarket suppliers do ($350 from a local machine shop). You could do an online thing as a group buy also.
I also purchased slotted rear rotors from R1 Concepts, Geomet series (not required, $252). @EVTuning has these as well.
Total parts for new front setup and painting existing rear calipers: $1834
Total parts for a complete new system as described (Above $1834 plus new rear calipers and rotors): $2586
What do I do with all these parts…
This project took me about a year to do! There was a lot of measuring and remeasuring, test fitting, 3D printed parts, and more measuring. I didn’t want to screw up the rotor hats! In the end I made a slight error but I was able to work around it. The error was in my 5x120 hole spacing for the hat. It wasn't quite right and I had to drill out some material to get it on the hub studs. But the rotor sits dead center in the caliper, which was my biggest concern.
Before you do anything, flip the rear tubes so you don’t forget with 10mm and 11mm wrench…


Using wet sand paper, sand off the V logo and tape for painting (the rear calipers dont have a good line to tape to so there will be a bit of a line but you can't see it once they are mounted on the car, the fronts tape up nicely…


Paint doing multiple light coats, the lighter the better, enough coats to cover everything. Take your time and do multiple light coats, can't stress this enough…


Apply the Decals…


Clear coat, again light coats with a light medium coat at the end. If you put on too much you will ruin it, the paint looks all cracked and you will need to redo it like I did, learn from me and take it slow with light coats…

I let everything sit for a few days, then I turned the oven on to 200 degrees and turned it off when it hit temperature. I put the calipers in the oven and let them sit for an hour (I think? Follow the clear coat caliper paint instructions). This cures the paint, and didn't ruin any seals.
I also applied multiple coats of Nu-Finish in hopes to make them easy to clean later. So far it has worked out great, easy wipe down. I might try ceramic coating at some point.

Continued below...
Disclaimer 1: I have a classic MS with a separate parking brake in the rear, the new rear calipers have an integrated parking brake. If this is your case, you can just do the front calipers and paint your rears to match. Skip everything I say about the rear calipers
Disclaimer 2: This will void your warranty on the brake parts you're replacing, just like installing a big brake kit would. Thankfully the parts below are much cheaper than anything else you can get.
Disclaimer 3: I had help from someone that has done this multiple times already. I had confidence in knowing we were being safe. I am not responsible for any damage or harm you may cause to your car or yourself. Do at your own risk, I am not liable for it!
The summary if you don't feel like reading everything…
Like most of the parts on our car, the calipers are the same design as a different OEM.
- They are high volume off the shelf parts so the price is cheaper and they also bolt on directly to Teslas.
- There is no easy solution for 370mm 2 piece rotors, I created my own hats for off the shelf brembo rotors.
- This requires drilling but is reversible if necessary.
- Install is easy once you have all the parts ready to go, you can have a local mechanic do it for you if you are not handy for a few hours of labor.
The full story…
A friend of mine owns a CTS-V and a Pontiac G8 and noticed that our Tesla calipers looked really similar.
His eye was right, the Tesla calipers are near identical to the 2004-2007 CTS-V calipers. Only difference is they are two pieces, halves are bolted together (GM is one casting) and the rear calipers cross over tube is flipped (easy to unscrew and swap sides to make sure the bleeders are at the top).
So if you need new piston seals or new calipers or even want to custom powder coat stock calipers, you can get these new ones for a direct swap for around $800 (calipers, pads, pins) instead of paying Tesla prices. They are direct bolt on, no modifications of any type needed. Just paint to your desired color. Like these: 2004-07 Cadillac CTS-V 4 Piston Brembo Front & Rear Calipers w Brake pads & pins | eBay
So what does this have to do with a big brake kit for Tesla…
In the 2004 gen CTS-V and 2009 G8 community, changing the front calipers to the 2009-12 6 piston CTS-V is a very popular mod, and since our Tesla’s share the same parts I took on the challenge to do the same as the CTS-V and G8 owners. Google CTS-V 6 piston caliper mod and you will get a ton of results on the GM forums with lots of details for this mod. I will put those details here with additions needed to fit our Tesla.
The hard part…
There is a hard part about this mod
It’s the rotors. The 6 piston calipers use a 370mm rotor. Our stock rotors are 355mm. Our rotor height is much different than the GM ones. You can’t use GM rotors (kind of…read on). If you kept our 355mm rotors and just bolted on the 6 piston calipers than there would be a (370-355)/2 = 7.5mm pad stick out. Not the end of the world and you probably could drive on it like this but I didn’t like that solution.My quest to find Tesla aftermarket 370mm rotors reached a lot of dead ends. There is a lot of big brake kits for Tesla that have 370mm rotors but not sold individually. The closest I have found is Girodisc would make them for me but they wanted a 10 order minimum and wanted $1000 for the pair of rotors.
I ended purchasing the 2 piece Brembo rotors that go with the 6 Piston calipers, removed the OEM hats, made my own hats and bolted them on to the rotor ring. The hats I made have the same mounting as the OEM, only difference was the height and some custom looks!
What you need…
Parts List:
Front 6 piston calipers (required, $757 on ebay): GM Part #20982734 & 20982719 (if you’re going to paint them a different color than yellow, get the silver ones instead, they are cheaper!)
Rear 4 piston calipers (not required, just paint your rear calipers on your car to match, but I wanted everything new. If I was doing it again I would do just the fronts and paint my rear ones to save some money for the same result): GM Part 20982644 20982647
I purchased both sets from ZZperformance ($1257): New Cadillac CTS-V 6 Piston Yellow Brembo Calipers Front & Rear w/pads pins ZL1 | eBay
New front caliper mounting bolts (required, $15 on Ebay): Brembo 6 Piston Front Caliper Brake Mounting Bolts x 4 CTS-V Camaro ZL1 ZR1 Z06 | eBay
Caliper Paint to match the yellow calipers ($20, closest match I could find is Porche Speed Yellow, paint code: L12G)
Get caliper paint if you want a different color, such as red. The G2 paint is awesome. http://a.co/d/gj9SbXt
Caliper clear (VHT gloss $14): http://a.co/d/dlkBppa
Tesla Decals for calipers ($12, I made my own decal size and lettering and sent them to this guy to have printed, my decal template is available upon request): 12pc Tesla Brake Hi Temp Caliper Vinyl Decal Sticker (Any Color) | eBay
Stainless braided brake lines (required, $150 from @EVTuning solutions, the square block on the OEM lines doesn’t fit properly)
MISC:
CRC Disc Brake Quiet ($6, http://a.co/d/3ES6417)
Wet sand paper
9/16” drill bit (for the knuckle, the bolts for the 6 piston calipers are bigger, there is no avoiding this. It’s not as scary as it sounds, it’s very easy to drill these holes and you can’t mess it up, the drill bit centers itself in the hole. If you want to go back to OEM calipers you would just need to put in a sleeve/bushing to make the hole smaller again. This is also required on the G8 and CTS-V mods, hundreds of these mods have been done without any structural integrity issues. Not much of the material is taken off the knuckle) http://a.co/d/iLHwKJP
My Solution for the Rotors:
Ac Delco 2 piece brembo rotors part number (I paid $516 for both on Amazon, they occasionally have AC Delco coupons for 20% off, keep an eye on it): 177-1145, 177-1146
Custom made rotor hats, machined from 6061T Aluminum and black anodized like OEM and other aftermarket suppliers do ($350 from a local machine shop). You could do an online thing as a group buy also.
I also purchased slotted rear rotors from R1 Concepts, Geomet series (not required, $252). @EVTuning has these as well.
Total parts for new front setup and painting existing rear calipers: $1834
Total parts for a complete new system as described (Above $1834 plus new rear calipers and rotors): $2586
What do I do with all these parts…
This project took me about a year to do! There was a lot of measuring and remeasuring, test fitting, 3D printed parts, and more measuring. I didn’t want to screw up the rotor hats! In the end I made a slight error but I was able to work around it. The error was in my 5x120 hole spacing for the hat. It wasn't quite right and I had to drill out some material to get it on the hub studs. But the rotor sits dead center in the caliper, which was my biggest concern.
Before you do anything, flip the rear tubes so you don’t forget with 10mm and 11mm wrench…
Using wet sand paper, sand off the V logo and tape for painting (the rear calipers dont have a good line to tape to so there will be a bit of a line but you can't see it once they are mounted on the car, the fronts tape up nicely…
Paint doing multiple light coats, the lighter the better, enough coats to cover everything. Take your time and do multiple light coats, can't stress this enough…
Apply the Decals…
Clear coat, again light coats with a light medium coat at the end. If you put on too much you will ruin it, the paint looks all cracked and you will need to redo it like I did, learn from me and take it slow with light coats…
I let everything sit for a few days, then I turned the oven on to 200 degrees and turned it off when it hit temperature. I put the calipers in the oven and let them sit for an hour (I think? Follow the clear coat caliper paint instructions). This cures the paint, and didn't ruin any seals.
I also applied multiple coats of Nu-Finish in hopes to make them easy to clean later. So far it has worked out great, easy wipe down. I might try ceramic coating at some point.
Continued below...