yerEVan
Active Member
I failed to mention I hooked up the connector in the trunk lid as well that I didn’t see originally so maybe I pulled something else when I put the trim back up.Your light cable has 4 wires black, white, blue and red right?


You can install our site as a web app on your iOS device by utilizing the Add to Home Screen feature in Safari. Please see this thread for more details on this.
Note: This feature may not be available in some browsers.
I failed to mention I hooked up the connector in the trunk lid as well that I didn’t see originally so maybe I pulled something else when I put the trim back up.Your light cable has 4 wires black, white, blue and red right?
Haha, how do we know your foot sensor actually works? All jokes aside, I thought there was answer, a long time ago from the OP, that the foot sensor needed something to be close for over a quarter second to activate, in order to eliminate false opens. Maybe you should stop just over the box.I tested foot sensor with two different boxes for accidental opening.
The testing repeated a couple of times, and it never opened by itself.
https://youtu.be/QCIH-VVusqYView attachment 468522
We used the same method, but not sure if it's the best. One of us had a small leak couple of days ago.
Personally I'm not fan of this method, we're investigating another one using the rear bumper.
I will let you know if it's easy and doable.
It works perfectly for me. No leaks or anything.
I'm more interested in how you got water to run up a wire. That would be far more interesting than getting the automatic trunk/frunk to work.
") .
. Yes, it shows rear trunk always closed after the installing the kit.
Hansshow foot sensor is only about 3 inch wide unlike modern 20 - 30 inch OEM vehicle’s.
You need kick the specific spot where the sensor installed. It is a little harder than OEM vehicle’s sensor.
The bumper has to removed and the sensor cables(3 wires) need to be soldered to existing Hanssow positive power wire and two light wires.
It is really up to personal preference.
I failed to mention I hooked up the connector in the trunk lid as well that I didn’t see originally so maybe I pulled something else when I put the trim back up.
@not4antoher,
Appreciate the inner bumper foot sensor photos. That was my plan as well. On the foot sensor wires did they include the wire taps or did you have some handy (what size)?
Ski
Yeah, i'll be doing that tonight. i hope to find the culprit under the trunk lid trim. I'll definitely update this thread tonight.So it looks like I'm just behind you in the install and waiting for some insight into your situation in case I run into it myself when installing the foot sensor.
Not sure if this is related but while driving, maybe 10 miles an hour, in the app, i tried to open the trunk and it did not allow it, oddly it allows you to try. so not sure if while out of park that it just doesn't allow the trunk to open.Haha, how do we know your foot sensor actually works? All jokes aside, I thought there was answer, a long time ago from the OP, that the foot sensor needed something to be close for over a quarter second to activate, in order to eliminate false opens. Maybe you should stop just over the box.
Ok - I'm done installing mine successfully. I followed a combination of the instructions that were provided by the manufacturer (which are terrible):
Tesla Model 3 electric tailgate installation instructions | Intelligentized Auto Parts | Hansshow
And this YouTube video:
I wasn't anticipating having to remove the bumper to do this installation, so it was more work than I originally thought. Going through the firewall was really not a big deal at all because you're just going through a rubber grommet that's already there. I didn't use the 1/2" bit like suggested in the video. I used a much smaller bit and then shoved the power connection through so it makes a nice tight seal. Really, running the power was actually the easiest part even though I thought it would be the hardest. Also note you need to remove the plastic piece under the passenger side dash to get to that grommet where you need to drill through. I already knew how to do that from having to replace the air filters. If you need help with that step, just find one of the videos on replacing the air filters and it will show you how to pop that piece off.
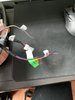
Also, my kit cable with an extra button and an extra cable which apparently I don't need unless I want to use the second button. It doesn't look like you need to connect the CAN-H or CAN-L connectors and I never figured out what the Yellow wire is for. Here is the cable that I ended up not using:
View attachment 466030
In order to get the car to think the trunk is always closed so that I can close the trunk from inside the car or from the app (by clicking OPEN when it's already open) I had to make one modification. There is a blue wire on the harness that goes to the existing trunk latch that needs to be removed from the harness. This is not documented anywhere. I'm not sure if maybe some kits come with this wire already removed?
View attachment 466031
Once that wire was removed, I could control open and close from inside the car.
Also worth mentioning is that with the default settings, it wouldn't close at all. You need to increase the closing power setting to 5 to get it to close properly. In order to do this, you need to use a screwdriver and put it in the latch so that the box thinks the trunk is closed, then hold the little black button on the controller until it beeps 5 times I think. I had to increase the speed setting as well by holding down the trunk close button. These steps are outlined in the written documentation link at the top of this post, but the english is not great, so it might be confusing.
Overall I'm very happy with the final results, even if it did take the better part of a day to get it done.
Another thing I want mention,
Those who install the kit by them self.
Please, turn off the vehicle and disconnect 12v negative cable, and also DISCONNECT main 12v cable from high voltage battery pack. If you don’t disconnect that cable 12v current still alive even though you disconnect 12v negative cable. View attachment 467307View attachment 467308
Yes.You're referring to the 12v cable under the red cap in your top pic? Disconnect that? That's also where I'm planning on running my power to.
I ran the cable though lower quarter panel grommets since rear bumper was already detached. View attachment 468301 View attachment 468302 View attachment 468303 View attachment 468304
Yes.
I am not sure that tapping power from the cable is okay.
It will cause a problem if the power is monitored by some modules.
Yep, that was it. Hansshow was super cool and helpful. I’m an idiot. Everything is working great. Going to do the frunk tomorrow.I failed to mention I hooked up the connector in the trunk lid as well that I didn’t see originally so maybe I pulled something else when I put the trim back up.
I believe you do to get access to the bolts on the top of the bumper to remove bumper.So that means you don't really need to remove the tail lights do you?
Yeah i ran it that new way, around the top part of the door. It was really easy so no pushing through the firewall.BTW - take a look at this video:
At the 23:24 mark, he shows a new way to run the 12v using a gap behind the side of the dash - pretty ingenious! Still not sure why I shouldn't just run it to under the rear passenger seat.