Welcome to Tesla Motors Club
Discuss Tesla's Model S, Model 3, Model X, Model Y, Cybertruck, Roadster and More.
Register

2021 Center Console Retrofit

This site may earn commission on affiliate links.
OK, never mind then. Before purchasing mine, i did look at a lot of used 1.0 and 2.0 Consoles photos on eBay. Saw some with M3 ducting and MY ducting. I assumed the front ducting inlet was different height. Could be Tesla made changes to reduce variants and cut costs.

You should be ok. If they don't line up, then you can just swap the ducts out. They are only installed with reusable plastic push rivets; similar to plastic push rivets used on the wheel well liners, but slightly smaller in size.

2.0CenterConsole40.JPG
 
For anyone who is interested, here is an update after completing the console retrofit (this is for my Model Y, but everything is exactly the same including the same part number).

1) The first thing I noticed is that the existing console was missing a bolt to hold it in place. I just placed a service request for this.
2) The new console including the USB hub without the data port. I bought the Tparts USB hub replacement which worked perfectly.
3) The new console was also missing the data cable that is connected to the old console. I pulled it out of the old console (it's held in with three clips) and used it in the new console.
4) I swapped the card reader from the old console into the new one. No issues with that.

The whole thing took about an hour and a half. Getting the old console out and the new one in are relatively quick. Taking both consoles apart to swap parts is what took the most time. It wasn't a difficult job, just mostly time consuming. I did have another person help me pull the old console out and put the new one in to line everything up. Everything works great and it's a nice upgrade/change.
 
  • Like
Reactions: Pricedm
oh ok u just used a usb to usb-c adapter and it worked fine?
No, I replaced the usb hub in the console with this: https://smile.amazon.com/TPARTS-Center-Transmission-Recovery-Charging/dp/B09YQ391FD

There are a few companies that make these. The usb hubs that come built into the new center console do not support data which is needed for sentry. It basically just allows you to charge devices through the usb c connections and that's it. Replacing the hub allows you to reconnect the data cable which will then restore data functionality and allow you to record sentry again when you plug in a usb drive.
 
I have the same situation with my 2018 Model 3 with 2.0 Center Console retrofit. There is no USB in the glovebox on my early car,

For the data capability, I purchased a new Tesla USB-C Hub Gen 3 ( p/n 1755200-00-B ) from my local Tesla Service Center. Ordered this for local pickup at the Customer Counter and it was available in about 7 days. Cost was only $34 USD, plus taxes (no shipping fee with local pickup).

Here's my 250GB Samsung T5 SSD situated below the front bin tray.
2.0CenterConsole41.JPG


I purchase the 0.5m long cable with 90-degree plug from AliExpress.com. I could only find one seller for this shorter length cable, but may be others. The cable comes equipped with the tie wrap shown in the photo above.

2.0CenterConsole42.JPG
 
Hi all - thanks for this, and for the custom cable. I'm a 2018 M3 owner. I ordered the new console and the cable, and began installing it today. Everything went fine - but when I went to reassemble I got interference from guiding pegs that changed between the two consoles? I can probably snip them off and make it work but curious if anyone experienced this and if it's a part I should tear down and swap out? I'll post pics in a follow up
 
Ignore my previous post - it was user error. Ha. Didn’t realize the older console was screwed into the dash and tore it out, leaving a plastic wall that prevented the new console from fitting. You can see the torn plastic on the old console here
F2962434-19A2-4B35-BF6E-74B3E25F91A8.jpeg
 
Just to clarify for others what you did wrong.

You should have removed two screws from inside the front bin. Those screws have access via the two large holes shown in your photo above. I am assuming that the screws are still installed on the car along with the plastic brace that you ripped off the 1.0 Console.

There should not be any fit-up interference with the 2.0 Console. For your 2018 Model 3, you need the 20-pin to 26-pin connector adapter cable, or replace the 26-pin connector housing on the 2.0 Console with a 20-pin housing. The terminals are compatible with both the 20-pin and 26-pin housings.
 
Last edited:
  • Informative
Reactions: tracksyde
Glad you got it together.

When I considered the overall length of the 26-pin/20-pin adapter's spec sheet, I considered that the adapter length could be such that it could be installed in either a horizontal "S" shape, or optionally a single loop. Since there is a cavity where the harness side exits to mate with the console harness, the S shape seems more appropriate. You want to make sure that there is no abrasion on the wires over time from road vibration.
 
i'm about to tackle this by buying a console, i have a 2018 as well but i'm not sure where to start lol
You're going to need to buy three things:
1) The new console
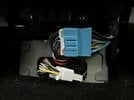
2) An adapter for the blue connector in the back. One end of the connector remains in the car and it won't fit into other side of the connector that is pre-installed in the new console. A picture of this is a few posts above and I'm sure someone can post where they bought the adapter.
3) A new usb hub. When you plug your usb drive into the new console for sentry/dashcam recording, it won't work. You can buy the usb hub that supports data directly from Tesla or buy one from a third party like I did.

Once you have these three things, you can pull the old console out and install the new one. You will have to pull out the usb data cable from the old console and install that into the new console. This cable will connect to the new usb hub that you install (#3 above). You will also have to swap the key card reader from the old console into the new one. Otherwise, you won't be able to drive your car until you have mobile service reprogram the new console/key card reader to your car.
 
  • Like
Reactions: MrFusion4
Glad you got it together.

When I considered the overall length of the 26-pin/20-pin adapter's spec sheet, I considered that the adapter length could be such that it could be installed in either a horizontal "S" shape, or optionally a single loop. Since there is a cavity where the harness side exits to mate with the console harness, the S shape seems more appropriate. You want to make sure that there is no abrasion on the wires over time from road vibration.
Thanks for the insight, I’ll work to adjust that tomorrow. I was thinking since there was a cavity just behind it, that I could tuck the excess there. But hear your point about cable wear.

It seems there are two consoles an -A and a -C version. Do we know if they both don’t have the USB cable? I plugged my micro usb near the dash into something so I assume it’s there by the usb-c

Does anyone have tricks to open that panel without the tool that some of these third parties have? Hoping to get a visual on what’s going on in there before ordering the data module
 
I was thinking since there was a cavity just behind it, that I could tuck the excess there. But hear your point about cable wear.

Does anyone have tricks to open that panel without the tool that some of these third parties have? Hoping to get a visual on what’s going on in there before ordering the data module
Yes, with the adapter already plugged into the console, bend the adapter's wire bundle into an "S" shape, with the other end inside the cavity. The harness plug should then have enough length to plug into the adapter plug inside the cavity. Afterward, gently make minor wire bundle bending adjustments to ensure wires are free from rubbing on any surrounding parts of the the car's chassis. That should allow plenty of clearances for the trim panel covering the connectors.

The interior USB felt panel is clipped with 3-clips on the top and 2-clips on the bottom. It is easier to pry from the top first, thus releasing the top first. The tool that is supplied with the T-parts USB hub (and other similar variants) is poor design and not really necessary, like you already found out.
 
My service center in Devon is saying the USB hub is a Tesla only installed part - so they want ~$40 for labor install which is ridiculous. Trying to convince them that I can self install, but not having luck. May just go 3rd party at this point since the part is now $90.