Welcome to Tesla Motors Club
Discuss Tesla's Model S, Model 3, Model X, Model Y, Cybertruck, Roadster and More.
Register

I tried Tesbros DIY PPF - here’s my thoughts

This site may earn commission on affiliate links.
In a previous post I mentioned purchased two PPF kits from Tesbros. One was the full front kit (hood, fenders, bumper, mirrors, headlights and fog lights) and the other was the exterior bundle kit (rockers, door handles, tail lights, trunk, door edges, and headlights again). Here’s my experience:

TLDR: If you’re a confident DIY-er, you can tackle this project.

INSTALL
I did the entire “exterior bundle” kit by myself. I taped some clean plastic sheet on the ground under the car in case something slid off, but that never happened. One thing to note: the little weeping holes for the tail lights were not weeded already on my kit - you’ll have to punch them out yourself. Nothing here was too difficult as most of the areas are flat. The rocker is the one place you have to be extra careful not to let any part slip off the car onto the ground.

I had a helper on the front kit which was much more involved. Having help was key in three ways: getting the ppf off the backing, getting it on the car without touching the ground or clothing, and was also helpful having him do the stretching while I tacked down the other end.

TIME
It took about two hours to set up, wash and prep the car following the prep videos. My car has less than 300 miles on it so it wasn’t very dirty or hard to clean. I did the “exterior bundle” in about three hours by myself (rockers, trunk, tail lights, etc) My help came when I started the front kit. Total time for the front kit with two people was about 5 hours.
DIFFICULTY

Never did I feel like I was close to disaster, but I had previously done the interior ppf kit so I had some practice, and I did watch the videos about 3 times through while waiting for it to be delivered. If I attempted some of the bigger pieces alone, especially the bumper, it might be a different story. If you are patient and careful about every step, making sure to keep things clean, that things are lined up properly, and going slowly to make sure you’ve got all your bubbles out before tacking down, then I would say it’s more “time consuming” than it is “difficult”. Tesbro’s directions are extremely thorough. The closer you stick to them, the less problems you’ll have.

RESULTS
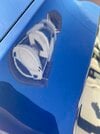
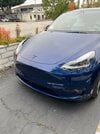
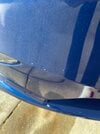
I wasn’t expecting everything to be lined up perfectly, and I was expecting a few bubbles here and there that would dissipate over time, and I even allowed myself to accept I might have a few flaws I couldn’t eliminate as the cost of doing the job myself. I also prepared for the reality that I might totally ruin a piece or two and have to repurchase it (at a discount). For me the money still saved would be worth it and I knew I would also enjoy the process. I was pleasantly surprised by the results. Even though I was careful to get all the bubbles out during the install, I woke up the next day to find NEW bubbles all over the place. It seems this is from residual liquid consolidating into pockets overnight. Assuming these small bubbles will mostly dissipate as they are supposed to, then I am very happy with the job. Below you’ll see some pictures of the bubbles I’m talking about. Even since I took the photos some of them have mellowed out. Hopefully in a week or two it’ll be looking pretty darn good! I’ll try to come back and post some pics after a couple weeks.

QUICK TIPS

Don’t drop the clay bar or the squeegees. They are slippery!

Don’t skip the practice kit. The more feel you have for things the better you’ll do!

The tutorials also have pictures beneath the video of the order in which to tack down each piece. I printed these full size on paper so it’d be easier to refer to in the middle of the install instead of trying to find it and zoom in on my phone in the heat of the moment.

If you are alone you can use the round tesbros stickers that keep the ppf rolls together or painters tape to stick the backing down on to your table while you peel off the pieces.

I didn’t have any folding tables so I taped some painters plastic to the garage floor to give me a surface to lay out the PPF and peel it off. Just be careful not to step on the plastic.

CONCLUSION
If you are a patient, thorough, and careful do-it-yourselfer, and you have some backup help if you need it, then this is absolutely doable with acceptable results. If you are a perfectionist, impatient, or don’t like to take a deep dive into tutorials/directions, then maybe have it done for you.
 

Attachments

  • 4DC0B91A-0061-4655-8679-6D75B5597146.jpeg
    4DC0B91A-0061-4655-8679-6D75B5597146.jpeg
    376 KB · Views: 1,256
  • 950AD912-06F6-4F4E-A757-289A43ECC230.jpeg
    950AD912-06F6-4F4E-A757-289A43ECC230.jpeg
    531.1 KB · Views: 690
  • 3279D120-ABC5-4836-8E7D-2DECD72305A4.jpeg
    3279D120-ABC5-4836-8E7D-2DECD72305A4.jpeg
    526.6 KB · Views: 714
thanks details information. I was tempted to do it my self. I have patience but I don’t have space in garage.

Do you have any concern about the pre-cut ppf where dirt can get stuck at the edge?

Assume you are going to keep a car for long time, do you have any concern about ppf get old and need to peel off? Ppf may break apart and difficult to remove?
 
@mvr1127 thanks for sharing your experience. I'm planning to keep mine no more than 3.5 years (sell before warranty is out) so I am contemplating the cost (of also time and effort) vs. benefit. I can live with a few rock chips. It's the malicious keying and people scratching the doors at parking lots that I am more concerned about.

In any case, now that it's been a couple of days, have the bubbles start to dissipate? Also, on the bumper picture, toward the driver side, there is a white spec. Is that a PPF finger? Great job, by the way. I'm sure it was satisfying getting it done yourself.
 
thanks details information. I was tempted to do it my self. I have patience but I don’t have space in garage.

Do you have any concern about the pre-cut ppf where dirt can get stuck at the edge?

Assume you are going to keep a car for long time, do you have any concern about ppf get old and need to peel off? Ppf may break apart and difficult to remove?
Time will tell about the dirt collecting at the edge. I think I did a pretty good job on most of it but there are a couple of small corners where dirt may collect but I think it will be minimal.

If the ppf becomes difficult to remove years later that doesn’t bother me (it was difficult to apply in the first place, so difficult is ok with me). As long as it doesn’t take any paint off with it!
 
@mvr1127 thanks for sharing your experience. I'm planning to keep mine no more than 3.5 years (sell before warranty is out) so I am contemplating the cost (of also time and effort) vs. benefit. I can live with a few rock chips. It's the malicious keying and people scratching the doors at parking lots that I am more concerned about.

In any case, now that it's been a couple of days, have the bubbles start to dissipate? Also, on the bumper picture, toward the driver side, there is a white spec. Is that a PPF finger? Great job, by the way. I'm sure it was satisfying getting it done yourself.
Well none of this covers the doors which is the spot people tend to key.

Some of the bubbles have dissipated after a week but some do remain. I’m hopeful they will go away. It’s been cold, humid, and raining a lot here in Southern California so it may take some time to dissipate. The white speck is a little finger but I took care of it after the picture was taken.

One thing NOT to do: I had a couple of bubbles close to the edge so I tried to scoot them out since I figured they didn’t have far to go. But this left behind a little trail that probably won’t come out. So resist the temptation to do that even if they are close to the edge and let them dry out naturally.
 
  • Like
Reactions: snovvman
Well none of this covers the doors which is the spot people tend to key.

Some of the bubbles have dissipated after a week but some do remain. I’m hopeful they will go away. It’s been cold, humid, and raining a lot here in Southern California so it may take some time to dissipate. The white speck is a little finger but I took care of it after the picture was taken.

One thing NOT to do: I had a couple of bubbles close to the edge so I tried to scoot them out since I figured they didn’t have far to go. But this left behind a little trail that probably won’t come out. So resist the temptation to do that even if they are close to the edge and let them dry out naturally.

Thanks for all the tips. Also appreciate you sharing your candid experience!
 
  • Like
Reactions: mvr1127
I just started with precutppf.store, did the headlights only so far, but what I've gathered
dust, lint, specks are definitely going to be an issue once you do larger pieces. Just doing a simple cellphone is tricky to avoid dust,lint. A whole hood is going to be a challenge.

From this, I think the only way to minimize is:
do not place the pieces on the floor as that's most likely to pick up dust. going to try table or even see if I can use a wall somehow. The window of time between coating the surface and placng the PPF must be a short as possible to minimize any dust getting on the surface.

I used very warm water ONLY as the tack solution (tip from driveprotected youtube), seemed to work well. Try and get a lint free cloth and wrap it around the squeegee to help get fingers to stay down.

The squeegee can definitely scratch the PPF, make sure there is always plenty of slip on the surface. I was surprised to see lots of micro scratches on the headlight PPF, so lesson learned for larger pieces
I thought ppf is self healing so scratches should be ok, shouldn’t it?
 
Some takeaways a month later.

#1 DON'T TOUCH IT THE NEXT DAY: Here's some info I didn't come across anywhere before I started and found out the hard way: The next day there will be NEW bubbles. This is where any soap underneath has converged probably because gravity carried it all to one spot. And here's the thing - RESIST the urge to try to push them out to an exit point, no matter how close. I had a couple of bubbles form near an edge and I didn't know this so I tried to push them out. I was successful, but not after leaving behind what I now learned is a "snail trail" - it left a mark from where the bubble started to the edge where I pushed it out and that mark isn't going to go away. BE PATIENT and don't do this - if it's a small enough bubble it will go away.

#2 POPPING BUBBLES WORKS PRETTY WELL I went to a pharmacy and bought some insulin needles. I used one to carefully pop some of the remaining tiny bubbles that didn't come out and flatten them down. This worked quite well for many of them, but then I realized a bunch of the tiny bubbles left behind aren't bubbles at all but tiny pieces of dirt under the film. Which leads me to #3...

#3 UNLESS YOU WORK IN A PROFESSIONAL ENVIRONMENT YOU WILL HAVE SOME DIRT under the film. I did my absolute best - cleaned the car exactly following the directions, clay bar, wet the ground underneath the car, had a friend help me with bigger pieces, the whole bit. But even if you follow everything to a T, I think at least a few specs of dust under the film are unavoidable. I think the pro outlets must go the extra mile in their environment to make sure this doesn't happen, probably to a degree that is just not feasible at home. BUT in my installation, these dust bubbles are minimal - to the point that it doesn't bother me, and I'm still absolutely glad I did it myself.

#4 UNLESS YOU HAVE LOTS OF PRACTICE IT WILL NOT BE PERFECT - I have a few very small fingers that won't go away, a few dust specs as I said above, and maybe a corner or two that's less than perfect. BUT - I am of the personality to accept these things. I do LOVE DIY projects, and they're never perfect and that's ok with me. If this doesn't suit you, hire a pro.

I'll try to add a few photos of the imperfections when I can...
 
In a previous post I mentioned purchased two PPF kits from Tesbros. One was the full front kit (hood, fenders, bumper, mirrors, headlights and fog lights) and the other was the exterior bundle kit (rockers, door handles, tail lights, trunk, door edges, and headlights again). Here’s my experience:

TLDR: If you’re a confident DIY-er, you can tackle this project.

INSTALL
I did the entire “exterior bundle” kit by myself. I taped some clean plastic sheet on the ground under the car in case something slid off, but that never happened. One thing to note: the little weeping holes for the tail lights were not weeded already on my kit - you’ll have to punch them out yourself. Nothing here was too difficult as most of the areas are flat. The rocker is the one place you have to be extra careful not to let any part slip off the car onto the ground.

I had a helper on the front kit which was much more involved. Having help was key in three ways: getting the ppf off the backing, getting it on the car without touching the ground or clothing, and was also helpful having him do the stretching while I tacked down the other end.

TIME
It took about two hours to set up, wash and prep the car following the prep videos. My car has less than 300 miles on it so it wasn’t very dirty or hard to clean. I did the “exterior bundle” in about three hours by myself (rockers, trunk, tail lights, etc) My help came when I started the front kit. Total time for the front kit with two people was about 5 hours.
DIFFICULTY

Never did I feel like I was close to disaster, but I had previously done the interior ppf kit so I had some practice, and I did watch the videos about 3 times through while waiting for it to be delivered. If I attempted some of the bigger pieces alone, especially the bumper, it might be a different story. If you are patient and careful about every step, making sure to keep things clean, that things are lined up properly, and going slowly to make sure you’ve got all your bubbles out before tacking down, then I would say it’s more “time consuming” than it is “difficult”. Tesbro’s directions are extremely thorough. The closer you stick to them, the less problems you’ll have.

RESULTS
I wasn’t expecting everything to be lined up perfectly, and I was expecting a few bubbles here and there that would dissipate over time, and I even allowed myself to accept I might have a few flaws I couldn’t eliminate as the cost of doing the job myself. I also prepared for the reality that I might totally ruin a piece or two and have to repurchase it (at a discount). For me the money still saved would be worth it and I knew I would also enjoy the process. I was pleasantly surprised by the results. Even though I was careful to get all the bubbles out during the install, I woke up the next day to find NEW bubbles all over the place. It seems this is from residual liquid consolidating into pockets overnight. Assuming these small bubbles will mostly dissipate as they are supposed to, then I am very happy with the job. Below you’ll see some pictures of the bubbles I’m talking about. Even since I took the photos some of them have mellowed out. Hopefully in a week or two it’ll be looking pretty darn good! I’ll try to come back and post some pics after a couple weeks.

QUICK TIPS

Don’t drop the clay bar or the squeegees. They are slippery!

Don’t skip the practice kit. The more feel you have for things the better you’ll do!

The tutorials also have pictures beneath the video of the order in which to tack down each piece. I printed these full size on paper so it’d be easier to refer to in the middle of the install instead of trying to find it and zoom in on my phone in the heat of the moment.

If you are alone you can use the round tesbros stickers that keep the ppf rolls together or painters tape to stick the backing down on to your table while you peel off the pieces.

I didn’t have any folding tables so I taped some painters plastic to the garage floor to give me a surface to lay out the PPF and peel it off. Just be careful not to step on the plastic.

CONCLUSION
If you are a patient, thorough, and careful do-it-yourselfer, and you have some backup help if you need it, then this is absolutely doable with acceptable results. If you are a perfectionist, impatient, or don’t like to take a deep dive into tutorials/directions, then maybe have it done for you.
Great DIY exp. PPF, vinyl or widow tint takes practice to get good. I did the hood, bumper and mirror caps - used a pre-cut kit online. Here are some of the tips that make the install better and more professional.

1) Having a second person to help, makes a world of difference.
2) Know when to use the isopropyl mix to tack a corner or panel helps in getting it to stay and squeeze the water out.
3) A heat gun or hair dryer will aid on the curved panel. (Just don't apply too much heat, or you will melt the PPF, distort it or get it to stick too quickly).
4) Work the panel till you get all the water bubbles out. Next day is way too late.
5) PPF can be stretched and picked up, re-wet to place down again. It's much more forgiving than window film or a vinyl wrap.
6) No PPF install is perfect, either from a professional shop, the factory or you. Over time the edges will come up and get dirt in them - thats a fact.
 
What are the options to deal with this?

Trim, clean and try to get it re-adhere, or is there something else that pros use to deal with lifting PPF other than reinstalling the panel?
It's in the "Prep". Getting the panels clean and remove any wax or spray polish. Best way is to wipe those panels down a few time with baby shampoo and the isopropyl - thats the trick. Warm weather is best, tacking the corner with the isopropyl spray mixture will hold it while you squeegee the PPF on the rest of that panel. Sometime a little heat is needed via a hair dryer or heat gun to get it to lay-down without bubbles.

Takes a lot of practice to master. YouTube videos make it look super easy - DIY 1st timers will have a learning curve. Helps if you have done window film or vinyl in the past.

To me the PPF is just "ok", I prefer the paint without any PPF - as it has more depth. If you live in an area with lot of debris on the roads - PPF on the high impact panels may help. Just know it only last 3-5 years (no matter what they say), will yellow in time (they all do) and if you only do a partial panel (when removing it - there may be two different colors from the exposure to the elements.
 
Last edited:
It's in the "Prep". Getting the panels clean and remove any wax or spray polish. Best way is to wipe those panels down a few time with baby shampoo and the isopropyl - thats the trick. Warm weather is best, tacking the corner with the isopropyl spray mixture will hold it while you squeegee the PPF on the rest of that panel. Sometime a little heat is needed via a hair dryer or heat gun to get it to lay-down without bubbles.

Takes a lot of practice to master. YouTube videos make it look super easy - DIY 1st timers will have a learning curve. Helps if you have done window film or vinyl in the past.

To me the PPF is just "ok", I prefer the paint without any PPF - as it has more depth. If you live in an area with lot of debris on the roads - PPF on the high impact panels may help. Just know it only last 3-5 years (no matter what they say), will yellow in time (they all do) and if you only do a partial panel (when removing it - there may be two different colors from the exposure to the elements.

pros will clean the panel with 90% alcohol AND also ensure there is 1-2mm gap from any edge

Thanks for the tips. I am curious, though, what the pros do *after* the install, if an edge lifts. Aside from reinstalling the panel, for minor lifts, what are the options? Trim, clean and re-adhere, or something else?
 
For my project (DIY PPF on 2022 Blue Model S), the hood was challenging but not too bad. The front bumper was difficult. With a tack point diagram and the USS holes for reference it was also doable. The whole car was done with precuts that had all possible wrapped edges extended. Except for the hatch, which was done with bulk. Even a perfectly mated seam on that crest would show, so bulk was the way. It was a fun challenge. Learning how to tack one side while stretching the whole piece over the crest. Fingers were the enemy for sure. You definitely learn how to work it while doing a stretch like this.