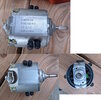
I put directly 12v in to blower and works.Hello
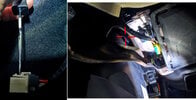
Someone can tell me how much resistance it’s correct between two pols (conector) in the blower?
I mean if put the two poles from the multimeter in to the two pols in the blower how many ohms?
I’m not fine information in internet about that.
Thanks to this forum, I take out the blower.
Mine motor it’s not working. At the connector comes 12,6v continually and when i change the speed, voltage it’s going down progressively to 10,4v.
I thing that’s it’s correct because the resistance it’s working… but I want to be 100% sure that the problem it’s the blower before I buying it.
Thanks!
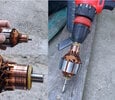
Any idea what is defect?
Thanks