Welcome to Tesla Motors Club
Discuss Tesla's Model S, Model 3, Model X, Model Y, Cybertruck, Roadster and More.
Register
This site may earn commission on affiliate links.
I was thinking about this over coffee. Anybody who is considering spending $400 for the Macsboost kit could DIY this for next to nothing. I need somebody to confirm the relationship between the spacer thickness and the camber, but I don't have a refresh X. If anybody is in the Bay area I'd be down to shim and measure the camber and toe values so we can share the data freely.

Some notes:
- Another member has already confirmed the $400 shims are off the shelf 2.9mm (approx 1/8").
- Factory hardware appears to be M12

a98aeaa6d8c4732c843503177200dedb.png


To do this at home you will need four M12 (metric, so the nominal diameter is 12mm) washers, approx thickness of 3mm; 1/8" is a close standard equivalent. A correctly sized washer will work in pinch.

If we can measure the factory arm's flange, I can draw a simple square part that others can customize for their desired thickness, if they want to hit a target alignment. There are plenty of shops that will mill these for you

426054ebfc7a1e7465d46e9e5d0e1d03.png


IMG_4916-markup.jpeg


Quick mock up with a non-standard thickness that I priced through Xometry. I quoted laser cut 6061 below but other materials are available for an additional cost. Grade 5 Titanium will double the price...to a whopping $11.

If you are happy with the alignment from the 1/8" thickness there is no reason to have a spacer machined.

f63a8fcbb82e764162d37c7bed5db0a0.png


f90aeef6d43beda7719d95e2e51b17d8.png


59e9d5441f7009b65fc60ea2def20a78.png


Of course, the cost goes way down with volume and we can do cool things like anodize or powdercoat. There are also other manufacturing options available with volume.

If none of these options speak to you grab some 1/8" stock, a hacksaw, and a drill!
 
Hi All,

Someone above asked about the grade of the bolts...
It is nested in the Tesla part description: They are
High-Strength Metric Class 10.9

Shawn
Excellent find! Thought I asked in this thread, but was in another thread. I didn't know that was the grade in the part description. Looks like someone could reduce camber issue for ~$30 in materials and some elbow grease. Here's what I've found.

McMaster-Carr has lots of M12 stainless steel washers. Various thicknesses and ODs available. I'm not sure which OD would fit. Prices vary from $2 - $19.

Pack of 5 bolts for less than $9 from McMaster-Carr. I think 50mm length would work, but not sure without test fitting. Tesla bolt is 46mm + 3mm washer (to address some camber) = 49mm. Hopefully the body would accommodate an extra millimeter of thread. Another concern is there is only 30mm of thread on the new bolt. Not sure if the original Tesla bolt is fully threaded or partially (and how much thread). I didn't see a fully threaded bolt in this size on McMaster-Carr. Someone try this. I'm too lazy :)


mcmaster-bolt-model-x.jpg
 
Excellent find! Thought I asked in this thread, but was in another thread. I didn't know that was the grade in the part description. Looks like someone could reduce camber issue for ~$30 in materials and some elbow grease. Here's what I've found.

McMaster-Carr has lots of M12 stainless steel washers. Various thicknesses and ODs available. I'm not sure which OD would fit. Prices vary from $2 - $19.

Pack of 5 bolts for less than $9 from McMaster-Carr. I think 50mm length would work, but not sure without test fitting. Tesla bolt is 46mm + 3mm washer (to address some camber) = 49mm. Hopefully the body would accommodate an extra millimeter of thread. Another concern is there is only 30mm of thread on the new bolt. Not sure if the original Tesla bolt is fully threaded or partially (and how much thread). I didn't see a fully threaded bolt in this size on McMaster-Carr. Someone try this. I'm too lazy :)


View attachment 980517
Someone was doing just that in Florida months ago. It was a bit of a trial and error approach. I just want with the Macsboost because I don't have time to fiddle around with it. So their solution worked fine for me. I don't mind compensating someone for their time. The shim plate they made was nicely done as well.
 
  • Like
Reactions: bionichomer
I ordered myself a Quick Trick 4th gen pro alignment tool setup and plan to tackle this install finally once I get that and measure my stock starting point. Will plan to update here what I see. The 5th gen seems insane for hundreds more when you could just drill and tap on some ruler ends and string…
 
I ordered myself a Quick Trick 4th gen pro alignment tool setup and plan to tackle this install finally once I get that and measure my stock starting point. Will plan to update here what I see. The 5th gen seems insane for hundreds more when you could just drill and tap on some ruler ends and string…

Expect to spend a lot of time verifying your work area is flat and level. You can do all of this with a set of string and jackstands, but it's a lot more work. The alignment kits just make it easier.
 
  • Like
Reactions: ZuleMYP
Expect to spend a lot of time verifying your work area is flat and level. You can do all of this with a set of string and jackstands, but it's a lot more work. The alignment kits just make it easier.
Yep thought about doing it that way, but this should allow the flatness not to matter since it mounts to the wheel and its reference point is the wheels surface and ground plane. To do it from the string lines needs it more flat than this should, in theory.
 
Yep thought about doing it that way, but this should allow the flatness not to matter since it mounts to the wheel and its reference point is the wheels surface and ground plane. To do it from the string lines needs it more flat than this should, in theory.

Even though you mount to the wheel you'll still need to set up your work area. Here's a great article on alignments (and leveling) in general:

I use hub stands and strings and I make sure the work area is level. You only need to do this once, so if you're at home you can mark your floor and skip this step in the future.

1696814893327.png
 
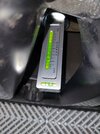
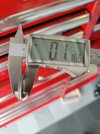
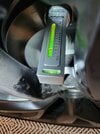
Great thread! Just wanted to add some data: 2023 MX Plaid, the initial driver side rear camber (at low) was -4. My M12 washers are thinner, I added 2 of them (0.1165 inch or ~3mm) the camber went down to -3.5. This doesn't seem to be nearly enough for me...
 

Attachments

  • 20231008_223705.jpg
    20231008_223705.jpg
    288.3 KB · Views: 89
  • 20231009_105037.jpg
    20231009_105037.jpg
    286 KB · Views: 85
  • 20231008_214223.jpg
    20231008_214223.jpg
    331.9 KB · Views: 79
  • Informative
Reactions: towndrunk
Great thread! Just wanted to add some data: 2023 MX Plaid, the initial driver side rear camber (at low) was -4. My M12 washers are thinner, I added 2 of them (0.1165 inch or ~3mm) the camber went down to -3.5. This doesn't seem to be nearly enough for me...
Good data points. Wow that's really negative! What ride height setting is that on? Did you happen to have any measurements off a previous alignment to compare the gauge to the alignment numbers? I was thinking it would have reduced camber by about 1deg, but guess not.

My 2022 MX Plaid rear wheels each measured about -2.2deg camber. This was April this year from alignment at tesla SC. The only problem is they didn't confirm which ride height it was done at. I feel like it was done at medium because on low, it's very noticeable negative camber.
 
I got some shims from a member on the Plaid performance facebook group and I was able to correct the rear 1'. I used a camber bubble level and also a digital angle finder. Got a base measurement and then an after.
I'm running N2itive adjustable links set to -5 front and -7 rear.

On my digital angle finder, I measured 2.3' camber after the shim. Before I was 3.3' camber. Using the bubble level I saw 4.3' and 3.3' after the shim. The angle finder was more accurate and easier to read. But this gave me a baseline to compare the before and after.

This is on Low setting.

Another member using the same shims lowered an 1" got his camber to 1.9' and 1.6' on an alignment rack with the same shims.
 
Last edited:
  • Informative
Reactions: NJturtlePower
So with all the talk about the inner rear wheel wear on the X I went out to Tesla and had a talk with the service folks there. I also had them do a Checl Alignment on my 2023 X LR for me. Cheaper than the full alignment which includes all 4 wheel balance as well. The cost of the Check Alignment was $74.20

Overall the service writer suggested to set the suspension to MEDIUM and to lock it into that setting. I'm still doing research on this recommendation because I know Tesla has recommended the X be set to LOW. I think I prefer the LOW setting due to my average driving which is highway. I think Tesla's suggestion of LOW is based on the half shafts.

I'm leaning towards the spacer suggestion and I'll probably get the X a full alignment by Tesla after I install. As the CAMBER and the SPACERS are not adjustable I would just have to accept the setting hoping it is closer -0.5 to -0.75 rather than the -2.20 & -2.10 that it is now.

I also figure I would not get any push back from Tesla with the spacers as CAMBER is not adjustable now so the spacers shouldn't throw any thing else out for them to have to deal with.

I'm no expert here. I'm curious what you "smarter folks than I" have to say.

Here are the results of the Check Alignment. I believe the "Vehicle TESLA 2022 MODEL X Air Suspension" is from the alignment machine and differs from the actual car which is a 2023 MODEL X LR.

1697145059311.png
 

Attachments

  • 20231012-AlignmentCheck-$74.20-Redacted.pdf
    197.3 KB · Views: 54
Good data points. Wow that's really negative! What ride height setting is that on? Did you happen to have any measurements off a previous alignment to compare the gauge to the alignment numbers? I was thinking it would have reduced camber by about 1deg, but guess not.

My 2022 MX Plaid rear wheels each measured about -2.2deg camber. This was April this year from alignment at tesla SC. The only problem is they didn't confirm which ride height it was done at. I feel like it was done at medium because on low, it's very noticeable negative camber.
This was measured at low setting. I never had an alignment done since the car is pretty new (~500 miles). There could be some margin of error with my gauge as others pointed out, but as a reference my front wheels are at -1.5' (low setting). I think I will try again with a thicker shim and I should probably get longer bolts too.
 
I got some shims from a member on the Plaid performance facebook group and I was able to correct the rear 1'. I used a camber bubble level and also a digital angle finder. Got a base measurement and then an after.
I'm running N2itive adjustable links set to -5 front and -7 rear.

On my digital angle finder, I measured 2.3' camber after the shim. Before I was 3.3' camber. Using the bubble level I saw 4.3' and 3.3' after the shim. The angle finder was more accurate and easier to read. But this gave me a baseline to compare the before and after.

This is on Low setting.

Another member using the same shims lowered an 1" got his camber to 1.9' and 1.6' on an alignment rack with the same shims.

Do you know the thickness of the shim?
 
I need to spend some more time with my QuickTrick gen 4 alignment tool; but on my initial attempt (to read the stock camber as delivered):

Calibrated sensor to tire/floor level.
Set horizontal to equal to tire level.
Set vertical to 90 degrees from horizontal. Did these on both sides.
Drivers side rear camber shows -3.85 degrees!!!
Passenger side rear camber shows -1.55 degrees.

What the heck, I have to hope some kind of error on my setup because that seems insane with passenger side being basically alright, and drivers side being insane. I'd think if this is the case I'll take it to Tesla and tell them to fix it as that's way outside even their "pseudo spec". Visually the drivers side is far more tilted inward I admit.
 
Last edited: