Welcome to Tesla Motors Club
Discuss Tesla's Model S, Model 3, Model X, Model Y, Cybertruck, Roadster and More.
Register

DIY: Roadster 2.5 PEM cleaning - step by step

This site may earn commission on affiliate links.
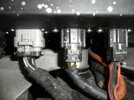
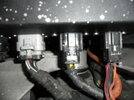
Based on what Mark did and other pieces of information I could find on this forum, I decided to clean my PEM. Enjoy and use at own risk......

I would rate this difficulty: 5/10. It's just following a procedure and making sure you don't drop any nuts :)


Mod Note: One of our other members posted a YouTube video on the process, which is a good compliment to this procedure. See Roadster Rear Blower Maintenance - Page 7

An AWESOME thanks for this. I just did it this morning.

After shutting down the power, it took about 10 minutes for the voltage across the BAT +/- terminals to fall to under 2 volts. Must have been a lot of capacitors to bleed off.

On my 2.5 the only difficulty was putting the PEM back in. Aligning it with the brackets that hold it from the left and right sides underneath, and with the 13mm bolts that go into the sides of the battery. That was a bit of manhandling.

And my PEM underside looked clean, and nearly pristine. I was gonna ignore cleaning it, since I had already done the blowers underneath.

Pem_smaller.jpg

But even thought it looked clean, when I took a compressor to it at 80+psi, it blew a lot of dust out. So I'm glad I did blow it out even if it appeared that it didn't need it.

With these instructions and a friend who used to service Hondas (but knows nothing about Tesla's) we got it knocked out is about 2 hours.

Seriously, it's two person job, but it's easy!

-Scotty
 
  • Like
Reactions: ra88it and Mark77a
I just cleaned my 1.5 PEM and while similar it is different. The high voltage connectors have a nice twist connector, which is good. But they are not easy to get to, bad. This one is about 8 inches in under the PEM with very little clearance. View attachment 99797 There are two 13mm nuts you have to remove from the underside with a 24" extensions, so it really helps for the car to up on ramps or jack stands. View attachment 99798 Then I saw one ranger use some wood block "jigs" that you can use to get the PEM up so you can reach the connectors as you do not have a little door to reach into from the trunk. It gives just enough space to reach in and twist off, assuming you do not have large hands. The wood blocks are from a 2x4 cut 6" long. View attachment 99799 It took me 4 hours, so while it saved me money it was not easy. I got very little dirt from the PEM and motor so I could likely go two years between cleaning as my PEM seems to stay quite clean. My baffles to keep the dirt out seem to be working well.

Did anyone ever post a step by step for cleaning the 1.5 PEM?
 
So I tried to get my 1.5 PEM off today, since my PEM has been overheating since I had it in for annual service with Javier.
So much for letting a "pro" do it.
I was progressing nicely until I got to the 13mm bolts that hold the PEM to the batter (one by the pump reservoir and one on the other side by the ground).

I will try to quote one of the pics in this thread:


What do people use to loosen these 13mm bolts that hold the PEM to the battery?
A 13mm crescent wrench?
I tried with an adjustable wrench but mine are on very tight and I am afraid of scratching the paint/carbon fiber around this area.
Why in the world would you want to use a Crescent/adjustable wrench?

Why not use a socket or box end wrench?
 
  • Like
Reactions: hcsharp
Hi there, I'm doing some maintenance and I’m having an issue removing the third connector under the PEM. It seems to be different than what I've seen on this forum and what I could find online elsewhere. See the picture enclosed. Does anybody know how I can remove it? I'm wondering if it may have to do with the white pin/lock that can be seen on the picture. Not sure what way to push it but I've tried in most directions (mostly up and down) and it won't move. Any help is appreciated. Thanks!
 

Attachments

  • IMG-2815.jpg
    IMG-2815.jpg
    278.8 KB · Views: 163
Not sure what that white peg is but have a good look at the 3d image from here
If you spin through the 3d model you will see the clip that needs to be pressed into the body, it needs to be pressed in hard, I had to use a screwdriver blade to push on it while I pulled with everything I could given the confines. If I do it again I will be lifting the PEM slightly to give me more room. Especially putting it back on.
 
Thanks. The white peg that would normally be facing towards the back of the car is gone and instead there seems to be this white round one facing the passenger side. I’m probably getting ready for using your screwdriver tip… What if I break the connector? It is easily replaceable?
 
Thanks. The white peg that would normally be facing towards the back of the car is gone and instead there seems to be this white round one facing the passenger side. I’m probably getting ready for using your screwdriver tip… What if I break the connector? It is easily replaceable?
I would replace it period. If you get stuck I have a few new ones floating around with gold plated pins
 
The white piece is the lock that slides into the connector and prevents you from pushing down to release. It looks like someone broke yours. Pull the white piece you have out towards the wires and then you should be able to push in on the connector directly above it to remove.

The first pic is pushed in and locked, the next it is out (center connector).
 

Attachments

  • SAM_4399.JPG
    SAM_4399.JPG
    300.9 KB · Views: 155
  • SAM_4400.JPG
    SAM_4400.JPG
    304.3 KB · Views: 159
Is your car a 1.5 or 2.x? Different connectors between them. I think ML Auto's pictures are from a 1.5.

On the 2.x, I would replace the connector regardless, or at least replace the pins. They are pretty much a single-to-couple use item, after which they don't make good enough contact with the mating connector on the PEM. When you do, clean the pins on the PEM side with some De-Oxit, and let it dry completely. Then when reassembling everything, push the connector straight on (don't wiggle it from side to side) and leave it there. The "springy" stuff in side the connector doesn't spring very far before permanently deforming. Also check the connections at the blower motor under the car. They are typically much more robust, but mine were loose and that caused the PEM-end connector to fry. More info here (skip to the last two pages): Think I need a new PEM Fan... Anything else to check?
 
Pulling on the wires won't release the connector housing. I suppose you could cut the wires, but then you're really committed to replacing the connector and pins. Though, seriously, you probably are already...

If you have the time, I'd get the replacements before cutting anything, and get extra pins. You'll use them in the future. I think I documented the part numbers in my thread.

Is the car properly charged, APS-disabled, and so forth?