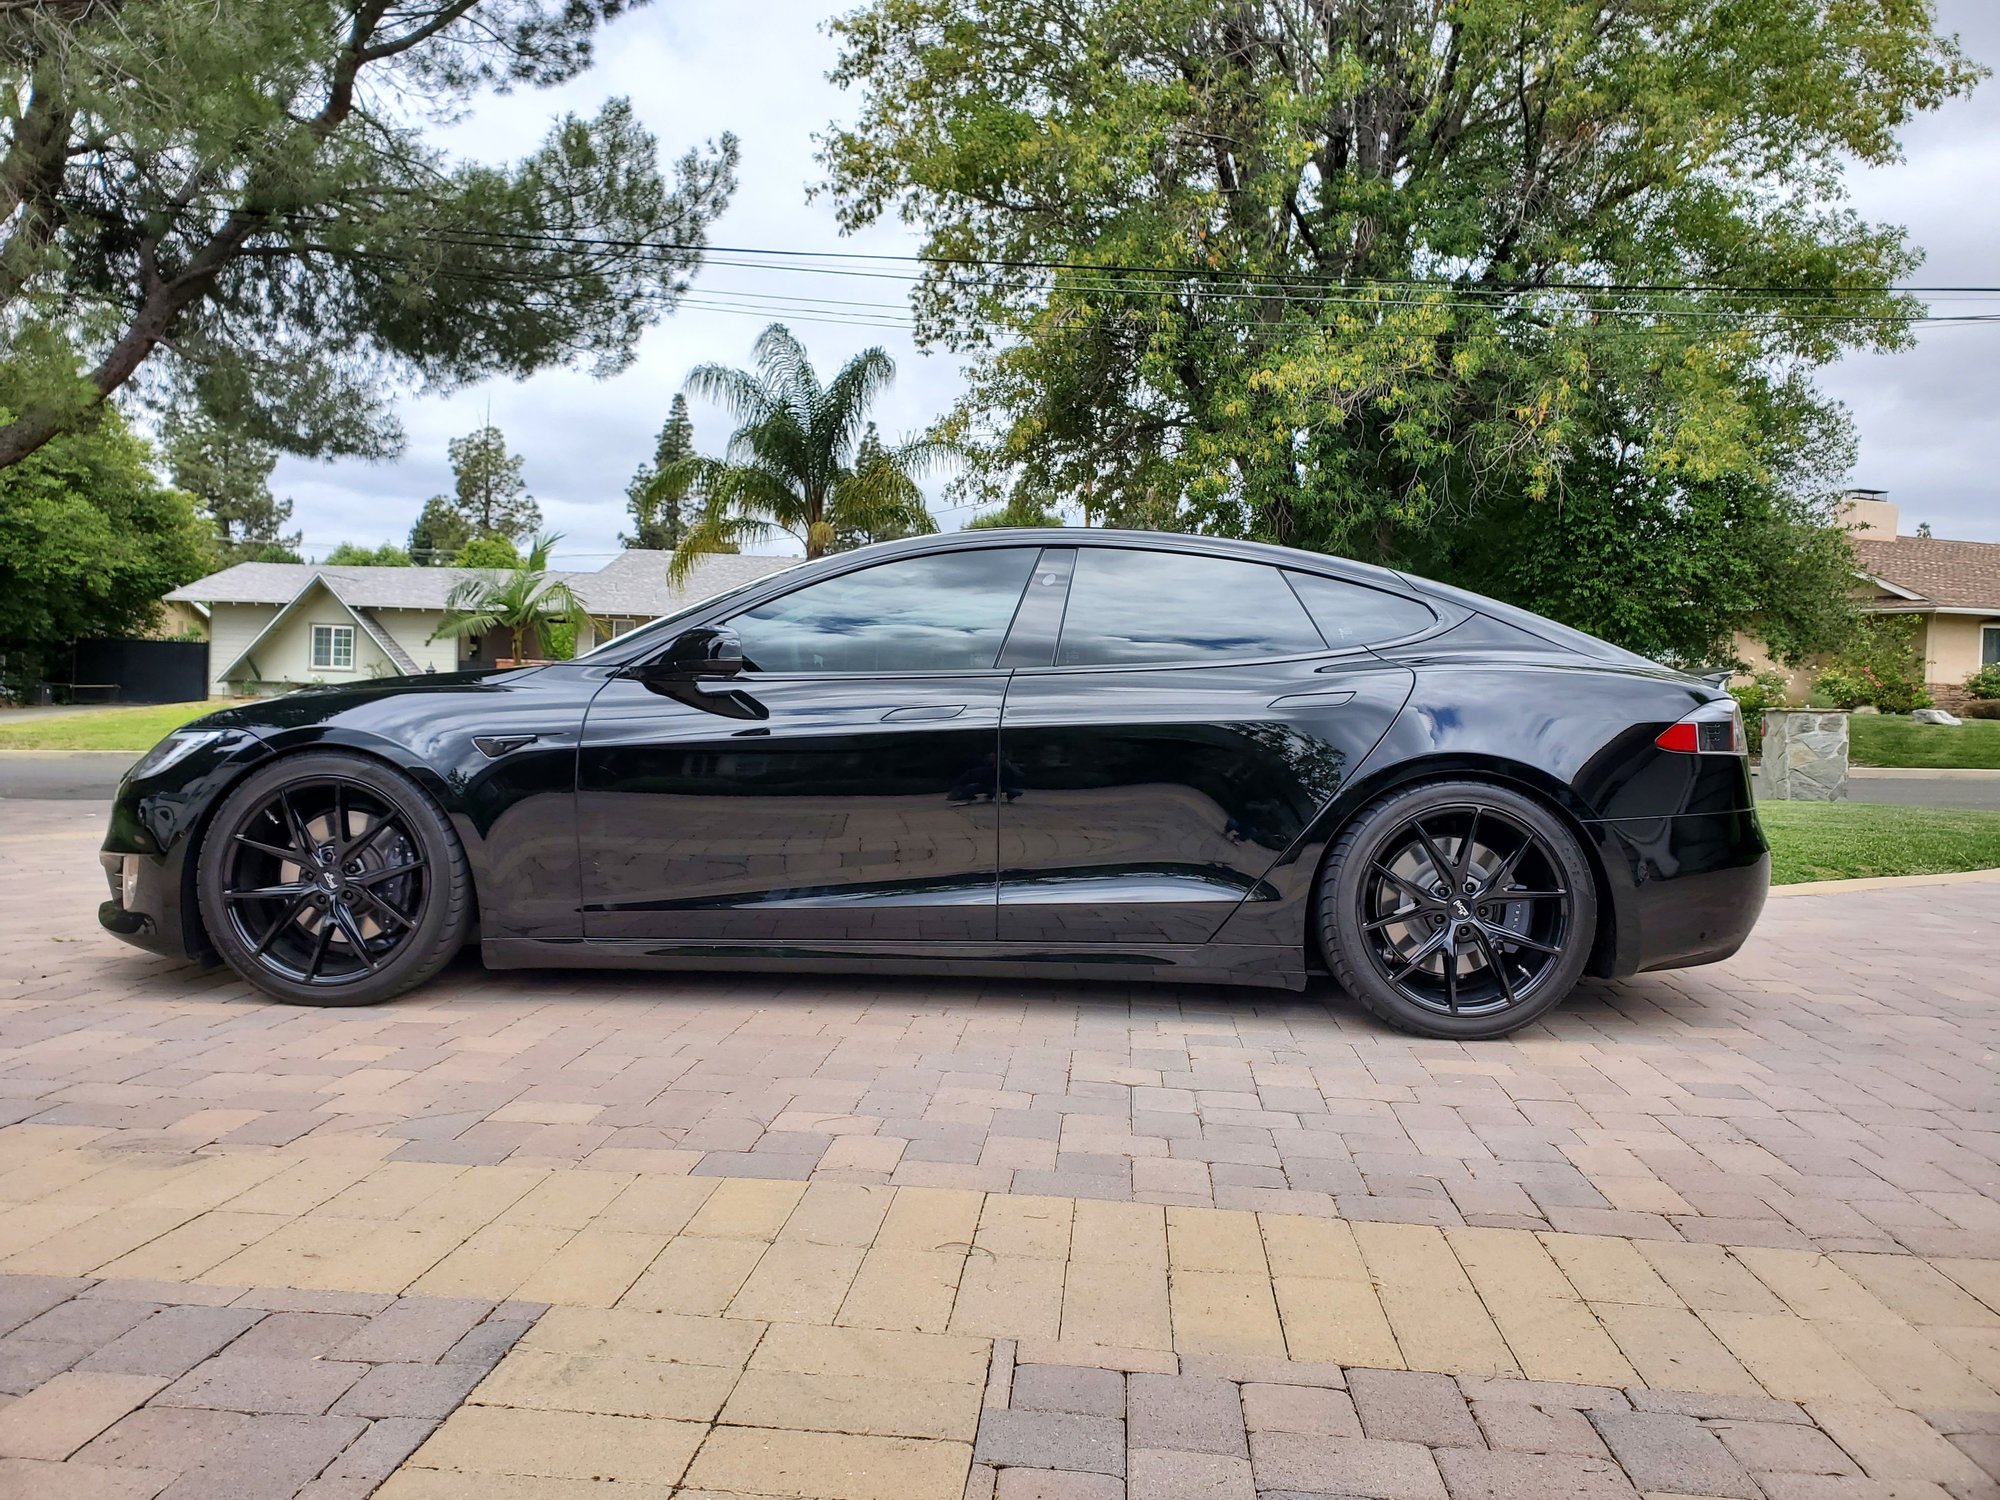
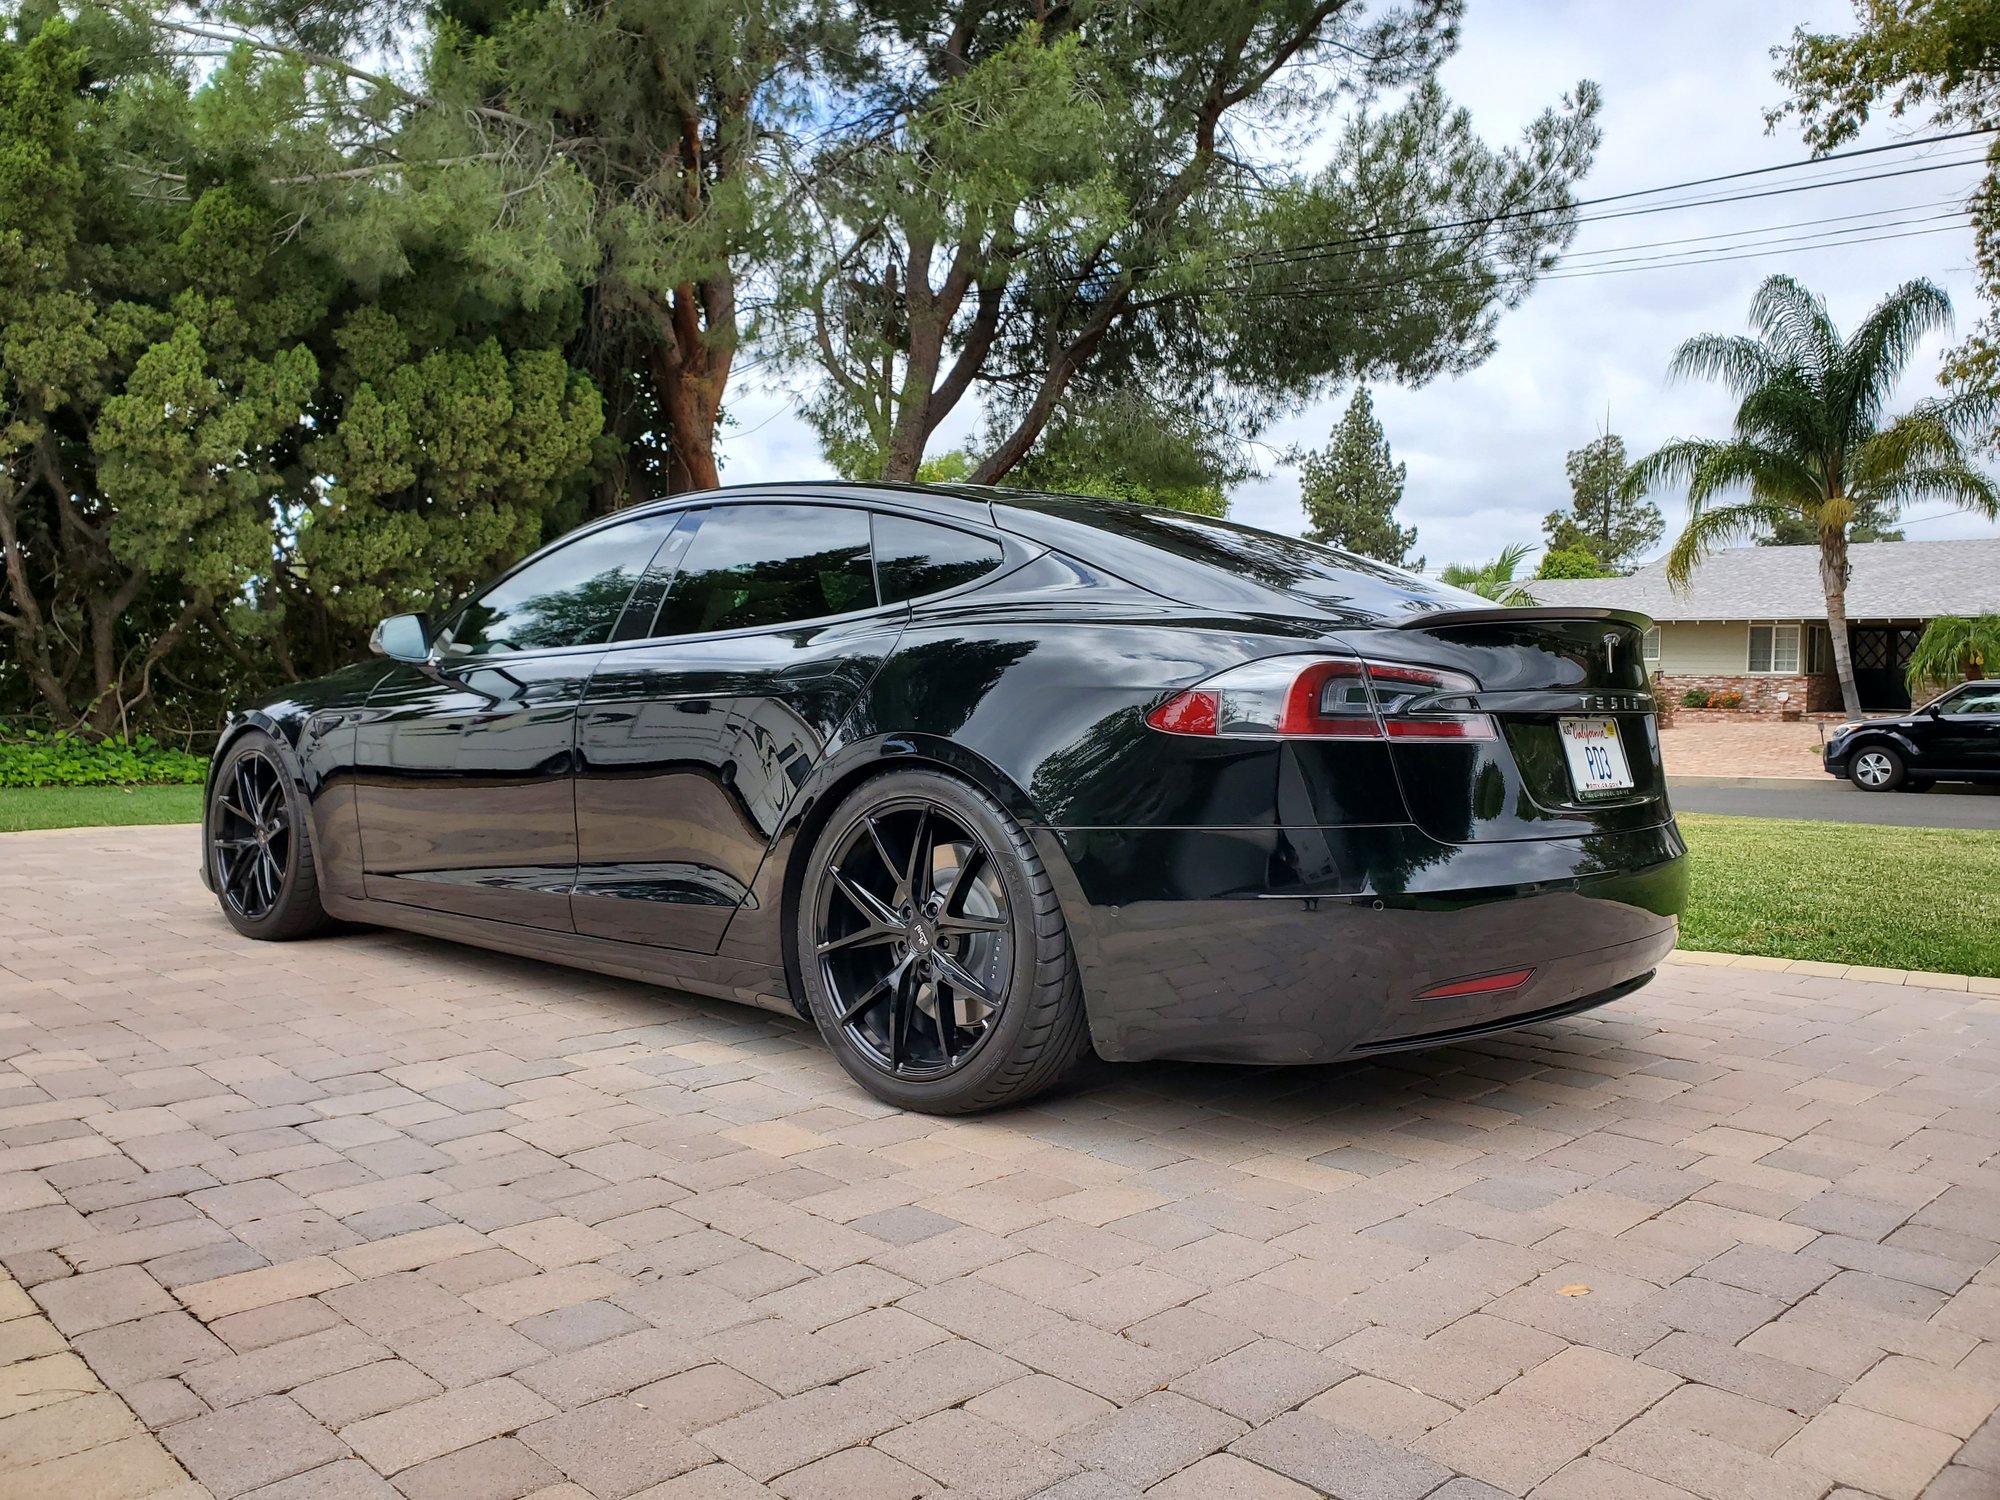
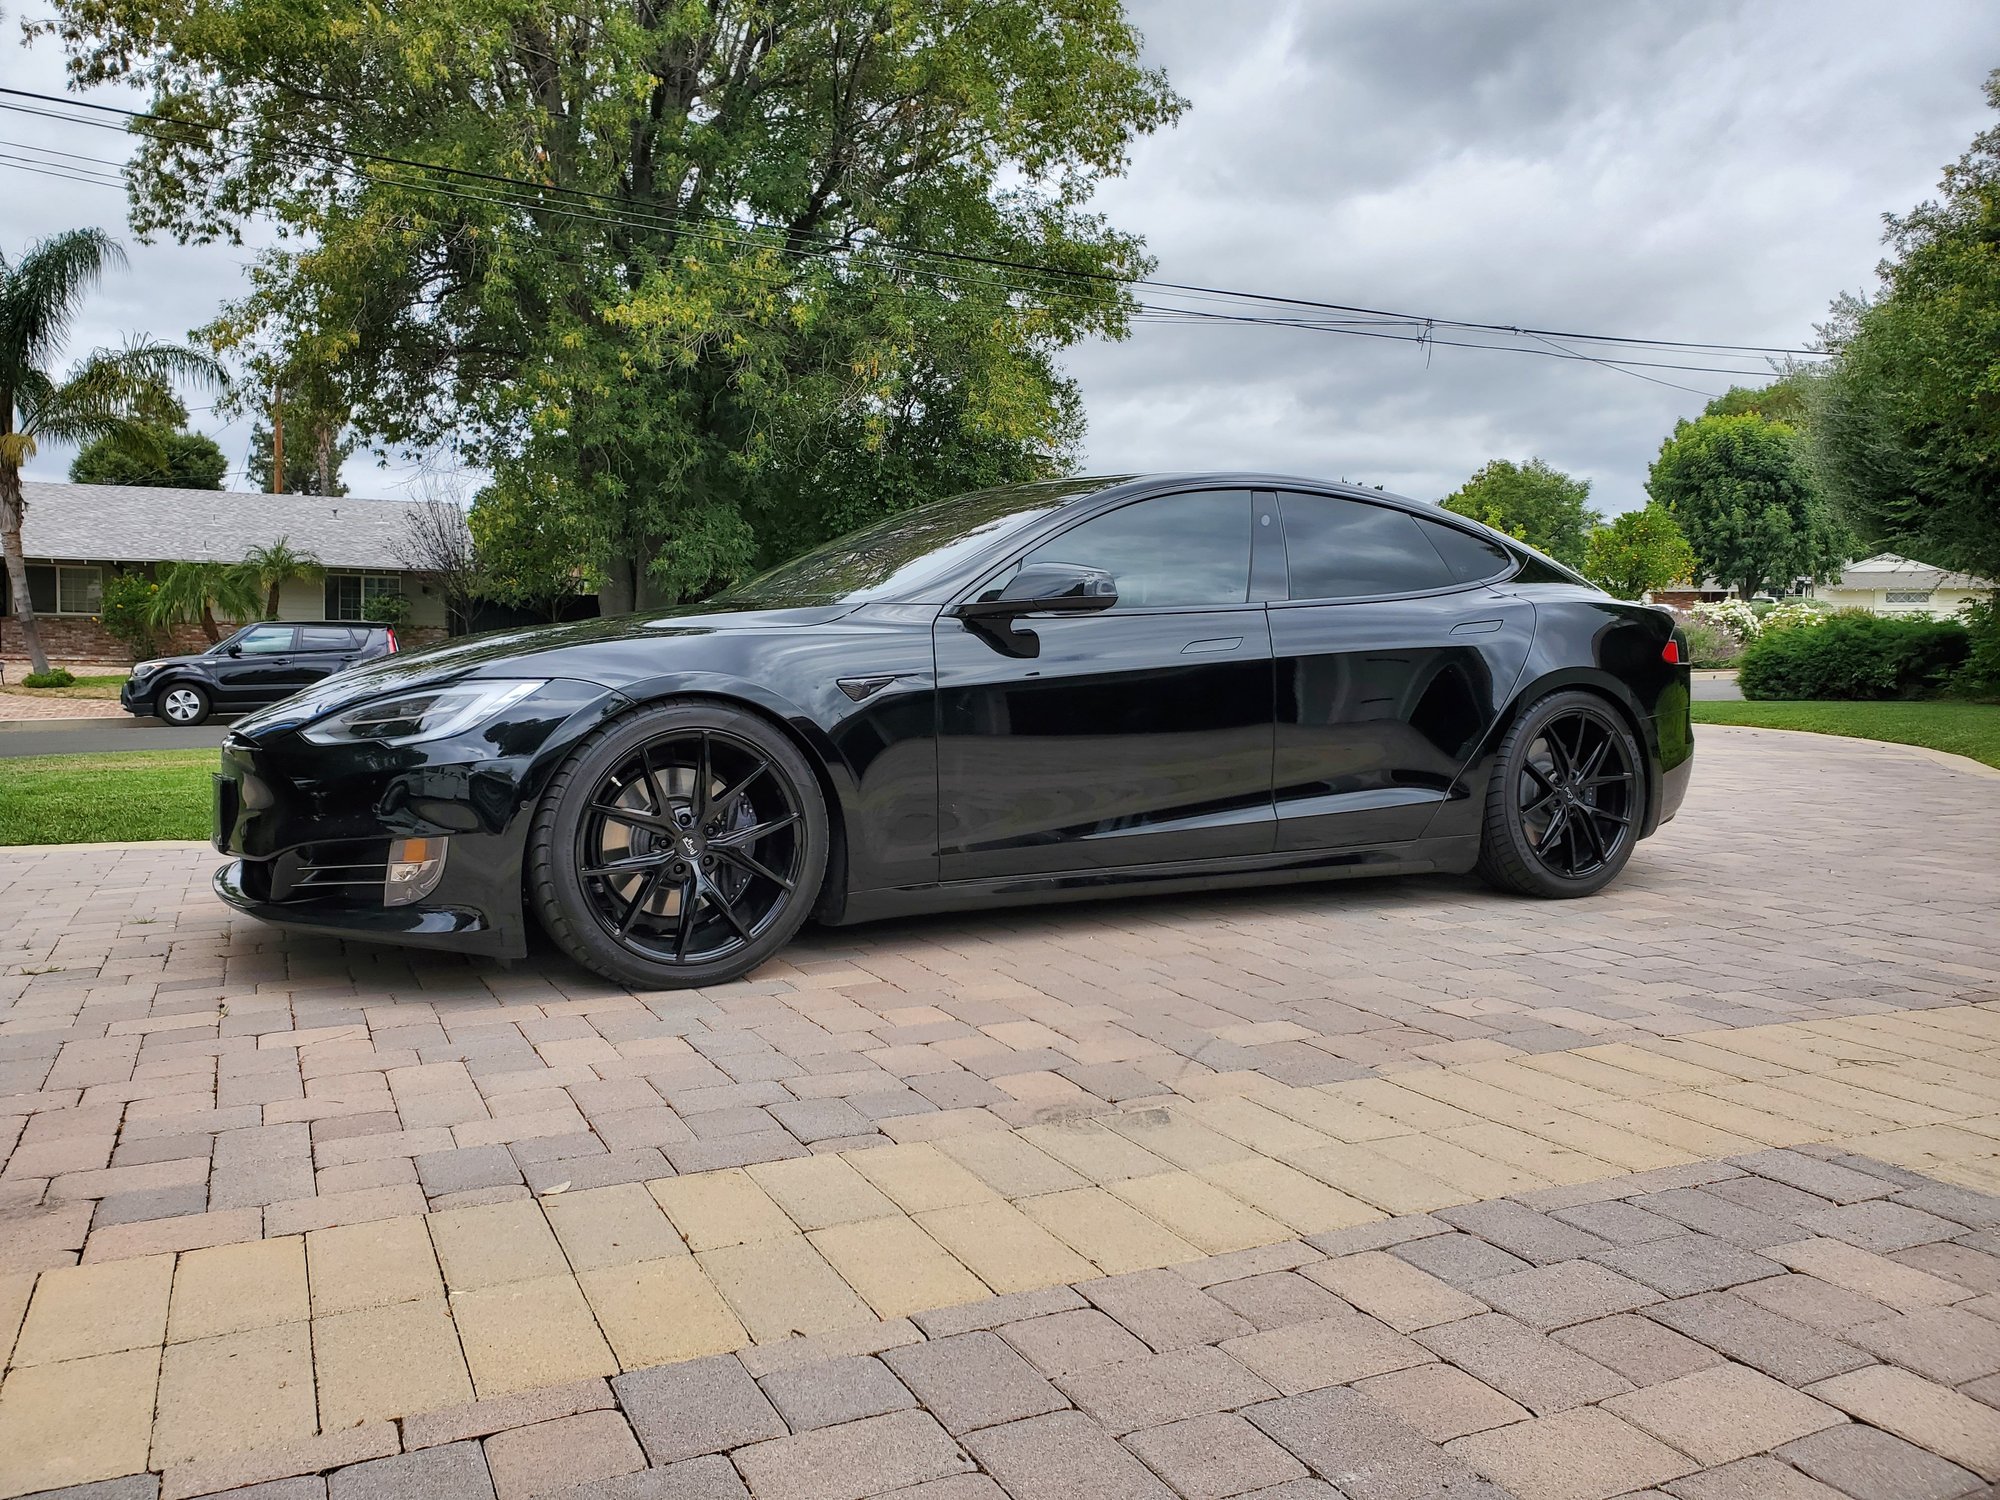
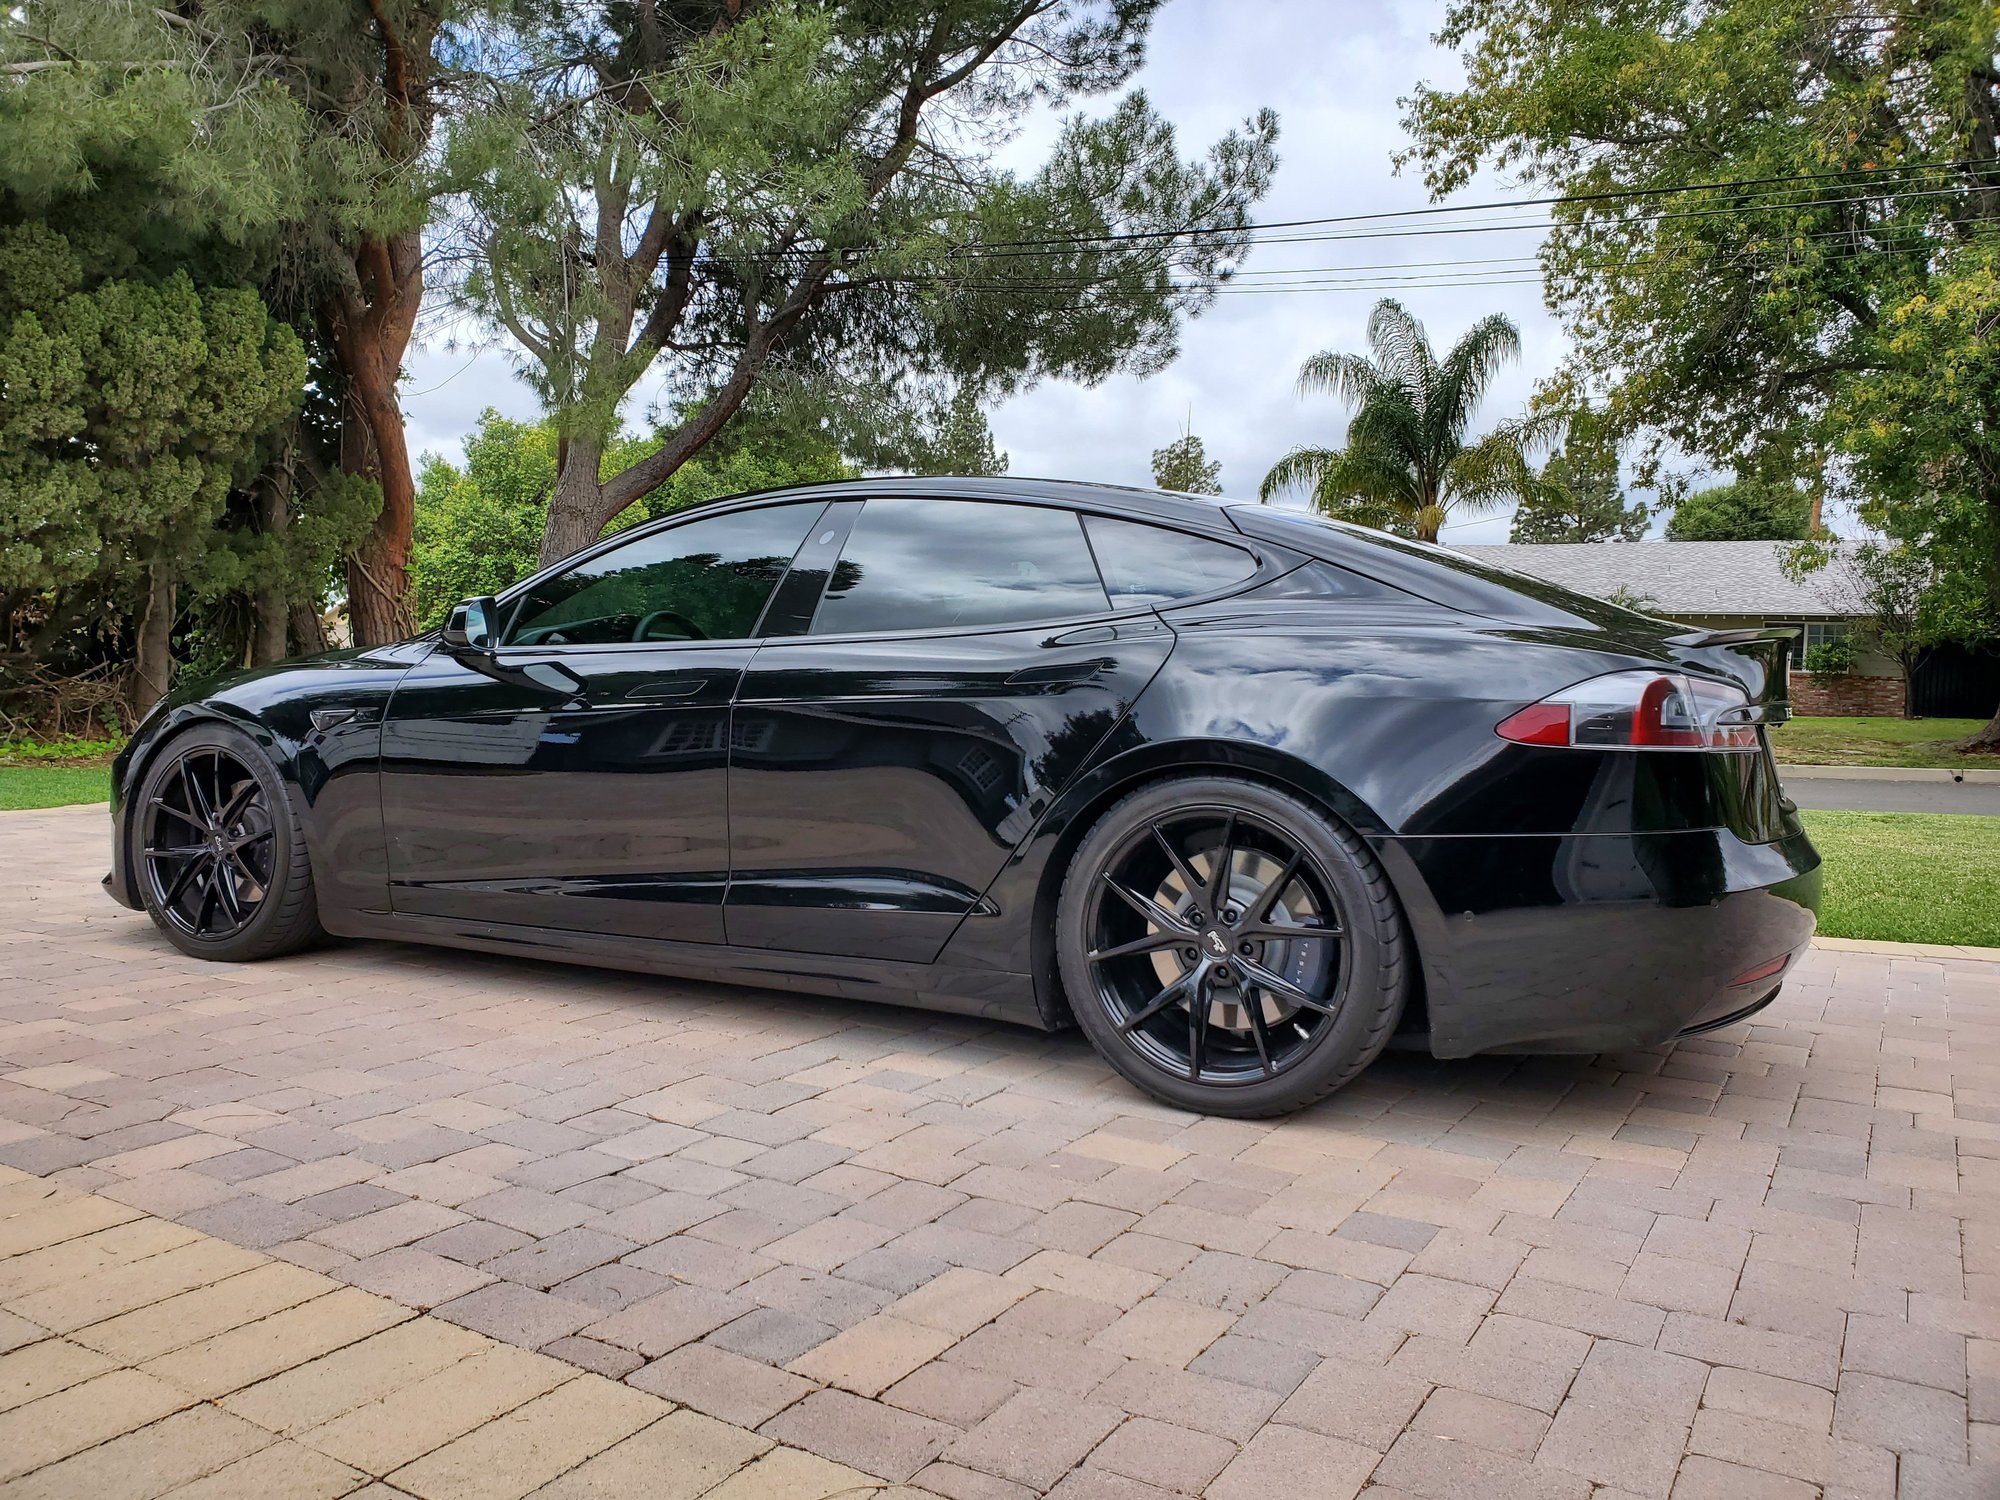
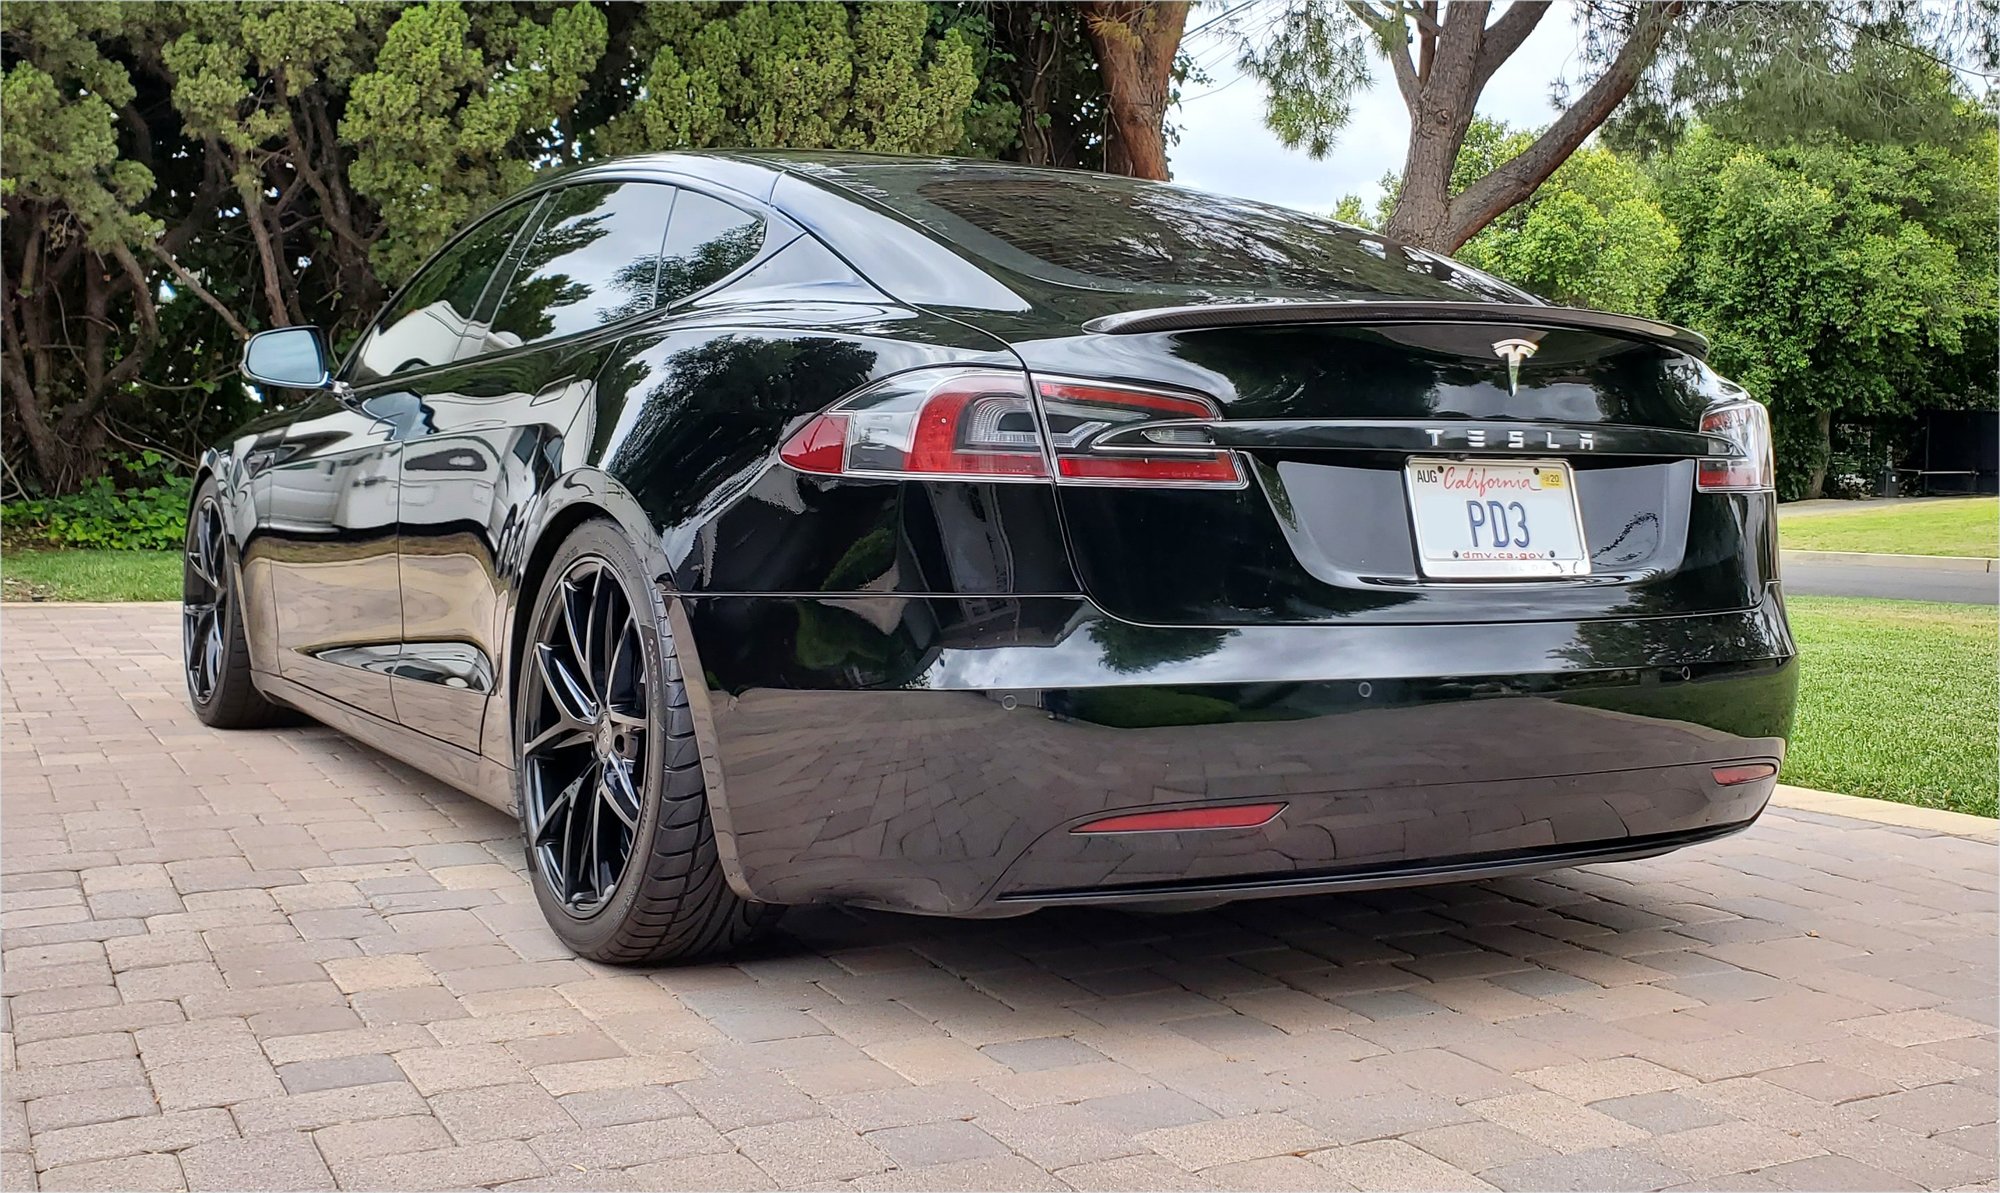
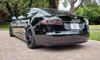
Finally was able to get the car washed after 3 months!! And finally got some photos of the car complete. See similar looking cars stating that over $30,000 was spent to get this look. Many of the Tesla suppliers understand that most Tesla Model S drivers can afford the best and their prices reflect it. With just a little elbow grease and small time investment, got everything done for under $8,000. Regardless of whether I can afford it, I'm not into throwing away cash.


Welcome to Tesla Motors Club
Discuss Tesla's Model S, Model 3, Model X, Model Y, Cybertruck, Roadster and More.
Register
Install the app
How to install the app on iOS
You can install our site as a web app on your iOS device by utilizing the Add to Home Screen feature in Safari. Please see this thread for more details on this.
Note: This feature may not be available in some browsers.
-
Want to remove ads? Register an account and login to see fewer ads, and become a Supporting Member to remove almost all ads.
You are using an out of date browser. It may not display this or other websites correctly.
You should upgrade or use an alternative browser.
You should upgrade or use an alternative browser.
Finally got some photos of the completed car.
- Thread starter kizamybute'
- Start date
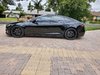


Great job! Just posted a similar thread in the Interior/Exterior section. Those wheels look... familiar.
View attachment 548783
Apparently we have similar tastes!
") And choose to be smart at the same time, spending about 20% of the money for wheels that look nearly identical to other common Tesla wheels.
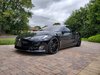
And choose to be smart at the same time, spending about 20% of the money for wheels that look nearly identical to other common Tesla wheels. I like the look of your rear wheels better! But, I chose to keep mine with a squared set up all the way around. With as quickly as these cars wear out the rear tires, wanted to be able to have the option of rotating them. Definitely prefer the look of the wider rear wheels though! Yours looks great.
f205v
Member
Yep, rear tires only last 15K-20K miles.Apparently we have similar tastes!
I like the look of your rear wheels better! But, I chose to keep mine with a squared set up all the way around. With as quickly as these cars wear out the rear tires, wanted to be able to have the option of rotating them. Definitely prefer the look of the wider rear wheels though! Yours looks great.
BTW, you’re using lowering links/brackets, yah? Which ones? I have a set of the 3D-printed ones, but never threw them on yet.
Looks amazing. All that work and $$, and you are leaving front license plate frame on?!Finally was able to get the car washed after 3 months!! And finally got some photos of the car complete. See similar looking cars stating that over $30,000 was spent to get this look. Many of the Tesla suppliers understand that most Tesla Model S drivers can afford the best and their prices reflect it. With just a little elbow grease and small time investment, got everything done for under $8,000. Regardless of whether I can afford it, I'm not into throwing away cash.
Looks amazing. All that work and $$, and you are leaving front license plate frame on?!
I was a little upset that Tesla had put it on the car like that when I picked it up. But, then realized I'm not a huge fan of the big flat space Tesla left for where a grille would go on most cars. I'm one that actually liked the nose cone!! LOL. In this case, since it was apparently painted with the car as it matches the gloss black perfectly, it started to grow on me as it breaks up the flat panel in front. So I've left it on. Actually never looked real closely, but I thought I saw screws in it, thus if I take it off, I'll be left with two holes in the bumper cover, so that was the other reason for not taking it off.
Last edited:
Thank you. I previously had a model 3 that looked almost exactly like my Model S above. Had the T-Sportline turbine wheels in gloss black, plus their lowering springs. I spent a fortune on that car to have it modified. It probably sold for $5,000 over what it would have without the upgrades. After that realization and a loss of over $20K on the upgrades, for the Model S, found a more economical way to get a very similar look for much less.Wow, that looks SUPER good! I've got my red Model 3 at the shop as we speak. Ceramic coat, various stuff from Abstract Ocean, chrome delete, window tint. I'll post pic's when done.
Iowa2
Member
I have to say that the very first picture that I saw because of the cloud reflection it looked like you had several dents in the rear door and quarter panel and my initial thought was WTF. But then I scrolled down and saw the rest and realized it was just a reflection.
Yep, rear tires only last 15K-20K miles.
BTW, you’re using lowering links/brackets, yah? Which ones? I have a set of the 3D-printed ones, but never threw them on yet.
@kizamybute' Car looks fantastic!!
What specifically did you do other than what is obvious (wheels, tint, chrome delete)? Wheel specs? List of upgrades?
Thank you.
Yes, I'm using the Unplugged Performance lowering brackets. $500 (3D printed ones can be done much cheaper)
After having 21" wheels on my prior Model S cars, and watching them bend at every pothole in L.A., finally chose to go with a 20" wheel.
They're cheapy wheels $278 each. 20x9. Tires are 275/35/20 and fit beautifully. (Not a fan of the rolled over look of the stock tire size. Bumping up to 275 and down 5mm on the sidewall number, straightens up the tire perfectly to the wheel. Maybe a little less efficient, but for my taste, is a big difference. The stock setup, the wheels stick out too far from the tire. I understand why so many get curb rash on their wheels. Knock on wood, I've never curbed a wheel before, but my set up would likely allow a light rub of the curb without damaging the wheel, giving some added protection, in addition to a cleaner look. (I did 275/30/21 on my prior cars, accomplished the same look for the 21's)
I got lucky and found a set of discontinued tires for $101 each. With sensors, mounting and balancing, the deal was made at $1,900 out the door. (Actually $1,860, but paid the extra $40 for road hazard insurance on the tires)
Niche Misano 20x9 5x120 +35mm wheels with 275/35/20.
They are not hub-centric wheels, but I had a set of custom spacers made that adapts the hub of the car to the hub of the wheels. Cost was $231. While relying just on the lugs to center the wheel is more than fine (done all the time), these spacers effectively make it hubcentric. Also pushed the wheels out 3mm. 35MM offset becomes effectively 32MM. Tires line up almost evenly with the fenders. Another minor difference, like the tire size, but something I notice as I'm also not a fan of how far Tesla sucks in the stock wheels from the fenders. Yes, loses a little in the efficiency, but with 370 miles in range, I've got more than enough range to sacrifice some efficiency to get the look I wanted. Also, the wheels are about 1 lb heavier than a stock wheel since they're the cheap wheels. But, I'm not racing the car, so not really concerned about 4 lbs added all the way around. Got the look I wanted for $1,900 instead of over $8,000 for wheels that look very similar from a Tesla retailer. After replacing so many 21" wheels previously, the cheaper wheels were appealing this time around. Although, happy to say, having had to replace one (knock on wood again). 20" versus 21" appears to have made all the difference.
RPM rear spoiler for $178 (looks identical to a stock spoiler)
My own window tinter did the car for $375. Not 3M, which significantly increases the cost, but still has a lifetime warranty, shields 97% of the UV rays (3M I think is 99%), so I sacrificed 2% for a more than $1,500 savings, and they look just as good.
Bought a 5' x 15' roll of gloss black vinyl and did the black out myself. Quotes to have it done were all over $1,700. I spent $50 on the roll and put in the time. It's not 100% perfect as I'm not a professional installer. This was my first time. But, from 2 feet away, I looks perfect. Some creases on underside of the mirror and the inner portion of the door handles, but not visible with door handles retracted and if you're not down on your knees looking up. 10 months in and it's held up great.
Again, not the expensive 3M, but VViVID had good reviews and gave it a try. Again, it's held up well so far, through multiple washes.
https://www.amazon.com/gp/product/B00FXY83DY/ref=ppx_yo_dt_b_asin_title_o01_s00?ie=UTF8&psc=1
Important tip,get the knifeless finish line cutting tape. Made it doable for a novice wrapper.
https://www.amazon.com/Knifeless-Fi...GC2VY23S7GR&psc=1&refRID=EF4797EFKGC2VY23S7GR
Considered plasti-dip as it looked easier originally, but after talking to people, it was actually more work and doesn't hold up as well as a vinyl wrap.
I did order the RPM precut rear Tesla bar since I wasn't good enough to get the Tesla letters covered without looking like crap. That added $59.00 to the total. Well worth it, easy install.
And sorry, apparently had a typo in my original post, where I said $8,000 total. Was actually around $3,000 total, $3,293 to be exact!! I think in my mind, I included the $5,000 down payment on the car in my total as that was my total out of pocket for the car in August, 2019 as I ordered everything above immediately after placing the order for the car.
Hope that helps.
Last edited:
I have to say that the very first picture that I saw because of the cloud reflection it looked like you had several dents in the rear door and quarter panel and my initial thought was WTF. But then I scrolled down and saw the rest and realized it was just a reflection.
LOL
TTime
New Member
The License plate bracket has two screws under the bracket bot thru the ficia. once removed there will be no holes. You can not see them without a mirror. Remove the screws and then you have to carefully pull the bracket off the ficia it is glued on. I removed mine shortly after delivery.
I was a little upset that Tesla had put it on the car like that when I picked it up. But, then realized I'm not a huge fan of the big flat space Tesla left for where a grille would go on most cars. I'm one that actually liked the nose cone!! LOL. In this case, since it was apparently painted with the car as it matches the gloss black perfectly, it started to grow on me as it breaks up the flat panel in front. So I've left it on. Actually never looked real closely, but I thought I saw screws in it, thus if I take it off, I'll be left with two holes in the bumper cover, so that was the other reason for not taking it off.
You can easily remove it. There are no screws into the bumper itself, and the paint matches underneath. The only real trick is using 90 degree needle nose to loosen the 2 security screws, and then polishing up the paint after removing double-sided tape. There are several videos on youtube, such as:
StealthP3D
Well-Known Member
Finally was able to get the car washed after 3 months!! And finally got some photos of the car complete. See similar looking cars stating that over $30,000 was spent to get this look. Many of the Tesla suppliers understand that most Tesla Model S drivers can afford the best and their prices reflect it. With just a little elbow grease and small time investment, got everything done for under $8,000. Regardless of whether I can afford it, I'm not into throwing away cash.
Very nice!
I like the idea of saving money but I think you went too far when you tried to save a few bucks by using old, sagged out springs. You can actually see how the car is sitting unnaturally low on those worn-out saggy springs.
Saguarojoe
Member
Do you keep your tire at or above recommended pressure always?Yep, rear tires only last 15K-20K miles.
BTW, you’re using lowering links/brackets, yah? Which ones? I have a set of the 3D-printed ones, but never threw them on yet.
Yep. I’ve replaced the tears multiple times now and 45PSI is indeed the sweet spot. I’ve gone lower and the outer wear was severe. Went high and the center suffered. All on top of default inner wear mind you. Also, these are summer tires, not all-season so I was never expecting 40K (nor would I want a hard compound tire).Do you keep your tire at or above recommended pressure always?
Hawkhandler
Member
i'm on the fence about doing this. i live in CA also and I don't feel like dealing with fixit tickets. what has been your experience?You can easily remove it. There are no screws into the bumper itself, and the paint matches underneath. The only real trick is using 90 degree needle nose to loosen the 2 security screws, and then polishing up the paint after removing double-sided tape. There are several videos on youtube, such as:
6+ years, 2 Teslas, no front plates, no issues. YMMV. I do a lot of freeway driving from OC up to Ventura and have been stopped a few times for speeding (luckily no resulting tickets), and have never experienced a problem. I've read the traffic cops inside LAX write these fixit tickets, so I'm careful when dropping off. Otherwise, it's not hard to temporarily use double-sided tape again if I ever need it. PS-I've also managed to only use 1 EV carpool lane sticker in bottom-right corner under the reflector. Despite being followed by CHP several times, no issues with that either.
Last edited:
Similar threads
- Replies
- 4
- Views
- 176
- Replies
- 75
- Views
- 4K
- Replies
- 4
- Views
- 489
- Replies
- 26
- Views
- 1K