


Welcome to Tesla Motors Club
Discuss Tesla's Model S, Model 3, Model X, Model Y, Cybertruck, Roadster and More.
Register
Install the app
How to install the app on iOS
You can install our site as a web app on your iOS device by utilizing the Add to Home Screen feature in Safari. Please see this thread for more details on this.
Note: This feature may not be available in some browsers.
-
Want to remove ads? Register an account and login to see fewer ads, and become a Supporting Member to remove almost all ads.
You are using an out of date browser. It may not display this or other websites correctly.
You should upgrade or use an alternative browser.
You should upgrade or use an alternative browser.
DOPEThis is a 5 minute video of BearBu’s HDMI and 360 surround view system I installed last weekend. Did another round of calibrating the cameras last night. Still not perfect, but making progress. At the end are a few pictures of sideview mirrors disassembled.
staran
Member
OK we received out kit, and this week end we will be dry running the electronics part.
Then next week-end will have two friends over to help - one is a master mechanic (my son).
Hope we can get it all installed on two days.
Good you are doing this in phases...
Good luck!
I just finished installing the 4 cameras of my 360 kit... I really love it!
I am sure some of us will be happy to answer questions on this forum if you have trouble.
Some suggestions:
- Disassembling the side mirrors takes time. Be sure to disable the two auto-folding options before starting working on them
- Used electric tape (instead of zip ties) to bundle the side camera cable to the rest of the mirrors cables
- The location to drill the hole in the side mirrors was incorrect in my instructions PDF.
Simply insert the camera into the only square hole available inside the mirror to find the correct location.
- Do not fully push the two side cameras in the mirrors until calibration is complete and you are fully satisfied with the 3D view.
It is very hard to rotate or pull them back once fully inserted
- The calibration procedure typically takes more than 10 min (not 2 min as indicated in my PDF)
During calibration the screen will freeze a bit, so be patient...
- Good you will have extra hands for the back camera
Removing the main back panel from hatch was not easy
I had great trouble unplugging one of the 4 connectors (the one in the middle for the buzzer)
because the release notch was very hard to reach (covered by the speaker bar panel)
- May also want to wait until everything is working and calibrated
before putting back the glove compartment and associated panels (assuming you are on AP2+)
- Watch out for airbags when routing the rear camera cable.
Bearbu is shipping my kit today, so we will do a video and pictures of the install, as I can use my wifes car for work.
Stay tuned, this is fun, thank everyone for their insight.
Thanks in advance for putting together the video...looking forward to it
I just received my kit, too, and will start posting videos as well. The 360-degree view is one of the only things I miss having on my MS.
Here's the first installation - picked up a junkyard side view mirror and figured out how to open it to find out how much room was inside there and where the camera might fit.
Here's the first installation - picked up a junkyard side view mirror and figured out how to open it to find out how much room was inside there and where the camera might fit.
The first thing Bearbu said to do in his wonderful documentation was to hook up, and load the MCU firmware into 360 device.
So, I disconnected all the plastic channels, and under the steering wheel plastic. Then connected all the cables as close as possible to the picture in the doc.
Then made sure I had the rear camera cable spotted, it was way up inside the top part of the dash, had to re-route it to get better access.
Then plugged in the ODB2 power, and saw the 360 device had red led lite inside. Waited a minute for things to load.
Pressed the menu button on the wheel, and nothing happened on the screen.
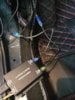
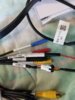
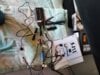
I took pictures and shared with Bearbu incase I have a wire not connected or something.
Will share here also, once I find the problem, I will repost.
So, I disconnected all the plastic channels, and under the steering wheel plastic. Then connected all the cables as close as possible to the picture in the doc.
Then made sure I had the rear camera cable spotted, it was way up inside the top part of the dash, had to re-route it to get better access.
Then plugged in the ODB2 power, and saw the 360 device had red led lite inside. Waited a minute for things to load.
Pressed the menu button on the wheel, and nothing happened on the screen.
I took pictures and shared with Bearbu incase I have a wire not connected or something.
Will share here also, once I find the problem, I will repost.
Attachments
-
 20190824_111240.jpg388.9 KB · Views: 118
 -
 20190824_111244.jpg353.2 KB · Views: 92
 -
 20190824_111321.jpg320 KB · Views: 83
 -
 20190824_111334.jpg332.8 KB · Views: 83
 -
 20190824_111337.jpg358 KB · Views: 91
 -
 20190824_111352.jpg418.4 KB · Views: 86
 -
 20190824_111314.jpg352.1 KB · Views: 79
 -
 20190824_111340.jpg463.8 KB · Views: 85
The first thing Bearbu said to do in his wonderful documentation was to hook up, and load the MCU firmware into 360 device.
So, I disconnected all the plastic channels, and under the steering wheel plastic. Then connected all the cables as close as possible to the picture in the doc.
Then made sure I had the rear camera cable spotted, it was way up inside the top part of the dash, had to re-route it to get better access.
Then plugged in the ODB2 power, and saw the 360 device had red led lite inside. Waited a minute for things to load.
Pressed the menu button on the wheel, and nothing happened on the screen.
I took pictures and shared with Bearbu incase I have a wire not connected or something.
Will share here also, once I find the problem, I will repost.
I’ll try to help if you would like. Did you try to manually bring the rear camera up on the MCU by pressing the camera button on the touchscreen? The hdmi switcher should also have an audible click when pressing the menu button. Did you hear that?
I just got mine installed in about 6 hours with a friend... yes, it’s a very challenging install as to do it in a professional way takes a lot of work removing panels and routing wires....
Biggest things I discovered during my install:
1. Routing the front camera to the inside through the “firewall” was mostly challenging due to finding a decent location. I finally found a grommet behind the drivers side which has some sort of plastic tube going through it (no idea what it is for, seems to be a drain for the sunroof but curiously exits under the drivers door sill). There is one on both sides, but this was closest to the module installation location under the steering wheel. It was tight, but with a little silicon lubrication the cable went right through.
2. Next most difficult was the mirrors, which really required a complete removal and disassembly. Had to take off the door covers on the inside and remove the three bolts holding the mirror in place. Then the mirror had to come apart, including the top cover and the plastic top and bottom bracket covers. Once inside, I had to cut the existing tie-wraps holding the mirror motor controls, heater, and the LTE and Wifi antenna connections. Then I routed the cables along the same path and re-tiewrapped it down. I followed one of the YouTube videos for doing a “chrome delete” as a guide. It wasn’t too hard if you are really careful about the plastic tabs which hold the bottom cover on.
3. The most scary part was drilling the holes... Bearbu has a good picture guide and once you are inside the mirror assembly the location is very obvious. I just drilled straight in after measuring several times, didn’t need to use any tape to protect the plastic chrome. The included bit worked perfectly by just going slow.
4. The rear camera cable path was a bit tricky until I realized the only path through was to remove/drill through the screw mount between the trunk open button and the license plate light on the right... the cable went right through and I screwed the camera directly into the plastic cover with some short screws.. there was more than enough room between the plastic and the metal for them to hold and not touch the metal. One little nit was the kit doesn’t include the proper sized screws for the adjustable rear camera, I happened to have some that worked. I routed the cable along the bottom door sills so as to not deal with any issues with airbags in the pillars.
5. The front camera installed easily on the bottom of my nosecone. I was worried that it would be too low to the ground vs closer to the logo for folks with the refresh model. It worked great however after calibration and I found I could mount it as far back as it would go against the plastic grill and still not have any views blocked while also being very discreet.
6. For getting through rubber boots, I highly recommend using a fiberglass glow-rod and generous silicon.. it makes the job much easier.
7. One big tip which is in the manual is to not mount the mirror cameras in their rubber boots until you have everything up and running. Regarding the advice about 50deg to the side and 50deg to the back in the manual, it’s not necessary to worry about it as BearBu has included cameras which are already angled.. There are two rubber boots in the kit.. one is flat and one provides more of an angle for mounting. I used the flat one and it worked great. When everything is up and you are ready to calibrate, the system provides a live view including rough guidelines as to what the camera should see.. once I got that going it was really easy to rotate the cameras to the proper view.
8. I was worried about the calibration location points as it looked pretty tricky in the guide as to which one goes where.. once the system is up and running however, it already put the points in roughly the correct place. I just had to move them out to the corners of the black squares on the calibration sheets and we were off and running.
9. Calibration calculations do take about 14 mins when the system uses the low power ARM chip to calculate the spherical distortions. Once it’s done it loads that into the FPGA and its up. I did it about three times to tweak it and got very good results almost immediately. I would recommend finding a very level place to do it as the Tesla seems to auto level the car when it’s on a grade which will throw off the calibration. Also be aware that it will never be perfect, especially from the front camera to the mirror cameras due to the height difference. The crossover between them will also be more off depending on the height of what you are looking at, for instance, when you are looking at a curb versus parking lines, the curb “line” transition from the front to the sides will be a little more offset.
10. MASSIVE KUDOs to BearBu for not only engineering the LVDS to HDMI converter module but for also going several extra miles (or kilometers depending") ) for getting the Shenzhen vendor to include a Tesla 3D model in their system as well as the amazing work he did configuring the canbus interface so that the left and right turn signals and reverse gear change the viewpoint and then even going further by coding additional controls in the steering wheel for moving the view around without using the handheld remote control.
) for getting the Shenzhen vendor to include a Tesla 3D model in their system as well as the amazing work he did configuring the canbus interface so that the left and right turn signals and reverse gear change the viewpoint and then even going further by coding additional controls in the steering wheel for moving the view around without using the handheld remote control.
11. Finally, I recommend installing a USB extension cable for both the USB memory stick port (for the “dash cam” recording) as well as the microUSB for firmware updates. Once I got everything inside, i realized it wasn’t going to be convenient to take off the lower dash cover under the steering wheel to pull out an SD card to get the video. With an extension cable mounted somewhere discreetly under the dash, you can easily swap out a USB memory stick so you can plug into a computer.
Biggest things I discovered during my install:
1. Routing the front camera to the inside through the “firewall” was mostly challenging due to finding a decent location. I finally found a grommet behind the drivers side which has some sort of plastic tube going through it (no idea what it is for, seems to be a drain for the sunroof but curiously exits under the drivers door sill). There is one on both sides, but this was closest to the module installation location under the steering wheel. It was tight, but with a little silicon lubrication the cable went right through.
2. Next most difficult was the mirrors, which really required a complete removal and disassembly. Had to take off the door covers on the inside and remove the three bolts holding the mirror in place. Then the mirror had to come apart, including the top cover and the plastic top and bottom bracket covers. Once inside, I had to cut the existing tie-wraps holding the mirror motor controls, heater, and the LTE and Wifi antenna connections. Then I routed the cables along the same path and re-tiewrapped it down. I followed one of the YouTube videos for doing a “chrome delete” as a guide. It wasn’t too hard if you are really careful about the plastic tabs which hold the bottom cover on.
3. The most scary part was drilling the holes... Bearbu has a good picture guide and once you are inside the mirror assembly the location is very obvious. I just drilled straight in after measuring several times, didn’t need to use any tape to protect the plastic chrome. The included bit worked perfectly by just going slow.
4. The rear camera cable path was a bit tricky until I realized the only path through was to remove/drill through the screw mount between the trunk open button and the license plate light on the right... the cable went right through and I screwed the camera directly into the plastic cover with some short screws.. there was more than enough room between the plastic and the metal for them to hold and not touch the metal. One little nit was the kit doesn’t include the proper sized screws for the adjustable rear camera, I happened to have some that worked. I routed the cable along the bottom door sills so as to not deal with any issues with airbags in the pillars.
5. The front camera installed easily on the bottom of my nosecone. I was worried that it would be too low to the ground vs closer to the logo for folks with the refresh model. It worked great however after calibration and I found I could mount it as far back as it would go against the plastic grill and still not have any views blocked while also being very discreet.
6. For getting through rubber boots, I highly recommend using a fiberglass glow-rod and generous silicon.. it makes the job much easier.
7. One big tip which is in the manual is to not mount the mirror cameras in their rubber boots until you have everything up and running. Regarding the advice about 50deg to the side and 50deg to the back in the manual, it’s not necessary to worry about it as BearBu has included cameras which are already angled.. There are two rubber boots in the kit.. one is flat and one provides more of an angle for mounting. I used the flat one and it worked great. When everything is up and you are ready to calibrate, the system provides a live view including rough guidelines as to what the camera should see.. once I got that going it was really easy to rotate the cameras to the proper view.
8. I was worried about the calibration location points as it looked pretty tricky in the guide as to which one goes where.. once the system is up and running however, it already put the points in roughly the correct place. I just had to move them out to the corners of the black squares on the calibration sheets and we were off and running.
9. Calibration calculations do take about 14 mins when the system uses the low power ARM chip to calculate the spherical distortions. Once it’s done it loads that into the FPGA and its up. I did it about three times to tweak it and got very good results almost immediately. I would recommend finding a very level place to do it as the Tesla seems to auto level the car when it’s on a grade which will throw off the calibration. Also be aware that it will never be perfect, especially from the front camera to the mirror cameras due to the height difference. The crossover between them will also be more off depending on the height of what you are looking at, for instance, when you are looking at a curb versus parking lines, the curb “line” transition from the front to the sides will be a little more offset.
10. MASSIVE KUDOs to BearBu for not only engineering the LVDS to HDMI converter module but for also going several extra miles (or kilometers depending
) for getting the Shenzhen vendor to include a Tesla 3D model in their system as well as the amazing work he did configuring the canbus interface so that the left and right turn signals and reverse gear change the viewpoint and then even going further by coding additional controls in the steering wheel for moving the view around without using the handheld remote control. 11. Finally, I recommend installing a USB extension cable for both the USB memory stick port (for the “dash cam” recording) as well as the microUSB for firmware updates. Once I got everything inside, i realized it wasn’t going to be convenient to take off the lower dash cover under the steering wheel to pull out an SD card to get the video. With an extension cable mounted somewhere discreetly under the dash, you can easily swap out a USB memory stick so you can plug into a computer.
KArnold
Active Member
Nexus - that's very helpful, thanks for posting. Did you take any pics?
I have my kit but haven't done anything other than look at everything yet. I have some questions I sent to BearBu, but maybe you know as well.
1. Do both the boxes ('surround monitoring system" and "hdmi interface" get installed inside the panel lower-left of the steering wheel? There's enough room inside there?
2. Is the recording to removable media supported? What media and where do you put it? Maybe this goes to your last point - running a Micro USB extension to USB media? I assume that recording wraps?
3. Where is the IR receiver mounted?
4. Is the parking surveillance functional when not driving? With recording?
5. I have a Samsung Galaxy S10 phone that I want to connect to the HDMI interface to mirror that screen. The phone has a USB type C connection. What and where does that connect to on your system? The push button switch? Is that also a USB-C? I assume that cable is not included?
Thank you again.
staran
Member
1. Do both the boxes ('surround monitoring system" and "hdmi interface" get installed inside the panel lower-left of the steering wheel? There's enough room inside there?
Install location depends on your version of Autopilot. (If you don't have AP then it does not matter)
I have both modules installed behind the glove compartment but others have installed as you described.
My understanding is that if you have Autopilot 2.5 for example, you have to connect behind the glove compartment.
Otherwise, autopilot will lose rear camera signal when switching to HDMI feed.
2. Is the recording to removable media supported? What media and where do you put it? Maybe this goes to your last point - running a Micro USB extension to USB media? I assume that recording wraps?
Good questions...On mine, it started filling up the formatted 32GB micro SD card automatically with 4 fisheye cameras footage,
but didn't wrap recordings. Maybe there is a toggle for that. Hopefully, BearBu can answer here...
3. Where is the IR receiver mounted?
You can mount it anywhere you'd like. Personally I have it near the 17'' screen
4. Is the parking surveillance functional when not driving? With recording?
An other question for Bearbu here...
5. I have a Samsung Galaxy S10 phone that I want to connect to the HDMI interface to mirror that screen. The phone has a USB type C connection. What and where does that connect to on your system? The push button switch? Is that also a USB-C? I assume that cable is not included?
I think this has been answered in other threads already...
staran
Member
I’ll try to help if you would like. Did you try to manually bring the rear camera up on the MCU by pressing the camera button on the touchscreen? The hdmi switcher should also have an audible click when pressing the menu button. Did you hear that?
Starlog,
Getting an audible click is indeed the first thing to check to make sure the unit is "alive"...
Do I understand correctly that you performed a firmware upgrade for the 360 unit?
If so, maybe something went wrong during reflashing of the firmware?
Also, make sure you remove the micro SD card after upgrading...
staran
Member
Nexus,
Thanks for sharing! I agree with you that Bearbu created an awesome kit for the model S.
Can you share a link to buy the same two USB extender/micro extenders that worked for you?
ps: I didn't drill any hole through the firewall to route my front cam. There is an easier way to route it (see one of my previous post)
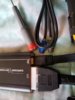
Yes we upgraded ok, no issues and it comes back online. I connected a small hdmi screen see above, to the 360 and it works.Starlog,
Getting an audible click is indeed the first thing to check to make sure the unit is "alive"...
Do I understand correctly that you performed a firmware upgrade for the 360 unit?
If so, maybe something went wrong during reflashing of the firmware?
Also, make sure you remove the micro SD card after upgrading...
Just no reaction from the hdmi box.
staran
Member
Yes we upgraded ok, no issues and it comes back online. I connected a small hdmi screen see above, to the 360 and it works.
Just no reaction from the hdmi box.
The blue box with ODB2 connector provides power to both the 360 and HDMI units.
If I remember well, the two power plugs and identical and interchangeable.
You could try to swap the two power feeds in case one is defective and see if the 360 responds with the second one.
Otherwise, I'd also disconnect/reconnect the ODB2 connector in case it is not properly seated.
The first time I plugged my ODB2, I noticed there was a wire behind the model S panel obstructing the ODB2 plug.
Make sure it is fully inserted.
Good luck!
The first time I plugged my ODB2, I noticed there was a wire behind the model S panel obstructing the ODB2 plug.
Make sure it is fully inserted.
Good luck!
No issues with the ODB2, as I had a 2003 Cobra Terminator and did some changes using ODB2 to it.
So, I went and swapped out the power cable again as you suggested, still no click. Bearbu said his distributor in LA will send me a replacement hdmi box. So looks like we may delay the install, on the side cameras. Will try to tackle the front and back camera wiring alone, or with my friend who also has a Tesla Model S P85.
Keep posting this is great info.
As your car is an AP0, the Menu button is not on CANBus , therefore the switching mechanism is on the cruise stalk. Also, please kindly check the checking steps from the PM I sent you about the pin configuration on the OBD2 port, as the vehicle manufactured before June 2013 doesn’t have the Pin 1 and Pin 9 (chassis CAN) which is necessary to our application (controls on steering wheel to the HDMI Box).
If you don’t have Pin 1 and Pin 9 on the OBD2 port, we will have the local agent to send you the TDC to OBD cable and it will solve the problem
Please refer to the following video for the switching function on AP0 Model S
If you don’t have Pin 1 and Pin 9 on the OBD2 port, we will have the local agent to send you the TDC to OBD cable and it will solve the problem
Please refer to the following video for the switching function on AP0 Model S
No issues with the ODB2, as I had a 2003 Cobra Terminator and did some changes using ODB2 to it.
So, I went and swapped out the power cable again as you suggested, still no click. Bearbu said his distributor in LA will send me a replacement hdmi box. So looks like we may delay the install, on the side cameras. Will try to tackle the front and back camera wiring alone, or with my friend who also has a Tesla Model S P85.
Keep posting this is great info.
Attachments
Similar threads
- Replies
- 2
- Views
- 750
- Replies
- 9
- Views
- 1K
- Replies
- 43
- Views
- 4K
- Replies
- 0
- Views
- 4K