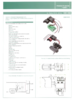
Happy friday all, I made a bit of progress today that I'd like to report. I was able to cut off the nubs that limit the steering angle, I found the easiest way to do that was remove the steering rack entirely and used a dremel metal cutting wheel.
View attachment 386799
I have not driven it yet but it seems like you can only fully turn the wheel if you pull up on the wheel a little bit, so I am thinking maybe add a little spacer collar between the wheel and the dashboard to keep it lifted, if I can't figure out where it's binding.
It seemed to work but of course we haven't driven the thing yet. Second I hooked up the 36V battery, speed controller, and pedal. I used connectors I got from electricscooterparts.com. The battery and motor connectors are CNX-50s, and the speed controllers tend to use those and CNX-52 3 wire connectors. They are not too hard to assemble with a soldering iron and needle nose pliers if you don't have the crimper.
Next time I have a few hours free the next project will be to figure out the wiring on the forward/reverse and 1/2 low/high switches. I suspect that the low-high switch rearranges the motors in series for low and parallel for high. The forward/reverse switch is a little weird because it seems to have 4 wires coming out, my theory is that it only powers one motor in reverse so it's slower in reverse, but since I haven't actually seen the car driven I can't confirm. Can anybody let me know if only 1 wheel is powered in reverse?
Finally here is a video of the ESC working:
You can see from the sparks why I say that the motors are basically sacrifical.. I don't expect it to last a long time because the brushes will burn up.